

AppSheet Multi-Tenant Architecture for Secure Data Isolation


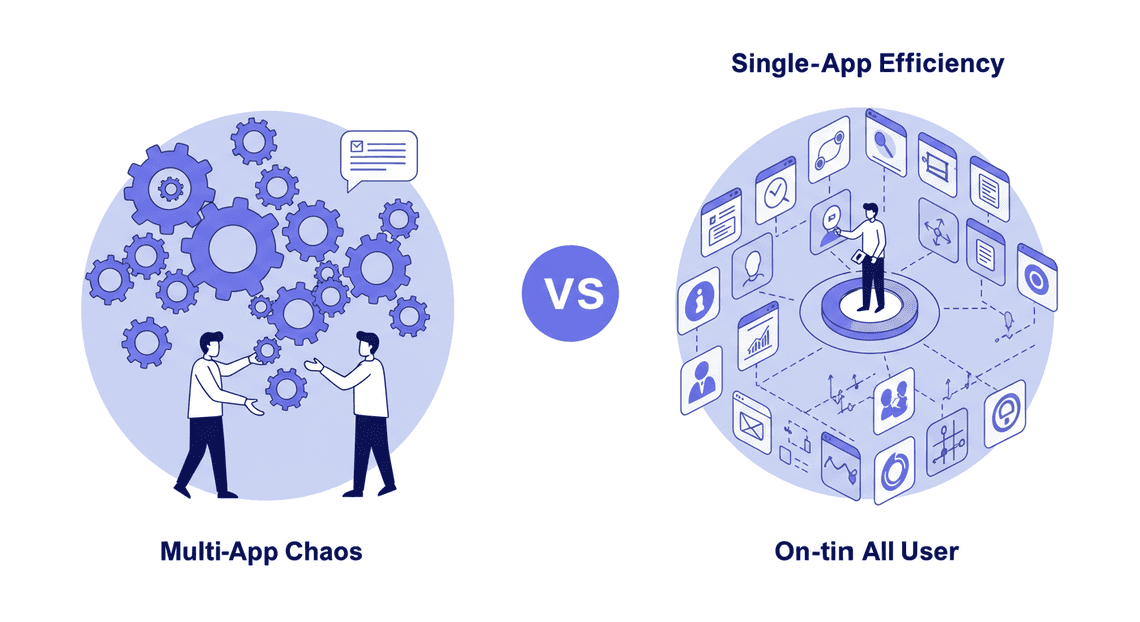
The ideal enterprise solution is a single, centralized app for all clients, but this creates a critical conflict with the non-negotiable need for segregated data. Here’s how to achieve the efficiency of one codebase while guaranteeing the security of a thousand firewalls.

The Enterprise Challenge: Centralized Apps with Segregated Data
As AI-Powered Invoice Processor solutions mature from single-purpose tools to mission-critical enterprise systems, a fundamental challenge emerges. The initial approach of copying an app for each new department, client, or region quickly becomes an unmanageable nightmare of maintenance and version control. The ideal is a single, centralized application that can serve everyone. But this ideal immediately collides with a non-negotiable requirement: the data for each group must be kept completely and utterly separate. This is the central tension of enterprise-grade AMA Patient Referral and Anesthesia Management System development: how to achieve the efficiency of a single codebase while guaranteeing the security of a thousand firewalls.
Why a single app for multiple clients or departments is efficient
Consolidating your AppSheetway Connect Suite portfolio into a single, multi-tenant application isn’t just about tidiness; it’s a strategic move that pays significant dividends in efficiency, consistency, and velocity. The arguments for this centralized model are compelling.
- **Simplified Maintenance and Updates: This is the most significant advantage. Imagine you need to fix a critical bug or roll out a game-changing new feature. In a multi-app environment, you’d have to manually update dozens, or even hundreds, of individual applications. It’s a tedious, error-prone process. With a single, multi-tenant app, you update the master application once. The changes are instantly propagated to all tenants, ensuring everyone benefits from the latest improvements simultaneously.
-
Guaranteed Consistency: A single codebase eliminates “version drift.” You no longer have to worry about the sales department using an outdated version of the app with fewer features than the marketing team. Every user, regardless of their department or company, interacts with the same UI, the same logic, and the same set of features. This consistency simplifies training, reduces support tickets, and provides a more professional and reliable user experience.
-
Accelerated Development Velocity: When your development team can focus all its energy on a single, sophisticated application, innovation happens faster. Instead of being bogged down by the repetitive overhead of managing multiple app copies, developers can invest their time in building more powerful features, optimizing performance, and refining the user experience for the entire user base.
-
Streamlined Onboarding: Bringing a new department or client into the fold becomes a simple configuration task rather than a complex app deployment project. Instead of copying the app, setting up a new data source, and configuring it from scratch, you simply add a new “tenant” to your control tables. This can reduce the onboarding time from days to mere minutes.
The critical need for robust data isolation and security
While the efficiency of a single app is alluring, it introduces a monumental security risk. If one tenant can see, modify, or delete another tenant’s data, the consequences are catastrophic. This is not a feature to be compromised; it is the bedrock upon which the entire architecture must be built.
The cardinal rule of multi-tenancy is absolute data isolation. A user from Client A must be fundamentally incapable of ever accessing a single row of data belonging to Client B. The failure to enforce this principle can lead to:
-
For External Clients: A data breach is an existential threat. It results in a complete loss of customer trust, severe legal liabilities under regulations like GDPR and CCPA, breach of contract lawsuits, and irreparable damage to your brand’s reputation.
-
For Internal Departments: The stakes are just as high. Imagine the chaos if the Sales team could view sensitive HR performance reviews, or if a regional office could see and alter the financial projections for headquarters. It leads to a breakdown of operational integrity, compromises confidential business strategy, and can create a toxic internal environment.
This isolation must extend beyond simple read access. A robust security model prevents unauthorized cross-tenant actions of any kind—Create, Read, Update, and Delete (CRUD). An OSD App Clinical Trial Management architecture must be meticulously designed to enforce this separation at every level. Standard security filters like USEREMAIL() = [EmailColumn] are a starting point, but a true multi-tenant system requires a more sophisticated approach to manage entire groups of users and lock them securely within their designated data silo.
Introducing the multi-tenant model in the AppSheet ecosystem
So, how do we reconcile the need for centralized efficiency with the demand for absolute security? The answer is a multi-tenant architecture.
In software engineering, multi-tenancy is a design pattern where a single instance of an application serves multiple, distinct groups of users, known as “tenants.” Think of it like an apartment building: it’s a single structure (the app) with shared infrastructure like the foundation, hallways, and elevators (the UI and core logic). However, each tenant has their own private, securely locked apartment (their data). One tenant cannot see inside another’s apartment, and their activities are completely isolated from one another.
In the AppSheet ecosystem, multi-tenancy is not a feature you simply toggle on. It is a deliberate architectural pattern that you, the developer, implement. It involves a strategic combination of:
-
Smart Data Structuring: Designing your backend data (in [Automated Web Scraping with [Multilingual Text-to-Speech Tool with SocialSheet Streamline Your Social Media Posting 123](https://votuduc.com/Multilingual-Text-to-Speech-Tool-with-Google-Workspace-p809282)](https://votuduc.com/Automated-Web-Scraping-with-Google-Sheets-p292968), SQL, etc.) to include a “Tenant ID” that links every single row of data to a specific tenant.
-
**Layered Security Filters: Moving beyond simple user checks to create powerful, context-aware rules that ensure a user can only interact with data tagged with their assigned Tenant ID.
-
Centralized User Management: Creating tables to manage not just individual users, but the tenants themselves and the roles users have within those tenants.
By implementing this model, you build an application that is both scalable and secure. You gain all the efficiencies of a single codebase while providing each client or department with a virtual “private app” experience, where their data is completely segregated and protected. The following sections will provide a detailed blueprint for constructing this powerful architecture.
Core Components of a Multi-Tenant AppSheet Architecture
Building a secure multi-tenant application isn’t about a single magic feature; it’s about orchestrating several key components that work in concert. Think of it like constructing a secure facility. You need a solid foundation to build upon, a sophisticated engine to manage internal operations, and a robust governance system to guard the perimeter. In our AppSheet architecture, these three pillars ensure that each tenant’s data is completely isolated and protected.
Foundation: The Google Sheets User Control Center
Before AppSheet can enforce any rules, it needs a source of truth—a central directory that defines who belongs to which tenant and what their role is. This is our User Control Center, and for most use cases, its perfect home is a simple, powerful Google Sheet.
This isn’t a feature you enable; it’s a data structure you design. This control sheet acts as the foundational ledger for your entire security model. It typically consists of at least two critical tables (or tabs):
TenantsTable: This table defines each individual client or organization using your app.
-
Columns:
TenantID(a unique identifier, like a UUID),TenantName,SubscriptionPlan,Status(e.g., Active, Suspended), etc. -
Purpose: It’s the master list of every isolated environment within your application.
UsersTable: This table maps individual users to their respective tenants and roles.
-
Columns:
UserEmail(the primary key, as this is what AppSheet uses for authentication),UserName,TenantID(a reference to theTenantstable),Role(e.g., Admin, Manager, User). -
Purpose: When a user logs in, this is the table AppSheet consults to answer the critical questions: “Who is this person?” and “Which organization’s data should they be allowed to see?”
This Google Sheet is the bedrock. Every security decision flows from the data within it. Its simplicity is its strength; it’s easily auditable, can be managed by non-developers, and integrates natively as an AppSheet data source.
Engine: The Power of AppSheet Security Filters
If the User Control Center is the foundation, then AppSheet’s Security Filters are the intelligent engine built upon it. This is where the magic of data isolation happens.
A Security Filter is a condition applied to a table that filters data on the server before it is sent to the user’s device. This is the most crucial concept for multi-tenancy. You are not simply hiding rows from other tenants; you are ensuring that data from other tenants never even reaches the user’s app.
Here’s how it works in practice. On every table that contains tenant-specific data (e.g., Projects, Invoices, Customers), you’ll add a TenantID column. Then, you’ll apply a Security Filter with an expression like this:
[TenantID] = LOOKUP(USEREMAIL(), "Users", "UserEmail", "TenantID")
Let’s break down this powerful one-liner:
-
USEREMAIL(): AppSheet automatically captures the email address of the currently logged-in user. -
LOOKUP(...): This function takes the user’s email and searches ourUserstable (the Control Center). It finds the row corresponding to the current user and returns the value from theirTenantIDcolumn. -
[TenantID] = ...: The filter then compares theTenantIDof every single row in theProjectstable with theTenantIDretrieved for the logged-in user.
The result? Only rows that match the user’s assigned TenantID are synchronized to their device. A user from “Tenant A” will receive only “Tenant A” data. A user from “Tenant B” will receive only “Tenant B” data. They are completely unaware of each other’s existence within the dataset, achieving true, server-side data isolation.
Governance: Leveraging Google Cloud Platform (GCP) IAM
Our architecture is now secure from within the app. But what about the back door? What if a clever user finds the URL to the master Google Sheet containing all tenant data? This is where our final layer, governance, comes into play.
The User Control Center and all your data tables live in Google Sheets, which are part of the Google Cloud ecosystem. We can protect this underlying data source using Google Cloud’s Identity and Access Management (IAM).
The principle is simple: humans should not have direct access to the data source. The only “user” that should have edit permissions on your production Google Sheets is the AppSheet service account itself.
Here’s the security protocol:
-
Lock Down the Sheet: In Google Sheets, click “Share” and remove all users and links. Do not use “Anyone with the link can view/edit.”
-
Grant Access to AppSheet: The only “person” you will share the sheet with is the unique service account ID associated with your AppSheet application. You can find this in your AppSheet app under Security > Domain Authentication. It will look something like
[email protected]. Grant this service account Editor permissions. -
Restrict Human Access: Your own Google account (and those of other developers) should, at most, have Viewer permissions for debugging purposes. In a true production environment, you might remove human access entirely, forcing all interactions to happen through the AppSheet app itself.
By implementing this IAM policy, you create a protective moat around your data. AppSheet becomes the sole, authorized gatekeeper. Users are forced to go through the app’s front door, where our Security Filter engine is waiting to enforce the rules defined in our Control Center. The back door to the raw data is locked and guarded.
Step-by-Step Guide to Building Your Secure Framework
Theory is a solid foundation, but execution is where the fortress gets built. We’re moving from architectural diagrams to the digital trenches. This guide breaks down the process into four critical, non-negotiable steps. Follow them precisely, and you’ll forge a robust, isolated, and scalable multi-tenant application.
Step 1: Designing the Master User and Tenant Mapping Sheet
This is your single source of truth. The linchpin. The Rosetta Stone of your entire security model. Every security rule you write will query this table to answer one fundamental question: “Who is this user, and where do they belong?” Get this wrong, and everything that follows is compromised.
Your master user table, let’s call it Users, doesn’t need to be complex, but it must be deliberate. It serves as the directory that maps a user’s login credential (their email) to their designated tenant and role.
Core Table Structure:
Create a new sheet or database table with the following essential columns:
| Column Name | Data Type | Purpose & Notes |
| :--- | :--- | :--- |
| UserID | Text / UUID | A unique, system-generated primary key for this record. Use UNIQUEID(). |
| UserEmail | Email | CRITICAL: This MUST be the exact email the user logs into AppSheet with. This is your lookup key. |
| TenantID | Text / Ref | The unique identifier for the tenant this user belongs to. This should match the TenantID in all your other data tables. |
| Role | Text / Enum | Defines the user’s permission level within their tenant (e.g., Admin, Manager, User). |
| UserName | Text | The user’s display name. Good for UX. |
| IsActive | Yes/No | A boolean flag to easily enable or disable a user’s access without deleting the record. |
Example Users Table:
| UserID | UserEmail | TenantID | Role | UserName | IsActive |
| :--- | :--- | :--- | :--- | :--- | :--- |
| 2f4b1a | [email protected] | TENANT_ACME | Admin | Jane Doe | TRUE |
| 9c8d3e | [email protected] | TENANT_ACME | User | John Smith | TRUE |
| 5a6b7c | [email protected] | TENANT_GLOBEX | Manager | Sara Jones | TRUE |
| 1d2e3f | [email protected] | TENANT_GLOBEX | User | Mark Chen | FALSE |
**Security Mandate: This Users table itself must be locked down. In AppSheet, set its table permissions to “Read-Only” for all users. The only people who should ever be able to modify this table are the super-admins of the entire application, and they should preferably do so directly in the backend data source (e.g., Google Sheets, SQL), not through the app interface.
Step 2: Writing Dynamic Security Filter Expressions in AppSheet
This is where the magic happens. A Security Filter is a server-side rule that AppSheet applies before any data is synchronized to a user’s device. It’s not a suggestion; it’s an unbreakable law. If a row doesn’t pass the filter, for that user, it simply doesn’t exist.
We will apply this filter to every single data table that contains tenant-specific information (e.g., Projects, Invoices, Customers, etc.).
-
Navigate to Data > Tables in the AppSheet editor.
-
Select the table you want to secure (e.g.,
Projects). -
Go to the Security tab.
-
Find the Security filter property.
Insert the following expression:
[TenantID] = LOOKUP(USEREMAIL(), "Users", "UserEmail", "TenantID")
Let’s dissect this powerful one-liner:
-
[TenantID]: This refers to theTenantIDcolumn in the current table we are securing (theProjectstable in this example). -
USEREMAIL(): This is a built-in AppSheet function that returns the email address of the person currently using the app. -
LOOKUP(...): This is the workhorse. It performs a search. -
USEREMAIL(): “Here’s the value I want you to find.” -
"Users": “Look for it in this table.” -
"UserEmail": “Search in this specific column.” -
"TenantID": “Once you find a match, return the value from this column.”
In plain English, the expression says: “Only show rows where the TenantID in this table is an exact match for the TenantID associated with the current user’s email in our master Users table.”
Apply this exact same expression to every table that needs to be isolated by tenant.
Step 3: Assigning User Roles and Permissions Based on Tenant ID
Data isolation is only half the battle. Now we need to control what users can do with the data they’re allowed to see. Can they add, edit, or delete records? This is where the Role column from our Users table comes into play.
We’ll combine our tenant-isolation logic with role-based checks in the Are updates allowed?, Are adds allowed?, and Are deletes allowed? permissions for each table.
Let’s go back to our Projects table in the editor.
-
Navigate to Data > Tables > Projects.
-
Under the Updates section (and similarly for Adds/Deletes), find the permission dropdown and set it to “by condition”.
-
In the expression box for Are updates allowed?, enter the following:
AND(

[TenantID] = LOOKUP(USEREMAIL(), "Users", "UserEmail", "TenantID"),

IN(LOOKUP(USEREMAIL(), "Users", "UserEmail", "Role"), LIST("Admin", "Manager"))

)
Deconstruction:
The AND(...) function ensures that all* conditions inside it must be true.
-
The first condition is our familiar tenant check. This is a crucial redundancy; it ensures a user can’t even attempt to edit data outside their tenant.
-
The second condition checks the user’s role.
-
It uses
LOOKUP()again to find the current user’sRolefrom theUserstable. -
The
IN(..., LIST(...))function checks if that role is present in the provided list. In this case, we’re saying only users with the role of “Admin” or “Manager” can update records.
You can now create granular permissions. For example:
-
Adds: Might be allowed for
LIST("Admin", "Manager", "User"). -
Deletes: Might be restricted to
LIST("Admin")only.
This layered approach ensures that a user must first belong to the correct tenant and then have the appropriate role to perform a specific action.
Step 4: Validating Isolation with Rigorous Testing
Do not ship what you do not test. Assumptions are the enemy of security. You must rigorously validate that your data isolation is working as intended.
Method 1: The “Preview as other user” Feature
This is your first line of defense. In the top right of the AppSheet editor, you’ll see the preview pane.
-
Click on the user icon/email address in the preview pane’s header.
-
Uncheck “Preview app as app creator”.
-
Enter the email of a test user from your
Userstable (e.g.,[email protected]). -
Click “Apply”.
The preview will now reload as if you were John Smith. You should only see data where TenantID is TENANT_ACME. Now, repeat the process with [email protected]. The app should refresh and show only TENANT_GLOBEX data. If you see any data bleed, your filter is wrong.
Method 2: A Formal Test Matrix
Create a simple spreadsheet to track your tests. Use real test accounts (not just the previewer) for the most accurate results.
| Test Case | User Role | Tenant | Expected Outcome | Actual Outcome | Pass/Fail |
| :--- | :--- | :--- | :--- | :--- | :--- |
| View Projects | User | Tenant A | Can see only Tenant A projects. | | |
| View Projects | Admin | Tenant B | Can see only Tenant B projects. | | |
| Edit Project | User | Tenant A | Action fails (permission denied). | | |
| Edit Project | Manager | Tenant B | Action succeeds for Tenant B project. | | |
| Delete Project | Manager | Tenant A | Action fails (permission denied). | | |
| Search Global | User | Tenant B | Search for Tenant A data yields no results. | | |
Adopt a hacker’s mindset. Try to break your own app. Can you search for another tenant’s data? Can you see another tenant’s customers in a dropdown list? If you can find a crack in the wall, so can someone else. Test, verify, and then test again.
Advanced Strategies for Scalability and Maintenance
Building a secure multi-tenant app is one thing; ensuring it can scale gracefully and be maintained efficiently is another. As your user base grows from ten tenants to a thousand, manual processes become bottlenecks, performance can degrade, and maintaining a clear audit trail becomes paramount. This section dives into the advanced strategies that transform a functional multi-tenant app into a robust, enterprise-ready solution.
Automating User Onboarding and Offboarding Processes
Manual tenant management is the enemy of scale. Every minute spent copying a spreadsheet, setting permissions, or adding a user to a list is a minute not spent improving your app. [Automated Job Creation in Real Time Jobber and Google Sheets Integration from Gmail](https://votuduc.com/Automated-Job-Creation-in-Jobber-from-Gmail-p115606) is the key to creating a seamless, error-free, and scalable management process.
Onboarding Automated Quote Generation and Delivery System for Jobber:
The goal is to create a zero-touch process from tenant sign-up to app access. This typically involves a dedicated “Admin” app or interface that triggers a cascade of automated actions.
A common and powerful pattern uses AppSheet Automated Work Order Processing for UPS combined with Google App Script:
-
Trigger: An administrator adds a new record to a
Tenantstable in the Admin app. This form captures essential details like the tenant’s company name, primary contact email, and subscription level. -
AppSheet Bot: An “On Add” bot monitors the
Tenantstable. When a new record is created, it triggers an action. -
Webhook to App Script: The bot’s primary task is to call a Google App Script via a webhook, passing the new tenant’s information in the JSON payload.
-
The App Script “Magic”: This script acts as your back-end orchestrator. Upon receiving the webhook, it can perform several tasks:
-
Create Data Source: Copy a master template Google Sheet or create a new database schema for the new tenant. This ensures a consistent data structure for every client.
-
Set Permissions: Programmatically set the ownership and editor permissions on the newly created data source.
-
Update Central Tables: Add the new user to your central
Userstable, assigning them the newly generatedTenantIDand a default role. -
Send Welcome Email: Use
MailAppto send a customized welcome email to the primary contact, including a link to the AppSheet application and initial login instructions.
Offboarding Automation:
Just as critical as onboarding, offboarding must be swift and thorough to protect data integrity. A forgotten user is a security risk.
-
Trigger: An admin changes a tenant’s status from “Active” to “Inactive” in the Admin app.
-
AppSheet Bot: An “On Update” bot detects this status change.
-
Webhook Call: The bot calls a dedicated offboarding App Script.
-
The App Script “Cleanup”:
-
Revoke Access: The script immediately removes the tenant’s users from the app’s user allowlist or changes their role in your central
Userstable to one with no access rights. -
Archive Data: Instead of deleting data, it’s best practice to archive it. The script can move the tenant’s Google Sheet or folder to a designated “Archive” location in Google Drive. This preserves the data for compliance or future reference while removing it from the active application’s scope.
-
Log the Event: The script adds an entry to an audit log, recording who initiated the offboarding and when it occurred.
Performance Optimization for Large-Scale Deployments
As your tables grow with data from hundreds of tenants, app performance—especially sync time—can become a major issue. Proactive optimization is essential.
1. Isolate Data Sources, Not Just Data Rows:
While using a single large table with a TenantID column and security filters is the simplest approach, it hits a performance ceiling. AppSheet must still sync and process the entire table on the back end before applying the filter.
For true scalability, the superior method is to provide each tenant with their own data source (e.g., their own Google Sheet or database table).
-
How it works: Your automation script creates a copy of a template sheet for each new tenant. You then need a way to tell the app which sheet to use. This can be managed with a central
Tenantstable that maps aTenantIDto its specific data source URL or table name. Dynamic table references or more advanced app-switching logic may be required. -
Benefit: Sync times are drastically reduced because each user’s app only ever needs to consider its own small subset of data. Data isolation is physically enforced, adding another layer of security.
2. Optimize Security Filters and Slices:
If you stick with the single-table model, the efficiency of your security filters is critical.
-
Server-Side Execution: Always base your security filters on
USEREMAIL(). This ensures the filter is applied on the server before data is sent to the device, which is fundamental for both security and performance. -
Avoid Complex Expressions: Avoid using heavy
SELECT()orLOOKUP()expressions directly within the security filter condition. These can slow down the initial data evaluation. A better approach is to have aUserSettingstable that pre-calculates the necessary values (like the user’sTenantID) for a simple and fast lookup. -
Bad:
IN([_THISROW].[TenantID], SELECT(Users[TenantID], [Email] = USEREMAIL())) -
Good:
[TenantID] = LOOKUP(USEREMAIL(), "Users", "Email", "TenantID")
3. Master Your Sync Strategy:
-
Enable “Quick Sync”: In Performance > Sync Settings, ensure “Delta Sync” (often called Quick Sync) is enabled. This tells the app to only sync changes since the last sync, dramatically speeding up the process.
-
Use Server Caching: Caching stores computed results on the server, which can speed up subsequent syncs and app interactions, especially for apps with many virtual columns or complex slices.
-
Minimize Virtual Columns: Virtual columns are recalculated on every sync, which can be a major performance drain. If a value doesn’t need to be real-time, use an AppSheet bot to calculate it once and write the result to a real, physical column.
Best Practices for Auditing and Compliance
In a multi-tenant environment, you are the custodian of your clients’ data. A robust and transparent audit trail is not optional—it’s a requirement for building trust and meeting compliance standards (like GDPR or HIPAA).
1. Go Beyond the Built-in Audit History:
AppSheet’s built-in audit history (Manage > Monitor > Audit History) is a great tool for app creators to debug issues. However, it is not designed to be a tenant-facing, permanent, or easily queryable audit log.
2. Implement a Custom, Immutable Audit Log Table:
The gold standard is to create your own AuditLog table within your data source. This provides a permanent, queryable, and tenant-aware record of all significant events.
-
Table Structure: Your
AuditLogtable should include, at a minimum: -
Timestamp: When the event occurred. -
UserEmail: Who performed the action. -
TenantID: Which tenant’s data was affected. -
ActionType: e.g., “Create Record”, “Edit Record”, “Delete Record”, “User Login”. -
TableName: The table that was modified. -
RecordID: The key of the record that was affected. -
Changes: A text field to store the details of the change. For edits, this could store a summary of “Field X changed from ‘OldValue’ to ‘NewValue’“. -
Population via Automation: Use [Architecting Autonomous Data Entry Apps with AppSheet and Building Self-Correcting Agentic Workflows with Vertex AI](https://votuduc.com/architecting-autonomous-data-entry-apps-with-appsheet-and-vertex-ai-p-20260322535129) to populate this log. Create bots that trigger on all data changes (
Adds_Only,Updates_Only,Deletes_Only) for your critical data tables. The bot’s action will be to “Add a new row” to theAuditLogtable, filling in the details from the context of the event.
3. Conduct Regular Access Reviews:
Compliance isn’t just about logging; it’s about control.
-
Build an Admin Dashboard: Create views within your Admin app that are only visible to you. These views should allow you to easily see a list of all users, their assigned
TenantID, their role, and their last login date. -
Schedule Reviews: Make it a quarterly or semi-annual process to review this list. Are all users still active employees of your tenants? Are their assigned roles still appropriate? This proactive management helps prevent unauthorized access and demonstrates due diligence.
-
Document Everything: Maintain clear documentation of your security architecture, data isolation methods, and auditing procedures. If a client or a regulator asks how you protect their data, you’ll have a comprehensive answer ready.
Build a Scalable Future for Your Business Applications
Transitioning from a functional prototype to a robust, enterprise-ready solution requires foresight. The architectural decisions you make today will directly impact your ability to grow, adapt, and maintain security in the future. A well-designed multi-tenant architecture isn’t just a technical exercise; it’s a strategic foundation for scaling your operations efficiently and securely on the AppSheet platform.
Recap: The benefits of a secure multi-tenant architecture
Throughout this article, we’ve explored the technical underpinnings of building a multi-tenant AppSheet application. Let’s distill those concepts into the core business advantages you unlock with this approach:
-
Ironclad Data Security: The primary benefit is robust data isolation. By architecting your app correctly, you ensure that one tenant’s data is completely invisible and inaccessible to another, mitigating the risk of data leakage and building client trust.
-
Effortless Scalability: Onboarding a new client or department becomes a simple data entry task, not a complex development project. You can add hundreds of tenants to a single application without deploying new code, dramatically reducing your time-to-market for new customers.
-
Streamlined Maintenance: A single codebase means a single point of maintenance. When you need to fix a bug, roll out a new feature, or update branding, you do it once. The changes are instantly available to all tenants, eliminating the nightmare of managing and updating dozens of separate app copies.
-
Significant Cost Reduction: By avoiding the overhead of developing, deploying, and maintaining individual applications for each tenant, you drastically lower both development and ongoing operational costs. Your resources are focused on improving one superior product, not many mediocre ones.
-
Centralized Control & Analytics: Manage all your tenants from a single, unified application. This simplifies user administration, feature flagging, and allows you to gather aggregated, anonymized analytics across your entire user base to make data-driven decisions.
Is your current setup ready to scale securely?
Before you onboard your next ten—or your next hundred—tenants, take a moment to critically assess your current AppSheet environment. An honest evaluation now can save you from significant technical debt and security risks down the road. Ask yourself these questions:
-
Onboarding Process: If a new client signed up today, what is your process? Does it involve copying the app, duplicating the backend spreadsheet, and manually configuring permissions? How long does that take?
-
Security Confidence: How confident are you, on a scale of 1 to 10, that a clever user from Tenant A absolutely cannot find a way to view data from Tenant B? Are you relying on complex, brittle
IN()expressions in your security filters that are becoming difficult to manage? -
Update Deployment: When you release a new feature, what does that process look like? Do you have to manually apply it to multiple apps and hope you didn’t miss one? How do you ensure version consistency across your entire client base?
-
Data Structure: Look at your underlying data tables. Is there a clear, non-negotiable
TenantID(or equivalent) column in every single table that holds sensitive data? Is this ID used consistently in every relevant security filter, slice, and virtual column? -
Performance: As you add more users and more rows of data, are you noticing a slowdown? A single-app-per-tenant model might seem simple initially, but a properly designed multi-tenant app with indexed data and efficient filters often performs better at scale.
If your answers to these questions reveal manual processes, complex workarounds, or a general sense of uncertainty, it’s a clear sign that your current architecture will not support your growth ambitions securely.
Take the Next Step with a Professional Architecture Audit
Navigating the complexities of security filters, data schemas, and scalable design in AppSheet can be daunting. A small oversight in your initial design can easily cascade into a major security vulnerability or an unmaintainable application as you grow. This is where an expert eye can make all the difference.
A professional AppSheet architecture audit provides a clear, actionable path forward. Instead of guessing, you get a comprehensive review of your existing application that includes:
-
In-Depth Security Filter Analysis: We’ll scrutinize your security filters and user roles to identify potential gaps or data leakage vectors that could expose tenant data.
-
Data Schema Evaluation: We’ll assess your backend data structure for scalability, ensuring it’s optimized for efficient filtering and robust tenant isolation.
-
Performance & Bottleneck Identification: We’ll pinpoint parts of your application—from inefficient virtual columns to poorly constructed slices—that could cause performance degradation as your user base expands.
-
A Strategic Migration Roadmap: You won’t just get a list of problems; you’ll receive a detailed, step-by-step plan to refactor your application into a secure, scalable, and maintainable multi-tenant powerhouse.
Investing in an architecture audit is an investment in your application’s future. It provides the peace of mind that your platform is built on a solid foundation, ready to support your business as it scales. **Don’t wait for a security incident or a performance bottleneck to force your hand. Contact us today to schedule your comprehensive AppSheet architecture audit.**By prioritizing a scalable architecture now, you’re not just solving today’s problems—you’re building a resilient and agile foundation that will empower your business to seize future opportunities without being held back by technical debt. The journey from a functional app to a true business platform begins with the strategic decision to build it right, ensuring your technology acts as an accelerator, not an anchor, for your growth.


Stop Doing Manual Work. Scale with AI.
Want to turn these blog concepts into production-ready reality for your team?
Table Of Contents
Portfolios
Related Posts
Quick Links
Legal Stuff