

Boost SaaS User Activation with Google Sheets and Gemini AI


Your marketing is bringing users in, but they’re quietly vanishing before they ever become active. Learn how to combat this “silent churn” with a relentless focus on user activation.

The Silent Churn Problem: Why Early User Activation is Critical
Your marketing funnel is a masterpiece. You’re driving traffic, converting visitors, and the new user sign-up notifications are rolling in. But a few weeks later, the numbers tell a different story. Your active user count is flat, and your churn rate is uncomfortably high. What’s happening? You’re experiencing silent churn—the slow, quiet bleed of new users who sign up, poke around, and then vanish forever without ever reaching their “Aha!” moment.
This isn’t just a leaky bucket; it’s a fundamental threat to your SaaS business model. Every user who silently churns represents a wasted Customer Acquisition Cost (CAC) and zero Lifetime Value (LTV). They never convert to a paid plan, they never offer feedback, and they never become advocates. They simply become a ghost in your database. The antidote to this problem isn’t a better marketing campaign; it’s a relentless focus on user activation, the critical process of guiding a new user to experience your product’s core value as quickly and frictionlessly as possible.
Understanding the drop-off point for new SaaS users
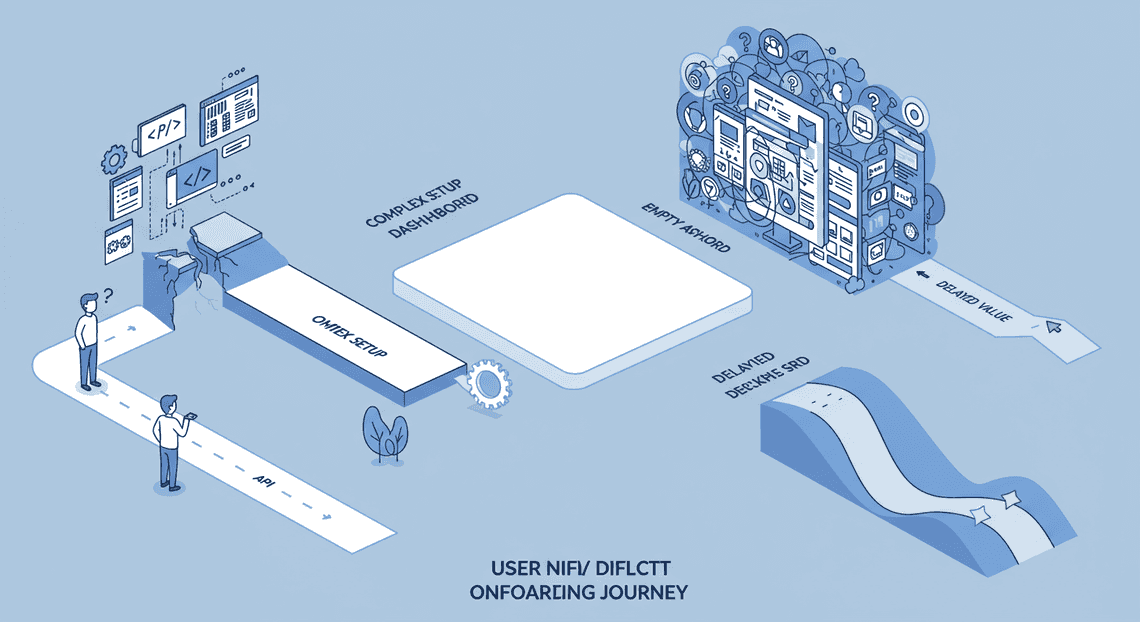
The first session a user has with your product is the most fragile. This “golden window” is your one shot to make a great impression and demonstrate value. The journey from sign-up to activation is a minefield of potential drop-off points:
-
The Setup Hurdle: The user is prompted to install a JavaScript snippet, connect a complex API, or import a large dataset. They get stuck, tell themselves they’ll “do it later,” and never return.
-
The Empty State Void: They log in for the first time to a clean, beautiful… and completely empty dashboard. With no data and no clear next step, they are paralyzed by choice and confusion. What are they supposed to do?
-
Feature Overload: Your product is powerful, with dozens of features. You proudly show them all at once, but instead of being impressed, the user is overwhelmed. They can’t find the one or two features that solve their immediate problem.
-
Delayed Gratification: The path to seeing the product’s value requires multiple steps over several days. The user loses momentum and interest before they ever get to the payoff.
Identifying where and why users are dropping off is the core challenge. Traditional analytics can show you that users are leaving, but they often fail to capture the nuanced context of why an individual user got stuck at a specific step.
The limitations of manual tracking and generic email blasts
Faced with this activation puzzle, most teams resort to a familiar, yet deeply flawed, toolkit.
First is manual tracking. A dedicated product manager or customer success rep spends hours sifting through sign-up lists, cross-referencing them with product analytics dashboards, and trying to spot users who seem to be “stuck.” This approach is heroic but utterly unscalable. It’s reactive by nature; by the time you notice a user has been inactive for three days, they’ve likely already moved on. You can’t possibly provide real-time, personalized attention to every single new user.
The second, more common approach is the generic email blast. We’ve all seen them: a pre-canned, one-size-fits-all drip campaign triggered by a sign-up event.
-
Day 1: “Welcome to [Product]! Here’s a link to our getting started guide.”
-
Day 3: “Did you know you can do [Feature X]?”
-
Day 7: “Here are 5 tips for getting the most out of [Product].”
While better than nothing, these campaigns are fundamentally disconnected from the user’s actual in-app behavior. The user who is stuck on API integration gets the same email as the one who is confused by the dashboard UI. It’s like sending a generic city map to every lost tourist, regardless of where they are or where they’re trying to go. The lack of context makes the messages irrelevant, easy to ignore, and ultimately, ineffective at solving the user’s specific problem.
Introducing an intelligent [Automated Job Creation in Real Time Jobber and Google Sheets Integration from Gmail](https://votuduc.com/Automated-Job-Creation-in-Jobber-from-Gmail-p115606) engine for proactive engagement
To truly solve the silent churn problem, we need to graduate from reactive, generic communication to proactive, personalized intervention. We need to build an intelligent system that acts like a hyper-aware co-pilot for every new user, ready to offer the right help at the exact moment it’s needed.
Imagine an intelligent Automated Quote Generation and Delivery System for Jobber engine built on three core principles:
-
**Observational: It constantly monitors key user activation events in near real-time. It knows the moment a user signs up, when they complete Step 1 of your onboarding, and, crucially, when they fail to complete Step 2 within an expected timeframe.
-
Intelligent: This is where it gets powerful. The engine doesn’t just see data points; it uses AI to interpret them. It can infer the user’s potential intent and diagnose the likely reason they’re stuck. Is the user a developer struggling with a technical integration, or a marketer confused by analytics terminology? The engine can reason about the context.
-
Proactive & Personalized: Based on its observation and analysis, the engine automatically triggers a hyper-personalized intervention. Not a generic blast, but a specific, helpful message tailored to the user’s exact situation. For the user stuck on the API, it might send an email with a link to the relevant developer docs and a code sample. For the user staring at an empty dashboard, it might send a message highlighting the “Import Data” feature.
This might sound like a complex system reserved for enterprise companies with huge engineering teams. But what if you could build the core of this engine using two tools you’re likely already using? In the following sections, we’ll show you how to combine the simplicity of [Automated Web Scraping with [Multilingual Text-to-Speech Tool with SocialSheet Streamline Your Social Media Posting 123](https://votuduc.com/Multilingual-Text-to-Speech-Tool-with-Google-Workspace-p809282)](https://votuduc.com/Automated-Web-Scraping-with-Google-Sheets-p292968) as a real-time event tracker with the advanced reasoning power of Gemini AI to create a powerful, proactive system that turns struggling new users into activated, successful customers.
The Growth Hacker’s Framework for Proactive Activation
Activation isn’t a passive milestone you wait for users to hit. It’s a critical, fragile window where you must actively guide them to their “Aha!” moment. Waiting for a user to become disengaged is like waiting for a patient to code before starting CPR—it’s too little, too late. A proactive framework moves you from being a scorekeeper of activation rates to a hands-on coach, intervening at the first sign of friction. This is about building a system that doesn’t just track events but understands intent and anticipates needs.
Defining your key activation metrics and user events
Before you can build an engine, you need to know what fuel it runs on. For a user activation engine, that fuel is a stream of well-defined user events. “Activation” is an abstract concept; you must translate it into a concrete, measurable sequence of actions.
This isn’t just user_signed_up. It’s the combination of events that correlates most strongly with long-term value and retention. The goal is to identify the “magic wand” moment—the point where a user truly grasps your product’s core value proposition.
How do you find it?
-
**Work Backwards: Look at your most retained, highest LTV customers. What were the first 3-5 things they all did within their first session or first week?
-
Be Specific and Compound: A single event is rarely enough. Activation is usually a short sequence.
Let’s consider a fictional B2B project management tool, “TaskFlow”:
| Bad Activation Metric | Good Activation Metric |
| :-------------------- | :--------------------------------------------------- |
| User logged in. | Project Created + Task Added + Teammate Invited |
| Watched a demo video. | Integration Connected (e.g., Slack) + Comment Left |
Your first step is to ensure you’re tracking these discrete events. Whether you use a CDP like Segment, a product analytics tool like Mixpanel, or custom logging to your own data warehouse, you need a raw feed of timestamped user actions. These events are the fundamental building blocks of our system.
For TaskFlow, our raw event stream might look like this:
-
user_signed_up -
user_logged_in -
project_created -
task_created -
teammate_invited -
integration_connected_slack -
comment_left_on_task -
due_date_set
With these raw signals defined, we can move beyond simple observation and start applying intelligent reasoning.
Moving from simple rules to nuanced AI-driven reasoning
The traditional approach to automated onboarding is a brittle, rule-based decision tree. You’ve seen it, and you’ve probably built it:
IF user_signed_up_at > 72 hours ago

AND project_created = FALSE

THEN

send_email('template_project_creation_nudge.html')
This works, but it’s fundamentally stupid. It lacks context.
-
What if the user invited three teammates but hasn’t created a project yet? They aren’t stuck; they’re delegating. The nudge email is irrelevant and annoying.
-
What if the user created a project, added five tasks, but hasn’t invited anyone? They are an engaged solo user, and a generic “invite your team!” email misses the mark.
-
As your product grows, this
IF/THEN/ELSElogic explodes into an unmaintainable mess.
This is where we swap out the rigid rulebook for a reasoning engine. Instead of feeding events into a decision tree, we’ll feed the entire sequence of a user’s actions into a Large Language Model like Gemini.
We won’t ask it to follow rules. We’ll ask it to think.
The prompt becomes the new logic. We can give Gemini the raw event log for a user and ask high-level questions that a human product manager would:
Prompt: “You are a SaaS user activation expert. A new user of our project management tool, TaskFlow, has the following activity log in their first 48 hours:
['user_signed_up', 'user_logged_in', 'teammate_invited', 'teammate_invited', 'user_logged_in'].
Based on this, assess their activation journey. Are they on track, at risk, or stalled? Identify the most likely point of friction and suggest the single most effective intervention (e.g., a specific email, an in-app message, or a Slack alert for our success team).”
The AI’s reasoning capabilities allow it to understand the nuance. It can infer that a user who invites teammates before creating a project is likely a manager setting things up for their team. The “most effective intervention” isn’t a generic nudge, but perhaps a targeted email titled “Quick Tip: Let your team create the first project.” This is a monumental leap from context-blind Automated Work Order Processing for UPS to context-aware assistance.
The architecture of our low-code activation engine
Now, let’s assemble the pieces. The beauty of this framework is its reliance on accessible, “low-code” tools. You don’t need a team of data scientists or a complex microservices architecture to get started.
Our engine consists of five core components that form a continuous loop:
-
Event Ingestion & Data Warehouse: This is your single source of truth for user behavior. Tools like Segment or Rudderstack collect user events from your app and pipe them into a data warehouse like Google BigQuery, Snowflake, or Redshift. This provides a clean, queryable log of all user activity.
-
**Orchestration & Triggering: This is the conductor of the orchestra. It decides when to evaluate a user. A simple scheduler (like a cron job or a tool like Google Cloud Scheduler) can run every hour. It queries the data warehouse for users who are in the critical activation window (e.g., signed up between 24 and 48 hours ago and haven’t yet hit the key activation metric). For each of these users, it pulls their complete event history. A low-code platform like Zapier, Make.com, or a serverless function (e.g., Google Cloud Functions) is perfect for this role.
-
The AI Reasoning Core (Gemini): The orchestrator takes the event log for a single user and passes it to the Gemini API. This is where the magic happens. The carefully crafted prompt we designed earlier asks the model to analyze the user’s journey, diagnose their state (on track, at risk), and prescribe a specific, context-aware intervention. The LLM’s response should be structured (e.g., JSON format) for easy parsing.
{

"user_id": "user_123",

"status": "at_risk",

"reasoning": "User invited teammates but has not created a project, indicating they may be a manager who needs guidance on delegating project setup.",

"suggested_action": "send_email",

"action_payload": {

"template_id": "email_delegate_project_creation",

"subject": "Quick Tip: Let your team create the first project"

}

}
-
Action Delivery: The orchestrator receives the structured JSON response from Gemini. It then acts as a router. If
suggested_actionissend_email, it calls your email provider’s API (like SendGrid or Postmark) with the specified template. If it’ssend_slack_alert, it pings a specific channel to notify your customer success team. If it’sshow_in_app_message, it triggers an event in a tool like Intercom or Pendo. -
Measurement & Feedback Loop: The final, critical step. When an action is taken, the orchestrator logs an event back into your data warehouse (e.g.,
intervention_sent_email_delegate_project_creation). You can then build dashboards to track whether users who received a specific intervention were more likely to activate. This closes the loop, allowing you to analyze which interventions work and refine your prompts for the AI, making the entire system smarter over time.
This isn’t a static system; it’s a living, learning engine. By swapping rigid IF/THEN rules for nuanced AI reasoning, you move from shouting generic instructions at all your new users to whispering the perfect piece of advice to each one, exactly when they need to hear it.
Building the Core System: Step-by-Step Implementation
Alright, let’s roll up our sleeves and get to the fun part: building the actual system. We’ll move methodically from data structure to AI integration and finally to automated outreach. Follow these steps, and you’ll have a powerful user activation engine running in no time.
Step 1: Structuring your Google Sheet as a user activity database
Before we can analyze anything, we need data. For this system, our Google Sheet will act as a lightweight, accessible database. Think of it as our single source of truth for user activation status.
First, create a new Google Sheet. Name it something intuitive, like “SaaS User Activation Tracker”. Then, set up the following columns in the first row:
| Column | Header Name | Purpose |
| :--- | :--- | :--- |
| A | UserID | A unique identifier for each user. |
| B | Email | The user’s email address for communication. |
| C | SignupDate | The timestamp of when the user created their account. |
| D | LastSeen | The timestamp of the user’s last activity. |
| E | ProjectCreations | A key activation metric, e.g., how many projects they’ve created. |
| F | TeamInvitesSent | A critical collaborative metric, e.g., number of teammates invited. |
| G | FeatureX_Clicks | Usage count for a core feature. |
| H | SubscriptionPlan | The user’s current plan (e.g., Free, Pro, Enterprise). |
| I | AI_Analysis | This is where Gemini’s plain-language insight will be stored. |
| J | AI_Status | A clean status from Gemini (e.g., At-Risk, Activated, Healthy). |
| K | LastContactedDate | The date we last sent them an automated email. |
Why these columns? This structure provides a 360-degree view of a user’s initial journey. We have their identity (UserID, Email), their timeline (SignupDate, LastSeen), their engagement with key activation milestones (ProjectCreations, TeamInvitesSent), and columns dedicated to our script’s output (AI_Analysis, AI_Status, LastContactedDate).
Your sheet should look something like this:
| UserID | Email | SignupDate | LastSeen | ProjectCreations | TeamInvitesSent | FeatureX_Clicks | SubscriptionPlan | AI_Analysis | AI_Status | LastContactedDate |
| :--- | :--- | :--- | :--- | :--- | :--- | :--- | :--- | :--- | :--- | :--- |
| 101 | [email protected] | 2023-10-26 | 2023-10-28 | 1 | 0 | 12 | Free | | | |
| 102 | [email protected] | 2023-10-25 | 2023-10-29 | 5 | 3 | 88 | Pro | | | |
| 103 | [email protected] | 2023-10-02 | 2023-10-03 | 0 | 0 | 2 | Free | | | |
With this structure in place, our sheet is ready to receive data.
Step 2: Populating the Sheet with Live User Data
This Google Sheet is only useful if it reflects what’s actually happening in your application. The goal is to get data from your production database into this sheet automatically. You have a few options, ranging from simple to sophisticated:
-
Manual CSV Export/Import: The simplest starting point. Periodically (e.g., once a day), export the relevant user data from your application’s database as a CSV file and import it into this Google Sheet. This is great for testing the system without extensive engineering effort.
-
Third-Party Integration Tools (e.g., Zapier, Make): This is the recommended “low-code” approach. You can create a workflow that triggers on a schedule (e.g., every hour). The workflow would query your production database (many databases like PostgreSQL or MySQL have Zapier integrations) and then use the “Update Row in Google Sheets” action to add or update user information. This strikes a great balance between automation and ease of setup.
-
Custom Script via API: The most powerful and flexible method. Write a script (e.g., in JSON-to-Video Automated Rendering Engine or Node.js) that runs on a schedule. This script would:
-
Fetch user data from your application’s internal API or directly from the database.
-
Authenticate with the Google Sheets API.
-
Iterate through the data and update the sheet row by row.
Recommendation: Start with a manual export to validate that your data and columns are correct. Once you’re happy with the format, graduate to a tool like Zapier for robust, hands-off automation. For this guide, we’ll assume the data is being populated, allowing us to focus on the next step: the AI analysis.
Code Breakdown: The Apps Script Logic
Alright, let’s pop the hood and look at the engine driving this whole operation. We’re using AI Powered Cover Letter Automation Engine, a cloud-based JavaScript platform that lets us extend Automatically create new folders in Google Drive, generate templates in new folders, fill out text automatically in new files, and save info in Google Sheets applications. The beauty here is that everything lives right inside our Google Sheet—no external servers needed.
We’ll break our script into a few key functions: one to grab the data, one to talk to Gemini, one to process the results and send emails, and finally, we’ll set it all up to run on autopilot.
Function to read user data from Google Sheets
First things first, we need to get our user data out of the Sheet and into a format our script can work with. We’ll use the built-in SpreadsheetApp service, which is the gateway to all spreadsheet-related operations in Apps Script.
Our goal is to convert the rows and columns into an array of JavaScript objects. This makes the data much easier to handle later on, as we can access properties by name (like user.email) instead of by column index (like row[0]).
Here’s the function:
/**

* Reads user data from the "User Data" sheet and converts it into an array of objects.

* @returns {Array<Object>} An array of user objects.

*/

function getUserData() {

const sheet = SpreadsheetApp.getActiveSpreadsheet().getSheetByName("User Data");

if (!sheet) {

throw new Error("Sheet 'User Data' not found!");

}

// Get all data from the sheet, excluding the header row.

const dataRange = sheet.getDataRange();

const values = dataRange.getValues();

// The first row contains the headers (e.g., "email", "lastLoginDaysAgo").

const headers = values.shift();

// Map the remaining rows to objects.

const users = values.map(row => {

const userObject = {};

headers.forEach((header, index) => {

userObject[header] = row[index];

});

return userObject;

});

Logger.log(`Found ${users.length} users to process.`);

return users;

}
What’s happening here?
-
SpreadsheetApp.getActiveSpreadsheet().getSheetByName("User Data"): This line targets our specific worksheet named “User Data”. -
dataRange.getValues(): This powerful method reads the entire block of data in the sheet and returns it as a two-dimensional array, like[["email", "projectsCreated"], ["[email protected]", 5]]. -
values.shift(): We pull the first row off the array and store it inheaders. This leavesvalueswith only the actual user data rows. -
values.map(...): We iterate over eachrowof user data. For each row, we create a newuserObject, loop through ourheaders, and build the object key-by-key. The result is a clean array of objects, like[{ email: "[email protected]", projectsCreated: 5 }, ...].
Crafting the prompt for Gemini to analyze user behavior
This is where the magic happens. The quality of our prompt directly dictates the quality of Gemini’s analysis. We need to be specific, provide context, and clearly define the output format we expect. A well-crafted prompt turns a general-purpose AI into a specialized expert for our specific task.
We’ll construct a prompt that tells Gemini to act as a “User Activation Specialist” and forces it to return its analysis in a structured JSON format. This is crucial because we need a predictable, machine-readable response to automate the next steps.
Here’s the template we’ll use:
/**

* Creates a detailed prompt for Gemini to analyze a single user's data.

* @param {Object} user - The user object from our sheet.

* @returns {string} The formatted prompt string.

*/

function createGeminiPrompt(user) {

const prompt = `

You are an expert User Activation Specialist for a B2B SaaS platform.

Your task is to analyze the data for a single user and provide a concise, actionable assessment.

**User Data:**

- Email: ${user.email}

- Days Since Last Login: ${user.lastLoginDaysAgo}

- Projects Created: ${user.projectsCreated}

- Tasks Completed: ${user.tasksCompleted}

- Team Members Invited: ${user.teamInvites}

**Instructions:**

1.  **Classify the user:** Categorize the user into ONE of the following segments:

- "At Risk": The user is inactive or has very low engagement and is likely to churn.

- "Engaged": The user is active and using core features but has room for growth.

- "Power User": The user is highly active, uses advanced features, and is a potential advocate.

2.  **Provide Reasoning:** Briefly explain WHY you chose this classification based on the data.

3.  **Suggest Action:** Recommend ONE specific email template ID to send to this user. The available template IDs are:

- "TEMPLATE_REENGAGEMENT_OFFER": For 'At Risk' users. Offer help or a small incentive.

- "TEMPLATE_FEATURE_DISCOVERY": For 'Engaged' users. Highlight a useful feature they haven't used yet.

- "TEMPLATE_CASE_STUDY_REQUEST": For 'Power Users'. Ask them to participate in a case study or provide a testimonial.

**Output Format:**

You MUST respond with ONLY a valid JSON object. Do not include any explanatory text, markdown formatting, or anything outside of the JSON structure.

Your response must conform to this exact schema:

{

"user_email": "${user.email}",

"classification": "...",

"reasoning": "...",

"suggested_email_template_id": "..."

}

`;

return prompt;

}
Why this prompt works so well:
-
Role-Playing (
You are an expert...): It sets the context and primes the model to adopt the correct persona. -
Clear Data (
User Data: ...): We inject the specific user’s data directly into the prompt. -
Specific Instructions (
Instructions: ...): We break down the task into explicit steps, leaving no room for ambiguity. -
Strict Output Formatting (
Output Format: ...): This is the most critical part for automation. By demanding a JSON object with a specific schema, we make the response trivial to parse in our code.
Function to parse Gemini’s response and trigger emails
Now we connect the pieces. This function will take a user, generate the prompt, send it to the Gemini API, parse the JSON response, and then use that information to send the appropriate email.
We’ll use Apps Script’s UrlFetchApp service to make the HTTP request to the Gemini API. Remember to store your API key securely using Script Properties (File > Project properties > Script properties) rather than hardcoding it.
/**

* Analyzes a user with Gemini, parses the response, and triggers an email.

* @param {Object} user - The user object to analyze.

* @param {string} apiKey - The Gemini API Key.

*/

function analyzeAndActOnUser(user, apiKey) {

const GEMINI_API_URL = "https://generativelanguage.googleapis.com/v1beta/models/gemini-pro:generateContent?key=" + apiKey;

const prompt = createGeminiPrompt(user);

const requestBody = {

"contents": [{

"parts": [{

"text": prompt

}]

}]

};

const options = {

'method': 'post',

'contentType': 'application/json',

'payload': JSON.stringify(requestBody),

'muteHttpExceptions': true // Important for error handling

};

try {

const response = UrlFetchApp.fetch(GEMINI_API_URL, options);

const responseCode = response.getResponseCode();

const responseBody = response.getContentText();

if (responseCode === 200) {

// Clean the response to ensure it's valid JSON

const cleanedText = responseBody.match(/```json\n([\s\S]*?)\n```/)?.[1] || responseBody;

const analysis = JSON.parse(cleanedText).candidates[0].content.parts[0].text;

const result = JSON.parse(analysis);

Logger.log(`Gemini analysis for ${user.email}: ${result.classification} - ${result.reasoning}`);

// Trigger the email based on Gemini's suggestion

sendTargetedEmail(result);

} else {

Logger.log(`Error calling Gemini API: ${responseCode} - ${responseBody}`);

}

} catch (e) {

Logger.log(`Failed to process user ${user.email}. Error: ${e.toString()}`);

}

}

/**

* Sends an email based on the analysis from Gemini.

* @param {Object} analysisResult - The parsed JSON object from Gemini.

*/

function sendTargetedEmail(analysisResult) {

const to = analysisResult.user_email;

let subject = "";

let body = "";

switch (analysisResult.suggested_email_template_id) {

case "TEMPLATE_REENGAGEMENT_OFFER":

subject = "We miss you! Here's a little something to welcome you back.";

body = `Hi there, we noticed you haven't been active lately. Is there anything we can help with? Here's a link to our quick-start guide...`;

break;

case "TEMPLATE_FEATURE_DISCOVERY":

subject = "Did you know you could do this?";

body = `Hey! We saw you've been busy creating projects. You might find our 'Advanced Reporting' feature super helpful for your workflow...`;

break;

case "TEMPLATE_CASE_STUDY_REQUEST":

subject = "You're a Pro! We'd love to feature your story.";

body = `Wow, you're doing amazing things with our platform! We're looking for power users like you to feature in a case study...`;

break;

default:

Logger.log(`Unknown email template ID: ${analysisResult.suggested_email_template_id}`);

return; // Do not send an email if the template is not recognized

}

MailApp.sendEmail(to, subject, body);

Logger.log(`Email sent to ${to} with template ${analysisResult.suggested_email_template_id}`);

}
Setting up automated triggers to run the script daily
The final step is to make this process fully automatic. We don’t want to click “Run” every morning. We’ll use Apps Script’s built-in triggers to schedule our main function to run once a day.
Here’s how to set it up:
-
In your Apps Script editor, click on the Triggers icon in the left-hand sidebar (it looks like an alarm clock).
-
Click the + Add Trigger button in the bottom-right corner.
-
Configure the trigger with the following settings:
-
Choose which function to run: Select your main function (e.g.,
mainorprocessAllUsers). -
Choose which deployment should run: Leave this as
Head. -
Select event source: Change this to
Time-driven. -
Select type of time-based trigger: Choose
Day timer. -
Select time of day: Pick a time when your system usage is low, like
1am - 2am.
- Click Save.
Beyond the Basics: Scaling and Optimizing Your Engine
You’ve built the V1 of your activation engine—a powerful proof-of-concept that identifies at-risk users and sends them personalized, AI-generated nudges. Fantastic. But moving from a clever script to a reliable, production-grade system requires thinking about scale, resilience, and optimization. This is where your engine evolves from a helpful bot into a core part of your growth stack.
Let’s explore how to harden your system, test your assumptions, and expand its reach.
Managing API quotas and implementing robust error handling
When your script runs once a day for a handful of users, you rarely think about limits. But as you scale to hundreds or thousands of daily sign-ups, you’ll inevitably collide with the operational realities of APIs. A single unhandled error or a hit rate limit can silently kill your entire activation workflow.
Why it’s critical:
-
Reliability: Your activation engine is useless if it’s not running. Proactive error handling ensures that one bad row in your Sheet or one temporary network blip doesn’t halt the entire process.
-
Cost & Performance: Uncontrolled API calls can lead to surprising bills and throttling from Google, slowing down your entire operation.
-
**Visibility: When things go wrong (and they will), you need to know what failed, why, and for which user.
Implementation Strategies:
- Wrap API Calls in
try...catchBlocks: This is the most fundamental step in Genesis Engine AI Powered Content to Video Production Pipeline. Never make a call to the Gemini API orGmailAppwithout wrapping it in atry...catchblock.
// In your [Architecting Multi Tenant AI Workflows in [Building Modular Agentic Apps Script with Gemini Function Calling](https://votuduc.com/building-modular-agentic-apps-script-with-gemini-function-calling-p-20260322917321)](https://votuduc.com/architecting-multi-tenant-ai-workflows-in-google-apps-script-p-20260321290501)

function sendPersonalizedEmail(userEmail, prompt) {

try {

// 1. Call Gemini API

const geminiResponse = callGeminiAPI(prompt);

const emailBody = geminiResponse.text();

// 2. Send the email

GmailApp.sendEmail(userEmail, "A little help to get you started...", emailBody);

// 3. Log success

Logger.log(`Successfully sent email to ${userEmail}`);

return "SUCCESS";

} catch (e) {

// 4. Log the error with context

Logger.log(`Failed to process user ${userEmail}. Error: ${e.toString()}`);

return `ERROR: ${e.toString()}`;

}

}
In your main function, you would then write the return value (“SUCCESS” or the error message) back to a “Status” column in your Google Sheet. This creates an instant audit log.
- Implement Exponential Backoff for Rate Limiting: Sometimes an API fails not because your request is bad, but because you’re sending too many requests too quickly (a
429 Too Many Requestserror). The best practice is not to just retry immediately, but to wait and try again, increasing the wait time with each failure.
// A simplified exponential backoff utility

function callWithRetry(apiFunction, maxRetries = 3) {

let attempts = 0;

while (attempts < maxRetries) {

try {

return apiFunction(); // Attempt the API call

} catch (e) {

attempts++;

if (attempts >= maxRetries) {

throw e; // Give up after max retries

}

const waitTime = Math.pow(2, attempts) * 1000 + Math.random() * 1000; // 2s, 4s, 8s... + jitter

Logger.log(`Attempt ${attempts} failed. Retrying in ${waitTime}ms...`);

Utilities.sleep(waitTime);

}

}

}

// Usage:

// const geminiResponse = callWithRetry(() => callGeminiAPI(prompt));
- Monitor Your Quotas: Regularly check your Google Cloud Platform console for Gemini API usage and the AC2F Streamline Your Google Drive Workflow dashboard for your Google Sheets and Gmail API quotas. If you’re consistently approaching your limits, you can often request an increase from Google. Batching your reads/writes to Google Sheets is also a key optimization to stay under the limit.
A/B testing email copy and intervention timing
The message and moment that convinces one user to activate might not work for another. Your initial prompts for Gemini are educated guesses. To truly optimize, you need to turn those guesses into testable hypotheses. Google Sheets is a surprisingly effective tool for managing simple A/B tests.
The Goal: To systematically discover which email copy, subject lines, or send times lead to the highest activation rates.
How to set it up:
- Expand Your Google Sheet: Add new columns to your user tracking sheet:
-
TestVariant(e.g., ‘A’ or ‘B’) -
PromptVersion(e.g., ‘Prompt_A_Benefit_Focus’, ‘Prompt_B_Direct_CTA’) -
SendDelayHours(e.g., 24, 48) -
Status(e.g., ‘Pending’, ‘Sent’, ‘Error’) -
Activated(TRUE/FALSE - this you’ll need to update from your product database)
- Modify Your Script Logic:
- Assign Variants: When a new user is added, use a simple randomizer in your script to assign them to a variant.
const variant = Math.random() < 0.5 ? 'A' : 'B';

// Write 'A' or 'B' to the 'TestVariant' column
- Use Different Prompts: Based on the assigned variant, feed a different master prompt to Gemini.
let prompt;

if (variant === 'A') {

prompt = `You are a helpful onboarding specialist... Your tone is encouraging and focuses on the long-term benefits of setting up the first project. User data: ${userData}`;

} else {

prompt = `You are a product expert... Your tone is direct and provides a 3-step quick-start guide. User data: ${userData}`;

}

const emailBody = callGeminiAPI(prompt);
- Test Timing: Your main trigger can run hourly, but the script itself should only process users whose
signup_timestampis older than their assignedSendDelayHours. This allows you to test whether a 24-hour vs. 48-hour intervention is more effective.
- Analyze the Results: After running the test for a week or two, you can easily analyze the results directly in Google Sheets. Create a pivot table that groups by
TestVariantand calculates the average of theActivatedcolumn (formatted as 1 for TRUE, 0 for FALSE). This will give you the activation rate for each variant, allowing you to declare a winner and iterate.
Expanding the logic to other channels like in-app notifications
Email is a great start, but it’s a crowded channel. The most powerful interventions often happen inside your product. The beauty of your current setup is that the core intelligence—the “who” and the “what”—is decoupled from the delivery mechanism. Swapping email for an in-app notification is a straightforward change.
The Pattern: The logic in Google Sheets and Gemini remains your “brain.” You just need to call a different API to deliver the message.
Steps to Implement:
- Create an Internal API Endpoint: Your application needs a secure endpoint that can trigger a notification for a specific user. This might look something like:
POST /api/v1/notificationswith a body like:
{

"userId": "user_12345",

"message": "Hey Alex! Looks like you're ready to connect your first data source. Need a hand?",

"cta_link": "/integrations/new"

}
- Modify Your Google Apps Script: Instead of calling
GmailApp.sendEmail, you’ll useUrlFetchApp.fetchto make a POST request to your new endpoint.
function sendInAppNotification(userId, message) {

const apiUrl = 'https://yourapp.com/api/v1/notifications';

const apiKey = 'YOUR_SECURE_API_KEY'; // Store this securely using Properties Service

const payload = {

'userId': userId,

'message': message

};

const options = {

'method': 'post',

'contentType': 'application/json',

'headers': {

'Authorization': `Bearer ${apiKey}`

},

'payload': JSON.stringify(payload)

};

try {

const response = UrlFetchApp.fetch(apiUrl, options);

Logger.log(`In-app notification sent to ${userId}. Response: ${response.getResponseCode()}`);

return "SUCCESS";

} catch (e) {

Logger.log(`Failed to send in-app notification to ${userId}. Error: ${e.toString()}`);

return `ERROR: ${e.toString()}`;

}

}
- Beyond In-App: This pattern extends to any channel with an API.
-
SMS: Use the Twilio API to send a text for high-urgency actions.
-
Slack: If your product is for teams, send a helpful tip via a Slack bot to the user’s workspace.
-
Sales/CSM Task: For high-value B2B users, instead of sending a message, use the CRM’s API (e.g., Salesforce, HubSpot) to create a task for their account manager to personally follow up.
By abstracting your logic from your delivery channel, the Google Sheets and Gemini engine becomes a central hub for orchestrating your entire user activation strategy across multiple surfaces.
Conclusion: Your Automated Growth Co-Pilot
We’ve journeyed from a simple spreadsheet to a sophisticated, AI-driven engine for user activation. What we’ve built isn’t just a tool; it’s a new team member. Think of this system as your automated Growth Co-Pilot, constantly scanning the horizon of user data, identifying opportunities for intervention, and suggesting the right course of action to ensure every user reaches their “aha!” moment. It’s the fusion of accessible technology that delivers scalable, personalized user engagement.
Recap: The power of combining Sheets, Gemini, and Apps Script
The magic of this solution lies not in any single component, but in their seamless integration. Let’s break down the powerhouse trio one last time:
-
Google Sheets: This is more than a data repository; it’s your operational dashboard and lightweight database. Its universal accessibility means your entire team—from marketing to product—can view, understand, and even contribute to the user activation process without writing a single line of code.
-
Gemini AI: This is the cognitive core of our system. Moving beyond simple analytics, Gemini analyzes qualitative user feedback, deciphers complex usage patterns, and generates context-aware, personalized outreach copy. It answers the “why” behind the data, providing insights that were previously locked away or required hours of manual analysis.
-
Google Apps Script: The tireless orchestrator. As the connective tissue, Apps Script automates the entire workflow. It fetches data, communicates with the Gemini API, intelligently updates your Sheet with AI-generated insights, and can trigger external actions like sending emails or creating support tickets. It’s the engine that makes the whole system run on autopilot.
Together, they form a surprisingly robust, low-cost, and highly extensible framework for intelligent automation.
Transforming user retention from a reactive to a proactive strategy
Historically, user retention has been a reactive discipline. We wait for a churn signal—a cancelled subscription, a period of inactivity, a negative support ticket—and then we scramble to react. By then, it’s often too late. The user has already mentally checked out.
The architecture we’ve outlined flips this paradigm on its head. By feeding user behavior data to Gemini, we shift from analyzing lagging indicators to identifying leading ones.
-
Reactive: “Why did User A cancel their subscription last week?”
-
Proactive: “Gemini has flagged that User B’s usage pattern resembles that of previously churned users who struggled with our reporting feature. Here is a draft email offering them a 15-minute walkthrough and a link to a specific tutorial.”
This is a fundamental transformation. You’re no longer performing post-mortems on lost customers; you’re actively intervening to create successful ones. You’re moving from damage control to value creation, ensuring users not only stick around but become advocates for your platform.
Ready to Scale Your Architecture? Book Your GDE Discovery Call
The Google Sheets-based solution is an incredibly powerful starting point. It can take you from zero to one, proving the value of an AI-driven activation strategy with minimal engineering overhead. But as your SaaS scales from hundreds of users to hundreds of thousands, you’ll hit the natural limits of this architecture.
When you’re ready to graduate from a powerful prototype to a production-grade, enterprise-ready system, the principles remain the same, but the tools evolve. We’re talking about migrating from Sheets to BigQuery for data warehousing, swapping Apps Script for Cloud Functions for enhanced performance and scalability, and integrating directly with your production database and CRM.
If you’re at that inflection point or can see it on the horizon, let’s talk. A 30-minute GDE Discovery Call can help you roadmap your next steps, architect a scalable solution on Google Cloud, and ensure your growth co-pilot is ready for hyper-scale.


Stop Doing Manual Work. Scale with AI.
Want to turn these blog concepts into production-ready reality for your team?
Table Of Contents
Portfolios
Related Posts
Quick Links
Legal Stuff