

Build Low Latency Google Workspace AI Agents with WebMCP


Server-side latency is the insidious adversary of responsive AI agents in Google Workspace. This is how you defeat it with smarter architecture.
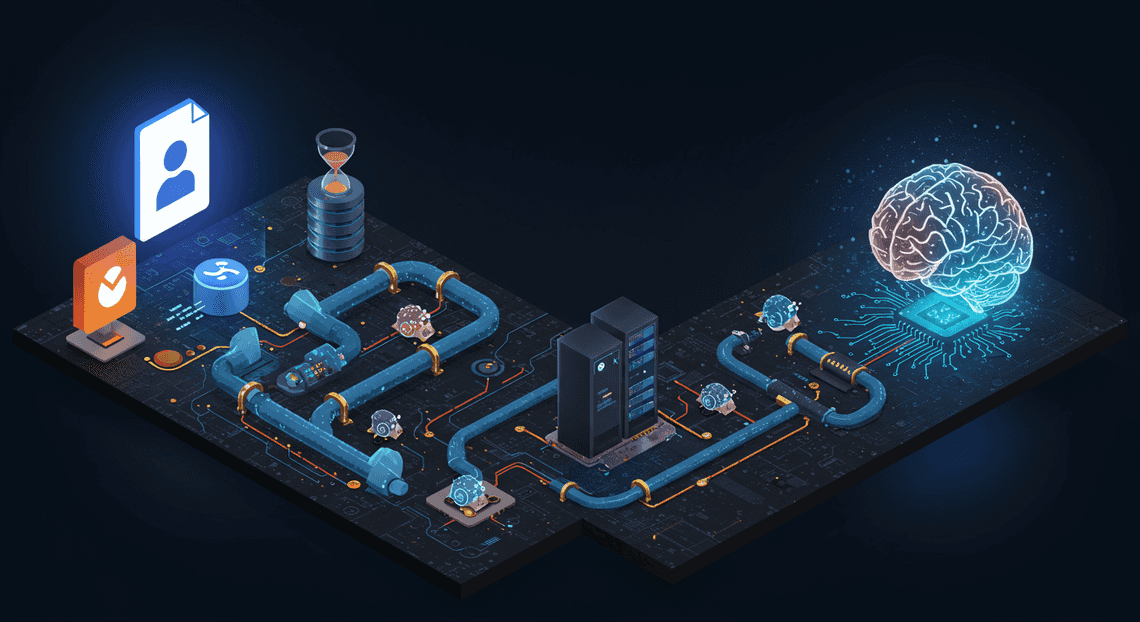
The High-Latency Challenge of Server-Side Architecting AI Agents for the Google Workspace Marketplace
In the quest to build intelligent, responsive AI agents, we often encounter an insidious adversary: latency. For an agent integrated into a real-time, interactive environment like [Automatically create new folders in Google Drive, generate templates in new folders, fill out text automatically in new files, and save info in [Automated Web Scraping with [Multilingual Text-to-Speech Tool with SocialSheet Streamline Your Social Media Posting 123](https://votuduc.com/Multilingual-Text-to-Speech-Tool-with-Google-Workspace-p809282)](https://votuduc.com/Automated-Web-Scraping-with-Google-Sheets-p292968)](https://workspace.google.com/marketplace/app/auto_create_folder_and_files/430076014869), every millisecond counts. A sluggish response can shatter the illusion of intelligence and turn a powerful tool into a frustrating bottleneck. The traditional server-side architecture, while robust for many applications, is fundamentally ill-suited for the low-latency interactions we demand from a modern AI assistant.
Analyzing the Bottleneck in Traditional Agentic Architectures
To understand the problem, let’s dissect the journey of a single user interaction in a typical server-side AC2F Streamline Your Google Drive Workflow agent. Imagine a user highlighting text in a Google Doc and asking an AI to “summarize this.”
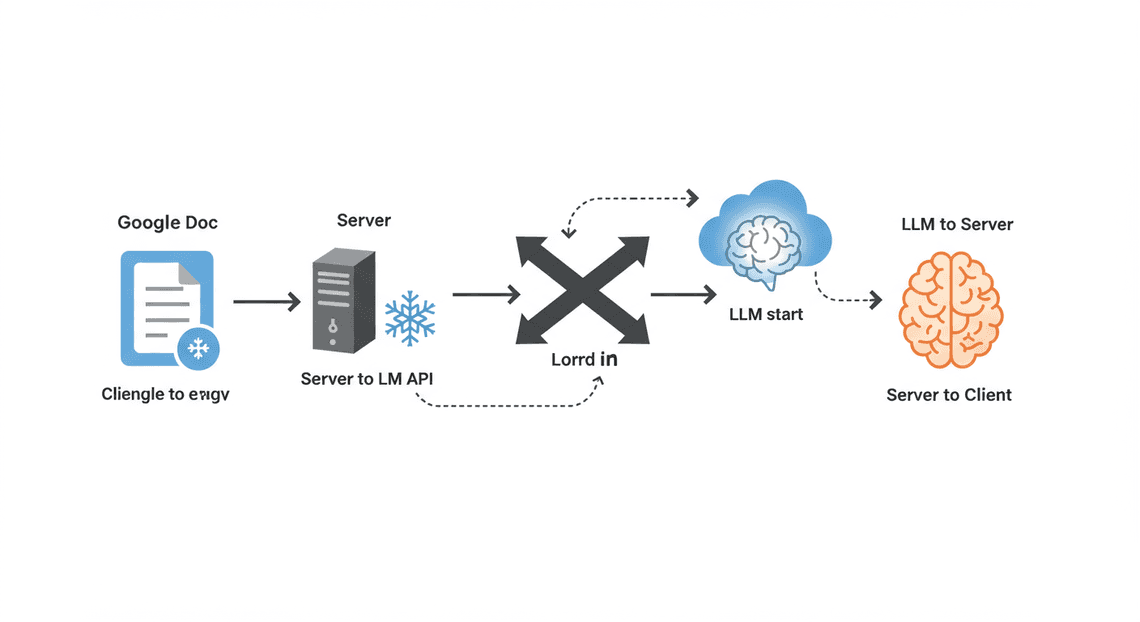
The sequence of events looks something like this:
-
Client to Server: The Automated Client Onboarding with Google Forms and Google Drive. Add-on captures the user’s action and the selected text. It then makes an API call, sending this context across the internet to your backend server. This is our first network hop.
-
Server-Side Orchestration: Your server (e.g., a Node.js app running on Cloud Run or a Lambda function) receives the request. It might perform validation, logging, and then prepares a new request for the Large Language Model (LLM). This step can introduce “cold start” delays if the serverless function isn’t warm.
-
Server to LLM: The backend server makes its own API call to a third-party service like the Google Gemini API or OpenAI API. This is the second major network hop.
-
LLM Inference: The LLM processes the prompt and generates the summary. This is the core “thinking” time, which can range from a few hundred milliseconds to several seconds depending on the model and the complexity of the task.
-
LLM to Server: The LLM API sends the generated summary back to your backend server. This is the third network hop.
-
Server to Client: Your server receives the LLM’s response, perhaps does some final formatting, and then sends the result back to the Automated Discount Code Management System Add-on running in the user’s browser. This is the fourth and final network hop.
-
Client-Side Rendering: The add-on receives the summary and updates the UI, inserting the text into the document.
This multi-hop relay race is the primary source of perceived slowness. Each round trip adds network latency, and the server-side processing, however minimal, contributes its own overhead. The total latency is the sum of all these steps, and it quickly adds up, often pushing the user’s wait time into the multiple-second range—an eternity in user-interface time. The user isn’t just waiting for the AI to think; they’re waiting for a cascade of network requests and server processes to complete.
Introducing WebMCP: A Paradigm Shift to Client-Side Execution
What if we could eliminate the middleman? What if the agent’s core logic could run directly where the user is working—inside the browser? This is the fundamental premise of WebMCP, or Web-based Model-View-Controller-Prompter. It’s an architectural pattern that moves the agentic orchestration layer from a remote server directly into the client.
By leveraging the power of modern browsers and secure, direct-from-client API calls, WebMCP radically simplifies the interaction flow:
-
Client-Side Orchestration: The Automated Email Journey with Google Sheets and Google Analytics Add-on captures the user’s action. The WebMCP agent, running as JavaScript in the browser, directly accesses the document’s context using the Automated Google Slides Generation with Text Replacement Add-on APIs.
-
**Client to LLM: The WebMCP agent constructs the prompt and makes a direct, authenticated API call from the browser to the LLM provider (e.g., Gemini API). This is the only network hop required for the core logic.
-
LLM Inference: The LLM processes the prompt and generates the response.
-
LLM to Client: The LLM API sends the response directly back to the WebMCP agent in the browser.
-
Client-Side Action: The agent receives the response and immediately uses the [Automated Order Processing Wordpress to Gmail to Google Sheets to Real Time Jobber and Google Sheets Integration](https://votuduc.com/Automated-Order-Processing-Wordpress-to-Gmail-to-Google-Sheets-to-Jobber-p649487) Add-on APIs to update the document.
This streamlined path bypasses our own backend server entirely for the agent’s core loop. We’ve cut the network round trips in half and eliminated server-side cold starts and processing delays from the critical path. The result is a dramatic reduction in end-to-end latency, creating an experience that feels fluid, responsive, and deeply integrated.
Architectural Goals: Our Browser-Based Automated Payment Transaction Ledger with Google Sheets and PayPal Agent
Adopting the WebMCP pattern isn’t just about chasing lower latency numbers; it’s about enabling a fundamentally better product. As we set out to build our Google Docs to Web agent, this client-side approach allows us to establish a clear set of architectural goals:
-
Sub-Second Interaction Latency: Our primary goal is to make interactions feel instantaneous. By removing server-side hops, we aim for the majority of the perceived latency to be the LLM’s actual inference time, not overhead from our own infrastructure. The AI should feel like a feature, not a remote service call.
-
Direct Document Context Access: The agent must be able to read from and write to the Google Doc, Sheet, or Slide in real-time. Running in the browser gives it native, low-latency access to the
DocumentAppand other client-side Workspace APIs, eliminating the need to serialize and transmit large document contexts over the network. -
Simplified, Infinitely Scalable Deployment: Our “backend” for the agent’s logic becomes a set of static assets (HTML, CSS, and JavaScript). These can be deployed to a simple object storage bucket or a Content Delivery Network (CDN). This architecture is trivial to deploy, requires zero server maintenance, and scales effortlessly to any number of users without us managing a single container or serverless function.
-
Enhanced Data Privacy: By not proxying the user’s document content through our own servers, we create a more secure and private architecture. The data flows directly from the user’s client to the trusted LLM provider, significantly reducing our data handling responsibilities and the potential attack surface.
Core Concepts: The WebMCP System Architecture
To build responsive and intelligent SocialSheet Streamline Your Social Media Posting agents, we need an architecture that prioritizes low latency and data privacy without sacrificing structure or scalability. Traditional server-side architectures often introduce network overhead that makes real-time interaction feel sluggish. WebMCP (Model-Controller-Prompter) is a client-centric architectural pattern designed specifically to address these challenges by shifting core logic into the browser, directly where the user is working. This section deconstructs the WebMCP framework, compares it to conventional server-side systems, and analyzes the critical trade-offs involved.
Deconstructing the Model-Controller-Prompter Framework
WebMCP adapts the familiar Model-View-Controller (MVC) pattern for the unique requirements of building LLM-powered applications. Instead of a “View,” which is implicitly handled by the Speech-to-Text Transcription Tool with Google Workspace application (Docs, Sheets, etc.), it introduces a “Prompter” as a first-class component. This separation of concerns is fundamental to creating maintainable and effective AI agents.
The entire framework is designed to execute within the client’s browser, typically as part of a Google Workspace Add-on’s sandboxed JavaScript environment.
-
Model: The “Model” in WebMCP refers to the external Large Language Model (LLM) itself, such as Google’s Gemini or OpenAI’s GPT series. It is an API endpoint that receives a prompt and returns a completion. The WebMCP agent does not host the model; it consumes the model’s capabilities as a service. Its sole function is generative inference based on the input it receives.
-
Controller: This is the operational brain of your agent. Written in JavaScript or TypeScript, the Controller runs client-side and is responsible for orchestrating the entire workflow. Its key duties include:
-
Event Handling: Listening for user actions within the Google Workspace UI (e.g., a button click, a text selection).
-
Context Acquisition: Interacting with the host application’s APIs (e.g.,
DocumentApp.getSelection()in Google Docs) to gather the necessary context for the AI task. -
State Management: Holding the application state, managing user inputs, and processing the final output from the Model.
-
Orchestration: Calling the Prompter to build the request, dispatching the request to the Model API, and updating the Workspace document with the result.
-
Prompter: This is the specialized component that distinguishes WebMCP. The Prompter’s single responsibility is to perform [Prompt Engineering for Reliable Autonomous Workspace Agents for Reliable Autonomous Workspace Agents](https://votuduc.com/prompt-engineering-for-reliable-autonomous-workspace-agents-p-20260319404106). It is a dedicated module that takes structured data and context from the Controller and transforms it into a precise, optimized, and effective prompt string or JSON object to be sent to the LLM. Decoupling this logic from the Controller provides several key advantages:
-
Modularity: Prompt engineering becomes a distinct, testable, and version-controlled artifact. You can iterate on prompts without touching the core application logic.
-
Clarity: It separates the “how” (the Controller’s logic) from the “what” (the Prompter’s instructions to the AI).
-
Reusability: Well-crafted prompter modules can be reused across different controllers or even different agents.
The typical data flow in a WebMCP agent is as follows:
-
A user interacts with the Google Workspace UI.
-
The Controller captures the event and uses Workspace APIs to fetch relevant context (e.g., selected text, surrounding paragraphs).
-
The Controller passes this structured context to the Prompter.
-
The Prompter formats the context into a carefully engineered prompt.
-
The Controller sends the prompt directly to the Model (LLM API).
-
The Model returns a response.
-
The Controller processes the response and updates the Google Workspace document.
Client-Side vs. Server-Side Execution: A Systems Comparison
The decision to execute logic on the client versus a server has profound architectural implications. WebMCP’s client-first approach stands in stark contrast to the more traditional server-side pattern for AI agents.
Traditional Server-Side Architecture
In a conventional setup, the Google Workspace Add-on acts as a thin client. All significant business logic, context processing, and API interactions with the LLM are handled by a backend server (e.g., a Google Cloud Function, a VM, or a container).
-
Execution Flow:
Client (Workspace) <--> Application Server <--> LLM API -
Pros:
-
Centralized Control: Business logic is maintained and updated in one place.
-
Enhanced Security: API keys and other secrets are securely stored on the server, never exposed to the client.
-
Heavy Computation: The server can perform complex data processing or connect to private databases before calling the LLM.
-
Cons:
-
High Latency: Every action requires at least one full network roundtrip from the client to your server, which then makes its own request to the LLM API. This added hop significantly increases perceived latency.
-
Infrastructure Overhead: Requires deploying, managing, and scaling a backend, incurring both complexity and cost.
WebMCP Client-Side Architecture
WebMCP eliminates the intermediate application server from the primary execution path. The Controller and Prompter logic reside and execute directly within the user’s browser.
-
Execution Flow:
Client (Workspace with WebMCP) <--> LLM API -
Pros:
-
Ultra-Low Latency: By removing the middle-man server, the only network latency is the direct call from the user’s browser to the LLM API endpoint. This results in a dramatically faster and more responsive user experience.
-
Simplified Infrastructure: Reduces or even eliminates the need for a complex backend, lowering operational costs and maintenance burdens.
-
Enhanced Data Privacy: User data from their documents is sent directly to the LLM API and is never processed or logged on your third-party servers, which is a major advantage for security and compliance.
-
Cons:
-
API Key Security: Managing API keys on the client-side is a significant challenge that requires careful mitigation strategies.
-
Limited Resources: All processing relies on the user’s browser and machine, making it unsuitable for computationally intensive pre-processing tasks.
| Feature | Server-Side Architecture | WebMCP Client-Side Architecture |
| :--- | :--- | :--- |
| Primary Logic Location | Backend Server (e.g., Cloud Function) | Client Browser (Workspace Add-on) |
| Latency | Higher (Client <-> Server <-> LLM) | Lower (Client <-> LLM) |
| Infrastructure | Required (Server, Database, etc.) | Minimal to None (Static hosting) |
| API Key Security | High (Stored securely on server) | Complex (Requires mitigation) |
| Data Privacy | Lower (Data passes through your server) | Higher (Data never touches your server) |
| Scalability | Depends on server infrastructure | Scales with user base (client-compute) |
Security and Performance Implications of In-Browser Processing
Embracing a client-side architecture with WebMCP necessitates a clear understanding of its security and performance profile.
Performance: The Latency Advantage
The primary performance benefit of WebMCP is the radical reduction in latency. A typical network roundtrip to a server in a different region can add 100-400ms of delay. By eliminating this hop, WebMCP ensures that the agent’s responsiveness is bound only by the speed of the LLM API itself. For interactive tasks like text generation, summarization, or editing, this difference is the key to a fluid user experience that feels integrated rather than bolted on.
The trade-off is that computation occurs on the user’s machine. While modern browsers are highly optimized for JavaScript execution, this architecture is best suited for tasks involving text manipulation and API orchestration, not heavy numerical or data processing. For the vast majority of Google Workspace agent use cases, browser performance is more than sufficient.
Security: Managing Keys and Protecting Data
Running code in the browser introduces a critical security challenge: how to protect your LLM API key. A key embedded directly in client-side JavaScript can be easily extracted. WebMCP’s viability depends on addressing this head-on.
Here are the primary mitigation strategies, from most to least recommended:
-
Short-Lived, Scoped Tokens (Recommended): This is the most robust and secure method. Your add-on first authenticates the user with a secure backend (e.g., using Google Sign-In). In return, the backend generates and provides the client with a temporary access token. This token is short-lived (e.g., valid for 5-10 minutes) and can be scoped to the specific user, preventing widespread abuse if compromised. The LLM API call is made using this temporary token.
-
Lightweight Secure Proxy: You can deploy a minimal proxy server (e.g., on Cloudflare Workers or Google Cloud Run) whose only function is to receive a request from the client, attach the secret API key, and forward it to the LLM API. While this re-introduces a network hop, the proxy contains no business logic, is highly cacheable, and can be geographically distributed to minimize latency. It provides a secure “black box” for your key without the complexity of a full application server.
-
User-Provided API Keys: For certain types of tools, you can delegate key management to the user. The add-on provides an interface for users to enter their own LLM API key, which is then stored securely in [AI Powered Cover Letter Automated Job Creation in Jobber from Gmail Engine](https://votuduc.com/AI-Powered-Cover-Letter-Automated Quote Generation and Delivery System for Jobber-Engine-p111092)‘s
PropertiesService(scoped to the user) or the browser’slocalStorage. This shifts the security responsibility but is a valid approach for developer-focused or power-user tools.
Conversely, in-browser processing offers a significant data privacy advantage. Because the agent reads data from a user’s document and sends it directly to the LLM provider, that sensitive information never transits through or is stored on your application servers. This greatly simplifies compliance with regulations like GDPR and builds user trust by minimizing the data footprint of your service.
Environment Setup and Prerequisites
Before we can start building the core logic of our AI agent, we need to lay the groundwork. This involves setting up our Chrome Extension to properly interact with Google Workspace pages, integrating the WebMCP SDK for real-time communication, and handling the authentication flow to securely access Google’s APIs.
Configuring Your Chrome Extension Manifest for Workspace
The manifest.json file is the heart of any Chrome Extension. It defines the extension’s capabilities, permissions, and the specific websites it can interact with. For a Google Workspace agent, we need to be precise about which pages our content scripts will run on.
First, ensure your manifest is using manifest_version: 3. Then, the most critical sections for our purpose are permissions and content_scripts.
-
permissions: We need theidentitypermission to use Chrome’s built-in OAuth 2.0 flow for secure Google authentication. Thescriptingandstoragepermissions are also standard for managing agent state and behavior. -
content_scripts: This is where we tell Chrome to inject our agent’s JavaScript and CSS into Google Workspace applications. We use thematcheskey to target specific URLs.
Here’s a well-structured manifest.json example tailored for interacting with Gmail and Google Docs.
{

"manifest_version": 3,

"name": "Workspace AI Agent (WebMCP)",

"version": "0.1.0",

"description": "A low-latency AI assistant for Google Workspace.",

"permissions": [

"identity",

"scripting",

"storage"

],

"content_scripts": [

{

"matches": [

"https://mail.google.com/*",

"https://docs.google.com/document/*"

],

"js": ["content.js"],

"css": ["styles.css"]

}

],

"oauth2": {

"client_id": "YOUR_GOOGLE_CLOUD_OAUTH_CLIENT_ID.apps.googleusercontent.com",

"scopes": [

"https://www.googleapis.com/auth/gmail.readonly",

"https://www.googleapis.com/auth/documents.readonly",

"https://www.googleapis.com/auth/userinfo.email"

]

},

"action": {

"default_popup": "popup.html"

}

}
Key takeaways from this manifest:
-
We target Gmail and Google Docs specifically. You can add more patterns for Sheets (
https://docs.google.com/spreadsheets/*), Slides, etc. -
We declare our intent to use the
identityAPI for authentication. -
The
oauth2section is crucial. You must replaceYOUR_GOOGLE_CLOUD_OAUTH_CLIENT_IDwith the ID you obtain from the Google Cloud Console for a “Chrome App”. Thescopesarray defines the specific permissions your agent will request from the user.
Integrating the WebMCP SDK into Your Project
The WebMCP SDK is the client-side library that establishes and manages the low-latency WebSocket connection to the WebMCP backend. It simplifies the process of sending context and receiving AI-generated commands.
You can integrate the SDK in two primary ways, depending on your project’s build process.
1. Using a Package Manager (Recommended)
If you’re using a modern JavaScript toolchain with a bundler like Vite, Webpack, or Rollup, installing the SDK via npm or yarn is the cleanest approach.
# Using npm

npm install @webmcp/sdk

# Using yarn

yarn add @webmcp/sdk
Once installed, you can import it directly into your content script (content.js) or other JavaScript modules.
// In your content.js or other module

import { WebMCP } from '@webmcp/sdk';

// Now you can initialize the client

// const client = new WebMCP({ / *config* / });
2. Using a CDN Link
For simpler projects or rapid prototyping without a build step, you can include the SDK via a <script> tag directly in an HTML file (like a popup or options page). Note that for a content script, you would still need a build process or use dynamic import mechanisms.
--- In popup.html or options.html -->

<script src="https://cdn.jsdelivr.net/npm/@webmcp/sdk/dist/webmcp.min.js"></script>

<script src="popup.js"></script>
When included this way, the WebMCP class becomes available on the global window object, so you can access it directly in your script:
// In popup.js

// The WebMCP class is available globally

// const client = new window.WebMCP({ / *config* / });
Authenticating with Google Workspace Client-Side APIs
To perform meaningful actions—like reading the content of an email or a document—our agent needs the user’s permission. We obtain this by acquiring an OAuth 2.0 access token. The chrome.identity API, combined with the oauth2 configuration in our manifest, makes this process secure and straightforward.
The flow involves calling chrome.identity.getAuthToken. The first time this is called, Chrome will display a consent screen to the user, showing the permissions requested in the manifest’s scopes array. On subsequent calls, it will return a cached token or refresh it if it has expired, without prompting the user again.
Here is a function that retrieves the token and then uses it to make an authenticated API call to the Gmail API to fetch the user’s profile.
/**

* Retrieves a Google OAuth 2.0 access token.

* @returns {Promise<string>} A promise that resolves with the access token.

*/

function getAuthToken() {

return new Promise((resolve, reject) => {

chrome.identity.getAuthToken({ interactive: true }, (token) => {

if (chrome.runtime.lastError || !token) {

reject('Could not get auth token: ' + chrome.runtime.lastError.message);

} else {

resolve(token);

}

});

});

}

/**

* Example function to fetch the user's email address using the token.

*/

async function fetchUserProfile() {

try {

const token = await getAuthToken();

console.log('Successfully retrieved auth token.');

const response = await fetch('https://www.googleapis.com/gmail/v1/users/me/profile', {

headers: {

'Authorization': `Bearer ${token}`,

'Content-Type': 'application/json'

}

});

if (!response.ok) {

throw new Error(`API call failed with status: ${response.status}`);

}

const data = await response.json();

console.log('User email:', data.emailAddress);

return data;

} catch (error) {

console.error('Authentication or API call failed:', error);

}

}

// You can call this function from your popup or background script

// to initiate the authentication flow.

// fetchUserProfile();
This token is the key to the kingdom. You will pass it along with your context data to your WebMCP backend, which can then use it to make server-side Google API calls on the user’s behalf. This client-side authentication pattern keeps user credentials secure and leverages the browser’s native capabilities.
Step-by-Step Implementation: Building the Agent
With the high-level architecture defined, let’s dive into the practical implementation of our WebMCP agent. We’ll construct the core components step-by-step, focusing on how each piece contributes to a responsive and intelligent user experience directly within the Google Workspace environment. This is where the abstract concepts of controllers, prompters, and models materialize into functional code.
Step 1: Defining the Controller to Interact with the Google Workspace DOM
The Controller is the agent’s physical embodiment within the browser. It acts as the essential bridge between the AI’s abstract instructions and the tangible Document Object Model (DOM) of the Google Workspace application. Its sole purpose is to read the state of the UI and execute actions upon it.
A robust Controller is paramount because Google’s DOM is notoriously complex and subject to change. Direct manipulation is brittle; instead, we create a stable API layer. This class encapsulates the messy details of finding and interacting with elements, exposing clean, intention-based methods like getActiveDocumentContent() or applyBoldStyle().
Here’s a conceptual structure for a GoogleDocsController in TypeScript. Notice how it abstracts away the specific querySelector logic, making the rest of our application code cleaner and more resilient to UI updates.
// Filename: GoogleDocsController.ts

/**

* A controller to abstract interactions with the Google Docs DOM.

* This provides a stable API for the AI agent to read from and write to the document.

*/

export class GoogleDocsController {

/**

* Reads the primary text content from the active document canvas.

* @returns {string} The text content of the document.

*/

public getActiveDocumentContent(): string {

// In a real implementation, this would target the specific, often complex,

// content-editable div that Google Docs uses for its main editor.

const editorCanvas = document.querySelector('.kix-page-content-wrapper');

return editorCanvas ? (editorCanvas as HTMLElement).innerText : '';

}

/**

* Retrieves the currently selected text by the user.

* @returns {string | null} The selected text, or null if no selection.

*/

public getSelectedText(): string | null {

const selection = window.getSelection();

return selection ? selection.toString() : null;

}

/**

* Inserts text at the current cursor position.

* @param {string} text - The text to insert.

*/

public insertText(text: string): void {

// This is a simplified example. A real implementation would need to handle

// the complexities of Google Docs' content-editable environment.

document.execCommand('insertText', false, text);

console.log(`Action Executed: insertText with content length ${text.length}`);

}

/**

* Clicks a UI button identified by its aria-label.

* Using aria-label is often more stable than relying on obfuscated CSS classes.

* @param {string} label - The aria-label of the button to click.

* @returns {boolean} - True if the button was found and clicked, false otherwise.

*/

public clickButtonByLabel(label: string): boolean {

const button = document.querySelector(`[aria-label="${label}"]`) as HTMLElement;

if (button) {

button.click();

console.log(`Action Executed: clickButtonByLabel for "${label}"`);

return true;

}

console.warn(`Button with label "${label}" not found.`);

return false;

}

}
This controller effectively creates a set of “tools” or “actions” that the AI model can later choose from. The key is to expose high-level actions rather than low-level DOM manipulations. Instead of an action like click('div.css-1a2b3c'), we provide clickButtonByLabel('Bold').
Step 2: Structuring the Prompter for Dynamic Context Injection
The Prompter is the agent’s cognitive assembler. It doesn’t just store a static string; it dynamically constructs the final prompt sent to the LLM by weaving together multiple sources of context. This is the most critical step for achieving accurate, context-aware model behavior.
Its primary responsibilities are:
-
Gathering Context: It calls the
Controllerto get the current state of the DOM (e.g., document content, selected text). -
Incorporating User Intent: It takes the user’s raw query (e.g., “summarize this and make the key points bold”).
-
Defining Capabilities: It lists the available actions from the
Controller, informing the model of what it’s capable of doing. -
Formatting: It assembles all this information into a structured format that the LLM is trained to understand, often using XML-like tags to delineate different sections of the prompt.
Below is an example of a PromptBuilder class that demonstrates this process.
// Filename: PromptBuilder.ts

import { GoogleDocsController } from './GoogleDocsController';

export class PromptBuilder {

private controller: GoogleDocsController;

constructor(controller: GoogleDocsController) {

this.controller = controller;

}

public build(userQuery: string): string {

const documentContext = this.controller.getActiveDocumentContent().slice(0, 2000); // Truncate for context window

const selectedText = this.controller.getSelectedText();

// Define the available tools in a structured format for the model

const availableTools = `

<tools>

<tool>

<name>insertText</name>

<description>Inserts the provided text at the user's current cursor location.</description>

<parameters>

<param name="text" type="string" required="true" />

</parameters>

</tool>

<tool>

<name>clickButtonByLabel</name>

<description>Clicks a UI button, such as 'Bold', 'Italic', or 'Insert link'.</description>

<parameters>

<param name="label" type="string" required="true" />

</parameters>

</tool>

</tools>

`;

// Assemble the final prompt using a template

const finalPrompt = `

You are an expert AI assistant integrated into Google Docs. Your goal is to help the user accomplish tasks by using the available tools.

You must respond with a JSON object containing the action to take. The JSON object should have two keys: "action" (the name of the tool to use) and "parameters" (an object of the parameters for that tool).

<context>

<document_preview>${documentContext}</document_preview>

<selected_text>${selectedText || 'None'}</selected_text>

</context>

${availableTools}

<user_query>

${userQuery}

</user_query>

Based on the user query and the current context, what is the next action you should take? Respond with only the JSON object.

`;

return finalPrompt;

}

}
The resulting prompt gives the model everything it needs: the user’s goal, the relevant context from the page, and a clear “menu” of functions it can execute.
Step 3: Executing the Model Directly in the Browser
This is the heart of the low-latency approach. Instead of a round-trip to a remote server, we run the LLM inference directly on the user’s machine. This is made possible by modern web technologies like WebAssembly and libraries such as transformers.js, WebLLM, or Google’s own MediaPipe LlmInference task.
For this example, we’ll use a conceptual WebLLM interface, which represents any library capable of running a model client-side. The process involves initializing the model (a one-time cost), creating a session, and then feeding it the prompt from our PromptBuilder.
A key feature for a good user experience is streaming. We don’t want to wait for the entire model response to be generated. By streaming the output token by token, we can update the UI in real-time, giving the user immediate feedback that the agent is “thinking.”
// Filename: ModelExecutor.js

// This is a conceptual example. The actual API will depend on the library used

// (e.g., transformers.js, MediaPipe, etc.).

import { WebLLM } from 'some-web-llm-library';

export class ModelExecutor {

private model;

private isInitialized = false;

constructor() {

this.model = new WebLLM('gemma-2b-it'); // Example model

}

async initialize() {

if (this.isInitialized) return;

console.log('Initializing on-device LLM...');

await this.model.load();

this.isInitialized = true;

console.log('Model initialized successfully.');

}

/**

* Executes the prompt and streams the response.

* @param {string} prompt - The fully constructed prompt.

* @param {(chunk: string) => void} onStreamUpdate - Callback for each new token.

* @returns {Promise<string>} The full generated response.

*/

async execute(prompt, onStreamUpdate) {

if (!this.isInitialized) {

throw new Error('Model is not initialized. Call initialize() first.');

}

console.log('Executing prompt...');

const fullResponse = await this.model.generate(prompt, {

onToken: (token) => {

// Pass the streaming token back to the UI layer

onStreamUpdate(token);

},

});

console.log('Execution complete.');

return fullResponse;

}

}
This setup eliminates network latency from the inference step entirely. The only latency is the computation time on the user’s device, which for smaller, optimized models, is often just a few hundred milliseconds.
Step 4: Handling State and Returning Actions to the UI
The model has executed and returned a response. In our prompt, we explicitly asked for a JSON object representing an action. The final step is to parse this response, validate it, and use it to drive our Controller.
This component, which we can call the ActionHandler, is the dispatcher. It takes the raw string output from the LLM and translates it into a concrete function call.
// Filename: ActionHandler.ts

import { GoogleDocsController } from './GoogleDocsController';

export class ActionHandler {

private controller: GoogleDocsController;

constructor(controller: GoogleDocsController) {

this.controller = controller;

}

/**

* Parses the LLM's string response and executes the corresponding controller action.

* @param {string} modelResponse - The raw string output from the LLM.

*/

public handle(modelResponse: string): void {

try {

// It's crucial to clean the response, as models sometimes add markdown fences

const cleanedResponse = modelResponse.replace(/```json|```/g, '').trim();

const actionObject = JSON.parse(cleanedResponse);

if (!actionObject.action || !actionObject.parameters) {

throw new Error('Invalid action format. Missing "action" or "parameters".');

}

console.log('Parsed Action:', actionObject);

// Use a switch or a map to route to the correct controller method

switch (actionObject.action) {

case 'insertText':

this.controller.insertText(actionObject.parameters.text);

break;

case 'clickButtonByLabel':

this.controller.clickButtonByLabel(actionObject.parameters.label);

break;

default:

console.error(`Unknown action: ${actionObject.action}`);

// Optionally, provide feedback to the user that the action is not supported.

}

} catch (error) {

console.error('Failed to parse or handle model action:', error);

// This is a critical point for error handling. We could re-prompt the model

// with the error, or ask the user for clarification.

}

}

}
This handler completes the agent’s execution loop:
-
User Query triggers the process.
-
Prompter builds context.
-
Model reasons and generates a JSON action.
-
ActionHandler parses the JSON and calls the…
-
Controller, which modifies the DOM, providing visible feedback to the user.
For multi-step tasks, the result of the Controller action (e.g., success or failure) would be captured and fed back into the Prompter for the next iteration, creating a continuous, stateful loop.
Advanced Strategies for Scaling and Optimization
Once you’ve mastered the basics of creating a WebMCP agent, the next frontier is building applications that are not only functional but also robust, fast, and scalable. A simple, single-session agent is powerful, but a production-grade solution must handle user state across sessions, minimize network latency, and manage complexity as features grow. This section dives into the advanced strategies that transform your prototype into a high-performance, professional-grade Google Workspace integration.
Managing Complex State Across Browser Sessions
By design, WebMCP agents operate within the client’s memory, meaning a page refresh wipes their state clean. For any non-trivial application, this is a significant limitation. To create a persistent and personalized user experience, you must leverage browser storage APIs to manage state across sessions.
The primary tools at your disposal are localStorage, sessionStorage, and IndexedDB.
localStorage: Ideal for storing small, simple key-value pairs that need to persist indefinitely until cleared by the user or the application. Think user preferences, UI settings, or a cached authentication token.
// WebMCP Agent Code

class SettingsAgent extends WebMCP {

constructor() {

super();

this.userTheme = localStorage.getItem('userTheme') || 'light';

}

async setTheme(theme) {

if (theme === 'light' || theme === 'dark') {

this.userTheme = theme;

localStorage.setItem('userTheme', theme);

// Here you would also update the UI

console.log(`Theme set to: ${this.userTheme}`);

return { success: true, theme: this.userTheme };

}

return { success: false, error: 'Invalid theme' };

}

}
-
sessionStorage: Behaves likelocalStoragebut is scoped to the browser tab’s session. When the tab is closed, the data is gone. This is perfect for storing temporary state that shouldn’t pollute the user’s long-term storage, such as the contents of a multi-step form or a temporary conversation history with the agent. -
IndexedDB: The most powerful option for client-side storage. It’s a transactional, object-oriented database built into the browser, capable of storing large amounts of structured data and enabling high-performance queries with indexes. UseIndexedDBwhen you need to: -
Store complex objects, not just strings.
-
Handle large datasets (e.g., caching dozens of emails or document metadata).
-
Perform efficient lookups and searches on the client side.
While the native IndexedDB API can be verbose, libraries like idb by Jake Archibald provide a much cleaner, promise-based interface.
// A conceptual example using a wrapper library like 'idb'

import { openDB } from 'idb';

const dbPromise = openDB('agent-db', 1, {

upgrade(db) {

db.createObjectStore('conversationHistory', { keyPath: 'id', autoIncrement: true });

},

});

class ChatAgent extends WebMCP {

async saveMessage(message) {

const db = await dbPromise;

await db.add('conversationHistory', message);

}

async loadHistory() {

const db = await dbPromise;

return await db.getAll('conversationHistory');

}

}
Client-Side Caching for Reduced API Calls and Latency
Every API call to Google Workspace introduces latency and consumes valuable API quota. Aggressive client-side caching is the single most effective technique for building a low-latency agent. By storing the results of frequent API calls in the browser, you can deliver a near-instantaneous experience for repeat actions.
The best tool for this job is IndexedDB due to its capacity and query capabilities. A common and highly effective caching strategy is Time-to-Live (TTL).
-
Request Data: The agent’s method is called to fetch data (e.g., today’s calendar events).
-
Check Cache: The agent first checks
IndexedDBfor a cached entry corresponding to this request. -
Validate Freshness: If an entry exists, it checks a timestamp stored with the data. If
(Date.now() - timestamp) < TTL, the data is considered “fresh,” and the cached version is returned immediately. -
Fetch and Cache: If no entry exists or the data is stale (older than the TTL), the agent makes the actual API call to Google.
-
Store Result: Upon receiving a successful response, the agent stores the data along with a new
Date.now()timestamp inIndexedDBbefore returning it.
Here’s how this pattern might look in a WebMCP agent:
// Using a conceptual DB wrapper for clarity
import db from './db'; // Assumes an IndexedDB wrapper setup
const CALENDAR_TTL = 5 *60* 1000; // 5 minutes
class CalendarAgent extends WebMCP {
async getTodaysEvents() {
const cacheKey = 'todays-events';
const cached = await db.get('api-cache', cacheKey);
if (cached && (Date.now() - cached.timestamp < CALENDAR_TTL)) {
console.log('Returning calendar events from cache.');
return cached.data;
}
console.log('Fetching fresh calendar events from API.');
// In a real app, this would be a gapi.client call
const events = await this.fetchEventsFromGoogleAPI();
const dataToCache = {
id: cacheKey,
data: events,
timestamp: Date.now()
};
await db.put('api-cache', dataToCache);
return events;
}
async fetchEventsFromGoogleAPI() {
// Placeholder for the actual Google Calendar API call
return [{ summary: 'Project Standup' }];
}
}
This strategy dramatically improves perceived performance, as frequently accessed data loads instantly from the local database, falling back to the network only when necessary.
Orchestrating Multiple WebMCP Agents in a Single Client
As your application’s complexity grows, a single, monolithic WebMCP agent becomes difficult to maintain. A better approach is to break down functionality into smaller, domain-specific agents (e.g., a DriveAgent, a GmailAgent, a CalendarAgent). The challenge then becomes: how do these specialized agents communicate and collaborate to perform complex tasks?
Directly calling methods on other agent instances can lead to tightly coupled, brittle code. A more scalable solution is to use an Architecting an Event-Driven Workspace with PubSub Firebase and Gemini with a central orchestrator or a message bus.
The CustomEvent API built into all modern browsers is a perfect, lightweight tool for this. Agents can dispatch events to signal that a task is complete, and other agents can listen for these events to trigger their own work. This decouples the agents entirely; they only need to agree on the event names and data payloads.
Consider a task: “Find the latest quarterly report in Google Drive and draft an email to the team with a link to it.”
-
UI/Orchestrator: A user action triggers the initial call to the
DriveAgent. -
DriveAgent: Finds the document and, instead of calling theGmailAgentdirectly, it dispatches a custom event. -
GmailAgent: Has an event listener set up fordocumentFound. When it “hears” the event, its handler fires, extracts the document details from the event’sdetailpayload, and proceeds to draft the email.
Here’s a simplified code implementation:
// DriveAgent.js

class DriveAgent extends WebMCP {

async findLatestReport() {

console.log('DriveAgent: Searching for report...');

// Fake API call

const report = { name: 'Q3 Financials.gdoc', id: 'doc12345' };

// Dispatch an event instead of calling another agent directly

const event = new CustomEvent('documentFound', {

detail: { document: report }

});

window.dispatchEvent(event);

return { success: true, message: 'Dispatched documentFound event.' };

}

}

// GmailAgent.js

class GmailAgent extends WebMCP {

constructor() {

super();

// Listen for the event dispatched by another agent

window.addEventListener('documentFound', this.handleDocumentFound.bind(this));

console.log('GmailAgent: Listening for documentFound events.');

}

handleDocumentFound(event) {

const doc = event.detail.document;

console.log(`GmailAgent: Heard 'documentFound', drafting email for ${doc.name}`);

this.draftEmailWithLink(doc);

}

async draftEmailWithLink(doc) {

const docLink = `https://docs.google.com/document/d/${doc.id}`;

// ... logic to call Gmail API to create a draft

console.log(`GmailAgent: Draft created with link: ${docLink}`);

return { success: true, draftId: 'draft-abcde' };

}

}

// main.js - Where agents are instantiated

const driveAgent = new DriveAgent();

const gmailAgent = new GmailAgent();

// Later, when the user clicks a button...

// driveAgent.findLatestReport();
This pattern creates a highly modular system. You can add, remove, or update agents without breaking others, so long as the event “contracts” (the names and data structures) remain consistent. This is the key to building complex, multi-faceted AI assistants that can scale gracefully.
Conclusion: The Future of Scalable Browser-Based Agents
We’ve moved beyond the era where every intelligent action required a round trip to a distant, powerful server. The modern browser is not just a thin client; it’s a formidable compute platform. For building AI agents within high-frequency environments like Google Workspace, harnessing this client-side power isn’t just an optimization—it’s a fundamental architectural shift. The traditional server-centric model introduces unavoidable latency and a direct correlation between user activity and operational cost. WebMCP offers a different path, one that leads to agents that are not only faster and more responsive but also exponentially more scalable and cost-effective. This isn’t just about improving an existing product; it’s about enabling a new class of applications that feel truly integrated into the user’s workflow.
Key Takeaways: Reducing Latency and Server Load with WebMCP
The core value proposition of architecting your Google Workspace agents with WebMCP can be distilled into three critical advantages:
-
**Drastic Latency Reduction: By executing logic directly within the browser tab where the user is working, WebMCP eliminates the network latency inherent in server-side API calls. Actions feel instantaneous because they are nearly instantaneous. This transforms the user experience from a clunky, “call-and-wait” interaction to a fluid, seamless partnership with the AI.
-
Decoupling Cost from Usage: In a server-side model, every user action translates to server CPU cycles, memory usage, and network bandwidth, creating a direct and often painful link between user growth and infrastructure cost. WebMCP shatters this link. By offloading the bulk of the computational work to the user’s own device, you can scale your user base massively with only a marginal increase in server load, which is now relegated to orchestration and state management.
-
Simplified, Resilient Architecture: Pushing computation to the edge (the browser) allows for a leaner, more focused backend. Your server’s primary responsibility shifts from heavy lifting to lightweight coordination. This not only reduces complexity and potential points of failure but also makes your entire system more resilient. The agent can continue to function with partial capabilities even if backend connectivity is temporarily degraded.
The Evolving Landscape of Client-Side AI
The move toward client-side processing with WebMCP isn’t happening in a vacuum; it’s aligned with the most significant trends in web technology and artificial intelligence.
The rise of WebAssembly (WASM) and WebGPU is unlocking near-native performance for complex computations directly in the browser. Simultaneously, the AI community is producing a wave of smaller, highly efficient models optimized to run on-device. This convergence means the browser is rapidly becoming a first-class citizen for sophisticated AI workloads.
Furthermore, this client-first approach offers a powerful answer to growing privacy concerns. When sensitive data from a user’s Google Doc or Sheet can be processed locally without ever being transmitted to a third-party server, you gain a significant advantage in security, data sovereignty, and user trust. WebMCP provides the ideal framework to orchestrate these on-device models and data flows, positioning your architecture not just for today’s challenges but for the future of a more powerful, private, and decentralized web.
Next Steps: Audit Your Architecture for Scalability
The theoretical benefits are clear, but the real test is how this paradigm applies to your specific use case. The immediate, actionable step is to conduct a critical audit of your current or planned AI agent architecture. Move beyond initial feature development and ask the hard questions about performance and scale.
Consider the following as you evaluate your design:
-
Latency Bottlenecks: Where does latency currently exist in your user interaction flow? Which steps depend on a network round trip, and can they be re-imagined to run client-side?
-
**Compute Locus: Make a clear distinction between tasks that must run on the server (e.g., accessing a proprietary, massive foundation model) and tasks that could run on the client (e.g., data transformation, UI logic, running smaller models).
-
Cost Modeling: How will your infrastructure costs evolve as your user base grows from 1,000 to 100,000 active users? Is your cost model linear or logarithmic? A WebMCP-based architecture fundamentally alters this curve in your favor.
-
Operational Complexity: Could a client-first approach reduce the number of microservices you need to maintain, deploy, and scale? Does it simplify your backend logic and reduce operational overhead for your team?
By challenging the assumption that the server must do all the heavy lifting, you open the door to building the next generation of Google Workspace agents: applications that are incredibly fast, economically scalable, and built on a foundation of user privacy and trust.


Stop Doing Manual Work. Scale with AI.
Want to turn these blog concepts into production-ready reality for your team?
Table Of Contents
Portfolios
Related Posts
Quick Links
Legal Stuff