

Automating Terraform HCL from Google Sheets with Gemini Pro


Infrastructure as Code was meant to simplify operations, but at scale, the code itself can become the bottleneck. The challenge shifts from managing servers to managing the unwieldy code that provisions them.

The Scalability Challenge of Manual Infrastructure as Code
Infrastructure as Code (IaC) is a foundational practice in modern cloud operations. Tools like Terraform have revolutionized how we provision and manage resources, replacing manual console operations with declarative, version-controlled code. This paradigm shift brings immense benefits in consistency, repeatability, and auditability. However, as organizations scale, a new class of challenges emerges. The very code meant to simplify infrastructure management can itself become a complex, unwieldy system that introduces its own operational friction. The bottleneck shifts from managing servers to managing the code that manages the servers.
Identifying the Bottlenecks
At a small scale, manually writing and maintaining HCL (HashiCorp Configuration Language) is manageable. An engineer can easily create a new module instantiation for a virtual machine or a storage bucket. But consider an environment with hundreds of microservices, multiple development teams, and stringent compliance requirements. The process breaks down.
Key bottlenecks include:
-
Repetitive Toil: Onboarding a new service might require creating a dozen standard resources: a service account, a set of IAM bindings, a logging bucket, a monitoring dashboard, and a database instance. This often translates to copying a block of 20-50 lines of HCL, meticulously changing variable names, and hoping no typos were introduced. Multiply this by ten new services a month, and the engineering cost becomes substantial.
-
The Pull Request Queue: In many organizations, a central platform or DevOps team owns the core Terraform repositories. When an application team needs new infrastructure, they file a ticket. The platform engineer translates this request into HCL, opens a pull request, waits for CI checks and approvals, and finally applies the change. This entire cycle can take days, stifling development velocity. The infrastructure team becomes a perpetual bottleneck, servicing a long queue of simple, repetitive requests.
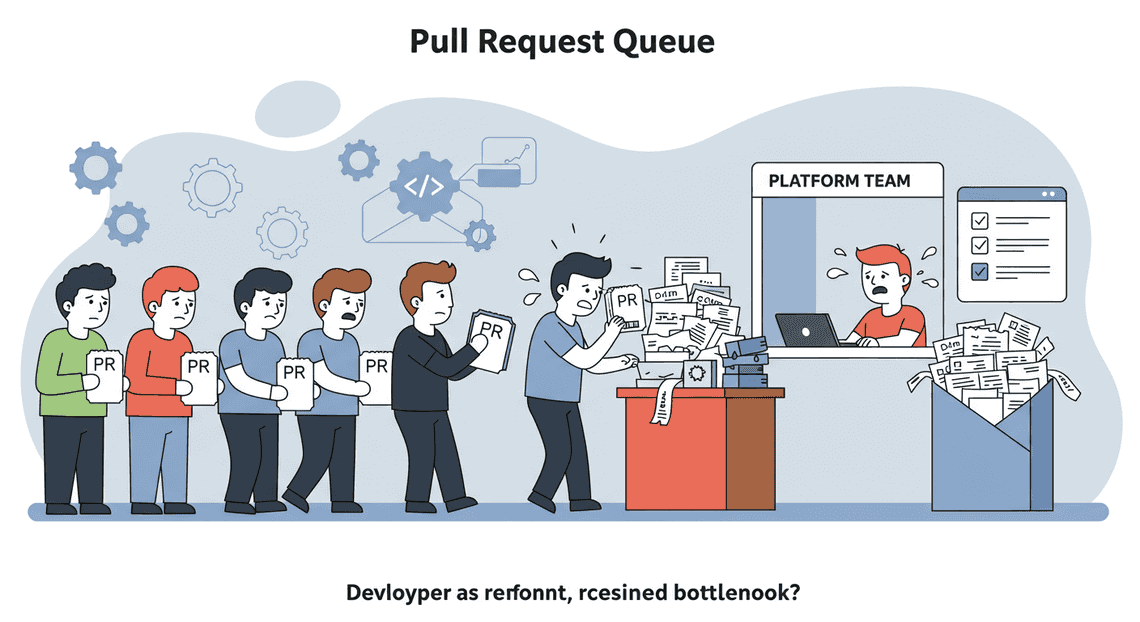
- A Disconnected Source of Truth: The true desired state of the infrastructure often lives outside of Git. It exists in design documents, project management tickets, or even tribal knowledge. The HCL in the repository is merely a reflection of that state at a point in time. When a request is made to “add a new GCS bucket for the analytics team,” the ticket, not the HCL, is the initial source of truth. This disconnect creates a gap where translation errors and misinterpretations can occur.
Human Error and Configuration Drift
Manual processes are inherently fragile and susceptible to human error. The more complex the system, the greater the probability and impact of these errors. In the context of manual HCL management, this manifests in two critical ways:
-
Direct Error Injection: Simple copy-paste mistakes are rampant. An engineer might forget to change a project ID, misspell a resource name leading to a violation of naming conventions, or accidentally assign overly permissive IAM roles. These errors can range from benign
terraform planfailures to catastrophic security vulnerabilities. Enforcing standards through code reviews helps, but it doesn’t scale; reviewers are just as human as the authors and can miss subtle mistakes in a large changeset. -
Configuration Drift: This is the insidious divergence of your deployed infrastructure from its definition in code. It often begins with a high-priority incident. An engineer makes an “emergency” change directly in the cloud console to restore service. The intention is always to go back and codify that change in Terraform later. But the manual process of cloning the repo, finding the right file, writing the HCL, and going through the PR process is high-friction. The urgent ticket is closed, and the HCL update is forgotten. Over time, these small, unrecorded changes accumulate, eroding the reliability of the IaC repository as the single source of truth. The
terraform plancommand, which should show no changes, suddenly proposes a disruptive list of modifications, making future updates risky and unpredictable.
A Vision for Spreadsheet-Driven Infrastructure Management
To overcome these scaling challenges, we must elevate our thinking. We need to decouple the intent of the infrastructure from the implementation of the HCL. The core problem is that we are forcing engineers to manually author the low-level implementation (HCL) to satisfy a high-level intent (e.g., “we need a new database for service X”).
What if we could define that intent in a structured, accessible, and collaborative format? A format that non-Terraform experts can understand and contribute to?
This is the vision for spreadsheet-driven infrastructure management. Imagine a Google Sheet that serves as the high-level, canonical source of truth for your resources. Each row in the sheet represents a resource to be provisioned, and each column represents a required configuration parameter (name, region, instance size, backup policy).
The workflow transforms entirely:
-
Define Intent: To provision a new resource, an engineer or even a project manager simply adds a new, validated row to the Google Sheet.
-
Automate Generation: An automated process reads this sheet.
-
Synthesize Code: This process programmatically generates the corresponding, perfectly formatted, standards-compliant, and error-free Terraform HCL code.
-
Execute via CI/CD: The generated HCL is automatically committed to a Git repository, triggering a standard CI/CD pipeline to run
terraform planandapply.
In this model, the HCL becomes a managed artifact, not a manually authored source file. We shift the human interaction point from writing complex code to populating simple, structured data. This approach promises to eliminate entire classes of human error, drastically reduce the toil of managing repetitive resources, and create a centralized, easily auditable registry of our infrastructure intent.
Architectural Blueprint: From Spreadsheet to Deployed Resource
To truly appreciate the power of this [Automated Job Creation in Real Time Jobber and Google Sheets Integration from Gmail](https://votuduc.com/Automated-Job-Creation-in-Jobber-from-Gmail-p115606), we must first dissect its architecture. This isn’t just about connecting a few APIs; it’s about creating a cohesive, intelligent system where each component plays a distinct and critical role. We’re building a digital assembly line that transforms a simple row of data into a fully provisioned cloud resource, with logic, intelligence, and execution neatly separated.
Core Components: [Automated Web Scraping with [Multilingual Text-to-Speech Tool with SocialSheet Streamline Your Social Media Posting 123](https://votuduc.com/Multilingual-Text-to-Speech-Tool-with-Google-Workspace-p809282)](https://votuduc.com/Automated-Web-Scraping-with-Google-Sheets-p292968), Apps Script, Gemini, and Terraform
Our architecture is built upon four pillars, each a powerful platform in its own right. When combined, they create a workflow that is greater than the sum of its parts.
- Google Sheets: The Declarative User Interface
At the very top of our stack is the humble spreadsheet. In this model, Google Sheets transcends its role as a data-entry tool and becomes a declarative “source of truth” for infrastructure requests. Its universal familiarity, collaborative features, and structured grid format make it the perfect, low-friction interface. Teams can define their desired state—a new virtual machine, a storage bucket, a database instance—in a simple, human-readable format without ever touching a line of code.
- [AI Powered Cover Letter Automated Quote Generation and Delivery System for Jobber Engine](https://votuduc.com/AI-Powered-Cover-Letter-Automated Work Order Processing for UPS-Engine-p111092): The Orchestration Engine
Embedded within Google Sheets, Apps Script acts as the central nervous system of our operation. It’s the serverless “glue code” that listens for user actions (like clicking a “Generate HCL” button) and orchestrates the entire workflow. Its responsibilities include reading data from the sheet, performing validation, constructing a precise prompt for the AI, and handling the API call to Gemini. It is the invisible but indispensable engine driving the automation forward.
- Gemini Pro: The Intelligent HCL Generator
This is the core intelligence of our system. Gemini Pro serves as a “translator” with deep domain expertise. We don’t just ask it to format text; we instruct it to act as an expert DevOps engineer. Apps Script sends it the structured data from the sheet, wrapped in a carefully engineered prompt. Gemini then uses its vast understanding of Terraform’s HashiCorp Configuration Language (HCL) syntax, best practices, and cloud provider specifics to generate clean, correct, and context-aware Terraform code. It turns the what (the data in the sheet) into the how (the HCL code).
- Terraform: The Execution Engine
The final piece of the puzzle is Terraform itself, operating within a standard GitOps or CI/CD pipeline. The HCL generated by Gemini is committed to a version control repository (e.g., GitHub, Cloud Source Repositories). This commit triggers an automated pipeline that runs terraform plan to verify the changes and terraform apply to enact them. Terraform is the “enforcer” that takes the generated blueprint and makes it a reality in the target cloud environment, ensuring the deployed infrastructure precisely matches the desired state.
Mapping the End-to-End Data and Logic Flow
Understanding the components is one thing; seeing how they interact in a seamless flow is another. The journey from a spreadsheet cell to a running cloud resource follows a clear, logical sequence:
-
Initiation (The Request): A user defines a new resource by filling out a designated row in the Google Sheet. This includes parameters like
instance_name,machine_type,region, andnetwork_tags. Once complete, they trigger the process via a custom menu item or button. -
Orchestration (Apps Script Activation): The user’s click invokes a specific Apps Script function. The script reads the data from the active row, sanitizes it, and dynamically constructs a detailed prompt. This prompt is not just the raw data; it’s a set of instructions for Gemini, such as: “You are a Google Cloud expert. Generate a Terraform HCL resource block for a ‘google_compute_instance’ using the following attributes…”
-
Generation (The Gemini API Call): Apps Script makes a secure, authenticated API call to the Gemini Pro model via Google’s [Building Self Correcting Agentic Workflows with Building Self-Correcting Agentic Workflows with Vertex AI](https://votuduc.com/building-self-correcting-agentic-workflows-with-vertex-ai-p-20260321542526) platform. The carefully crafted prompt is sent as the payload.
-
Translation (HCL Creation): Gemini processes the request. It parses the attributes, understands the intent to create a specific resource, and generates a syntactically correct HCL code block as a response. This response is typically a JSON object containing the code as a string.
-
Integration (The Handoff to Git): The Apps Script receives the HCL code from Gemini. In a production-grade setup, the script then uses a Git provider’s API (e.g., the GitHub API) to commit the new HCL code into a dedicated file (e.g.,
vm-web-prod-01.tf) within the infrastructure repository. This action serves as the clean handoff from the “generation” phase to the “execution” phase. -
Execution (The CI/CD Pipeline): The new commit to the repository automatically triggers a CI/CD pipeline (e.g., GitHub Actions, Cloud Build). The pipeline’s job is to run the standard Terraform workflow:
-
terraform initto prepare the workspace. -
terraform validateto double-check syntax. -
terraform planto show the proposed changes, which can be reviewed for approval. -
terraform applyto provision the resource in the cloud.
Why This Approach Unlocks Unprecedented Agility
This architectural pattern is more than a novelty; it represents a fundamental shift in how infrastructure can be managed, unlocking significant strategic advantages.
-
Democratizes Infrastructure Provisioning: It drastically lowers the barrier to entry. Product teams, developers, or even data analysts can request the resources they need through a familiar spreadsheet interface. This removes the DevOps team as a bottleneck and empowers teams with controlled self-service capabilities, fostering a culture of ownership and speed.
-
Enforces Consistency at Scale: By centralizing the logic in the Apps Script prompt, you ensure that every piece of generated HCL adheres to the same standards, naming conventions, and security guardrails (e.g., mandatory tags, approved machine types). This eliminates the “snowflake” servers and configuration drift that plague manual processes.
-
Accelerates Delivery Cycles: The time from identifying an infrastructure need to having it provisioned is reduced from days or hours to mere minutes. This radical acceleration allows development teams to iterate faster, test new environments on-demand, and respond to business needs with unparalleled velocity.
-
Combines Flexibility with Control: Unlike rigid forms or static templates, using a Large Language Model like Gemini provides intelligent flexibility. You can refine the prompts to handle more complex requests, add optional parameters, or even generate entire modules without rewriting the core automation. The spreadsheet defines the “what,” the prompt defines the “rules,” and Gemini handles the complex “how,” creating a system that is both powerful and easy to maintain.
Step 1: Designing the Master Configuration in Google Sheets
Before we even think about prompting an AI, we need to build a solid foundation. Our Google Sheet isn’t just a data table; it’s the source of truth, the user interface, and the contract for our entire automation pipeline. A well-designed sheet makes the downstream process smooth, predictable, and resilient to user error. A poorly designed one will just automate the creation of chaos. Let’s get it right.
Defining a Flexible Schema for Diverse Cloud Resources
The first challenge is creating a single, tabular format that can elegantly describe vastly different cloud resources. A Google Compute Engine VM has properties like machine_type and boot_disk, while a Cloud Storage bucket needs location and versioning. Trying to create a column for every possible attribute across all GCP services would result in an unmanageable sheet with hundreds of mostly empty columns.
The solution is to adopt a meta-schema that separates universal identifiers from resource-specific attributes. Our schema will consist of two types of columns:
-
Core Columns: These are mandatory, high-level identifiers that apply to every resource we define.
-
Attribute Column: A single, flexible column to hold the unique configuration for each resource type.
Here’s the schema we’ll use:
| Column Header | Purpose | Data Type | Example |
| :--- | :--- | :--- | :--- |
| ResourceName | A unique, human-readable name for the resource instance. | String | main-web-server |
| ResourceType | The official Terraform resource type. | String | google_compute_instance |
| Enabled | A flag to determine if this resource should be generated. | Boolean | TRUE / FALSE |
| Attributes | A JSON object containing all resource-specific arguments. | JSON (as a string) | {"machine_type": "e2-medium", "zone": "us-central1-a", ...} |
Why a single JSON column for Attributes?
-
Infinite Flexibility: It can accommodate any Terraform resource without ever needing to change the sheet’s structure. Adding support for a new resource type like
google_sql_database_instancerequires no schema changes. -
Direct Mapping: The key-value pairs inside the JSON object map directly to the arguments within a Terraform HCL block. This makes the translation logic for Gemini Pro incredibly straightforward.
-
Clarity: It keeps the main sheet view clean and focused on the “what” (
ResourceName,ResourceType), while the “how” (the specific configuration) is neatly encapsulated.
Here’s how it looks in practice for two different resource types:
| ResourceName | ResourceType | Enabled | Attributes |
| :--- | :--- | :--- | :--- |
| backend-api-vm | google_compute_instance | TRUE | {"machine_type": "e2-medium", "zone": "us-central1-a", "boot_disk": {"initialize_params": {"image": "debian-cloud/debian-11"}}, "network_interface": [{"network": "default"}]} |
| static-assets | google_storage_bucket | TRUE | {"location": "US-CENTRAL1", "force_destroy": true, "storage_class": "STANDARD"} |
| app-database | google_sql_database_instance | FALSE | {"database_version": "POSTGRES_14", "region": "us-central1", "settings": {"tier": "db-n1-standard-1"}} |
Notice how the app-database is disabled. Our automation will simply skip this row, providing an easy way to toggle infrastructure without deleting the configuration.
Implementing Data Validation for Error-Proof Inputs
A free-form text field is a bug waiting to happen. A typo in a machine type (e2-meduim instead of e2-medium) or a non-existent zone will cause Terraform to fail. We can drastically reduce these errors by using Google Sheets’ built-in data validation tools, turning our sheet into a guided, error-resistant management UI.
First, create a new tab in your sheet named _Lookups. This will be a centralized place to define all our valid inputs.
In the _Lookups tab:
| ValidResourceTypes | ValidMachineTypes | ValidLocations |
| :--- | :--- | :--- |
| google_compute_instance | e2-micro | US-CENTRAL1 |
| google_storage_bucket | e2-small | US-EAST1 |
| google_sql_database_instance | e2-medium | EUROPE-WEST2 |
| … | n2-standard-2 | … |
Now, let’s apply the validation rules to our main configuration tab:
-
EnabledColumn: Select the entire column (e.g., C2:C), go toData > Data validation, choose “Checkbox” as the criteria, and save. This provides a clean, unambiguous boolean toggle. -
ResourceTypeColumn: Select the column (e.g., B2:B), choose “Dropdown (from a range)” as the criteria, and select theValidResourceTypesrange from your_Lookupstab (e.g.,_Lookups!A2:A). This ensures users can only select from a pre-approved list of Terraform resources. -
**
AttributesColumn (Optional but Recommended): While we can’t validate the contents of the JSON directly in Sheets, we can add a validation rule that checks if the text is valid JSON. Use the “Custom formula is” criteria with a formula that leverages a custom Apps Script function for JSON validation if you need strict enforcement. For simplicity, we will rely on user care and the AI’s ability to spot malformed JSON.
By enforcing these rules, you guide the user toward correct inputs, dramatically increasing the reliability of the HCL generation process.
Structuring Tabs for Different Environments (Dev, Staging, Prod)
Managing a single environment is one thing, but real-world projects require separate configurations for Development, Staging, and Production. The goal is to manage these environments from our single Google Sheet without duplicating logic or creating a maintenance nightmare.
The best practice is to use a separate tab (worksheet) for each environment.
Your Google Sheet should be organized with the following tabs:
[ Dev | Staging | Prod | _Lookups ]
Crucially, the schema (the column headers and their order) MUST be identical across the Dev, Staging, and Prod tabs.
This consistency is the key to scalable automation. Our script and AI prompt won’t need custom logic for each environment. Instead, they can simply iterate through a list of tabs (['Dev', 'Staging', 'Prod']) and apply the exact same process to each one.
This structure allows for clear separation of concerns while maintaining a single point of management:
-
Dev: Can contain experimental resources or use cost-effective configurations (e.g.,
e2-micromachine types). -
Staging: A more stable environment that mirrors production, perhaps with slightly scaled-down resources.
-
Prod: The locked-down, production-grade configuration. You can even use Google Sheets’ cell protection features to restrict who can edit rows in the
Prodtab.
With this robust, validated, and multi-environment sheet structure in place, we now have a reliable source of truth ready to be fed into our AI automation engine.
Step 2: The Apps Script and Gemini Pro Integration Engine
With our Google Sheet structured for success, it’s time to build the engine that will power this automation. This is where Genesis Engine AI Powered Content to Video Production Pipeline comes in—a cloud-based JavaScript platform that lets us extend Automatically create new folders in Google Drive, generate templates in new folders, fill out text automatically in new files, and save info in Google Sheets applications. We’ll use it to read our sheet, communicate with the Gemini API, and write the generated HCL back. This is the heart of the entire operation.
Setting Up Your Apps Script Project and Required Permissions
Before we write a single line of code, we need to get our environment set up. This involves creating the Apps Script project, linking it to a Google Cloud project, and enabling the necessary APIs.
-
Open the Apps Script Editor: From your Google Sheet, navigate to
Extensions>Apps Script. This will open a new tab with a fresh script project, intrinsically linked to your spreadsheet. Give your project a meaningful name, like “Terraform HCL Generator”. -
Link to a Google Cloud Project: Apps Script needs a standard Google Cloud Project (GCP) to manage APIs and authentication.
- In the Apps Script editor, click the “Project Settings” (⚙️) icon on the left sidebar.
Scroll down to the “Google Cloud Platform (GCP) Project” section. If it’s not already associated, you’ll see a button to change the project. You’ll need the* Project Number** of a GCP project you have access to. You can find this on the GCP Console dashboard.
- Click the link provided to open your associated Cloud project.
- Enable the Gemini API: In the GCP Console for your linked project, you need to enable the API that allows us to talk to Gemini.
-
Navigate to
APIs & Services>Library. -
Search for
Generative Language API. -
Click on the result and hit the
Enablebutton.
- Secure Your API Key: You’ll need an API key to authenticate your requests. You can generate one from the Google AI Studio. Treat this key like a password. Never hardcode it directly into your script. The best practice within Apps Script is to use the
PropertiesService.
- In the Apps Script editor, add a function to store your key:
function storeApiKey() {

// IMPORTANT: Run this function once manually from the editor to store your key.

// Replace "YOUR_GEMINI_API_KEY" with the key you generated.

const apiKey = "YOUR_GEMINI_API_KEY";

PropertiesService.getScriptProperties().setProperty('GEMINI_API_KEY', apiKey);

Logger.log("API Key stored successfully.");

}
Paste your key into the function, save the script, and run storeApiKey once from the editor’s “Run” menu. You can then delete the key from the code itself.
- Verify Scopes: Apps Script requires explicit permission (scopes) to interact with other services. While it often prompts you for these automatically on the first run, it’s good to know what’s happening. Our script will need:
-
https://www.googleapis.com/auth/spreadsheets: To read from and write to our Google Sheet. -
https://www.googleapis.com/auth/script.external_request: To make the outbound call to the Gemini API.
Crafting the Perfect Prompt for Reliable HCL Generation
This is arguably the most critical part of the entire process. The quality and reliability of the generated HCL depend entirely on the quality of the instructions—the prompt—we give to Gemini. We aren’t having a conversation; we are programming a language model to perform a deterministic task. Your prompt must be precise, unambiguous, and structured.
A robust prompt for this use case has several key components:
-
Role-Playing: Tell the model what it is. This primes it with the right context and knowledge base.
-
Clear Task Definition: State exactly what you want it to do.
-
Input Specification: Define the data you will provide.
-
Strict Output Constraints: This is non-negotiable. You must forbid conversational filler, explanations, or markdown formatting that would corrupt the HCL output.
-
A Few-Shot Example: Provide a concrete example of the input and the desired output. This is one of the most effective techniques for improving model accuracy and consistency.
Here is a battle-tested prompt template you can adapt. We’ll build a function in our script to inject the row data into this template.
You are an expert Google Cloud engineer specializing in Terraform HCL. Your sole purpose is to generate a single, valid Terraform resource block based on the data I provide.

**RULES:**

- Generate ONLY the raw HCL code for the resource block.

- DO NOT include any explanatory text, introductions, or conclusions.

- DO NOT wrap the code in markdown backticks (```hcl or ```).

- The output must be valid HCL syntax, ready to be pasted directly into a .tf file.

**INPUT DATA:**

- Resource Type: {{resourceType}}

- Resource Name: {{resourceName}}

- Arguments: {{arguments}}

**EXAMPLE:**

**INPUT DATA:**

- Resource Type: google_project_service

- Resource Name: enable_gcs

- Arguments:

- project: "my-gcp-project-123"

- service: "storage.googleapis.com"

- disable_on_destroy: false

**EXPECTED OUTPUT:**

resource "google_project_service" "enable_gcs" {

project            = "my-gcp-project-123"

service            = "storage.googleapis.com"

disable_on_destroy = false

}

Now, generate the resource block for the following data.

**INPUT DATA:**

- Resource Type: {{resourceType}}

- Resource Name: {{resourceName}}

- Arguments:

{{arguments}}
The Code: Parsing Sheet Data and Calling the Gemini API
Finally, let’s write the Apps Script code that ties everything together. This script will read the data from our sheet, dynamically build a prompt for each row, send it to the Gemini API, and write the clean HCL response back into the appropriate cell.
Create a new file in your editor named Code.gs and paste the following:
// Add a custom menu to the spreadsheet for easy access.

function onOpen() {

SpreadsheetApp.getUi()

.createMenu('Terraform Tools')

.addItem('Generate HCL for Selected Rows', 'generateHclForSelectedRows')

.addToUi();

}

// Main function triggered by the menu item.

function generateHclForSelectedRows() {

const sheet = SpreadsheetApp.getActiveSheet();

const range = sheet.getActiveRange(); // Process only the user-selected rows

const data = range.getValues();

const startRow = range.getRow();

const header = sheet.getRange(1, 1, 1, sheet.getLastColumn()).getValues()[0];

// Find column indices dynamically

const typeCol = header.indexOf("Resource Type") + 1;

const nameCol = header.indexOf("Resource Name") + 1;

const argsCol = header.indexOf("Arguments (JSON)") + 1;

const hclCol = header.indexOf("Generated HCL") + 1;

if (typeCol === 0 || nameCol === 0 || argsCol === 0 || hclCol === 0) {

SpreadsheetApp.getUi().alert("Error: Could not find required columns. Make sure 'Resource Type', 'Resource Name', 'Arguments (JSON)', and 'Generated HCL' exist.");

return;

}

// Process each selected row

data.forEach((row, index) => {

const currentRow = startRow + index;

const resourceType = row[typeCol - 1];

const resourceName = row[nameCol - 1];

const argumentsJson = row[argsCol - 1];

// Skip empty rows or rows where essential data is missing

if (!resourceType || !resourceName || !argumentsJson) {

return;

}

try {

const prompt = buildPrompt(resourceType, resourceName, argumentsJson);

const generatedHcl = callGeminiApi(prompt);

// Write the clean HCL back to the sheet

sheet.getRange(currentRow, hclCol).setValue(generatedHcl);

SpreadsheetApp.flush(); // Apply changes immediately

} catch (e) {

// Log errors to the corresponding HCL cell for easy debugging

sheet.getRange(currentRow, hclCol).setValue(`ERROR: ${e.message}`);

}

});

}

// Constructs the detailed prompt for the Gemini API.

function buildPrompt(resourceType, resourceName, argumentsJson) {

let formattedArgs = '';

try {

const argsObj = JSON.parse(argumentsJson);

for (const key in argsObj) {

formattedArgs += `  - ${key}: ${JSON.stringify(argsObj[key])}\n`;

}

} catch (e) {

throw new Error("Invalid JSON in Arguments column.");

}

// This is the prompt template from the previous section.

const promptTemplate = `

You are an expert Google Cloud engineer specializing in Terraform HCL. Your sole purpose is to generate a single, valid Terraform resource block based on the data I provide.

**RULES:**

- Generate ONLY the raw HCL code for the resource block.

- DO NOT include any explanatory text, introductions, or conclusions.

- DO NOT wrap the code in markdown backticks (\`\`\`hcl or \`\`\`).

- The output must be valid HCL syntax, ready to be pasted directly into a .tf file.

**INPUT DATA:**

- Resource Type: {{resourceType}}

- Resource Name: {{resourceName}}

- Arguments:

{{arguments}}

`;

return promptTemplate

.replace('{{resourceType}}', resourceType)

.replace('{{resourceName}}', resourceName)

.replace('{{arguments}}', formattedArgs);

}

// Handles the API call to Gemini.

function callGeminiApi(prompt) {

const apiKey = PropertiesService.getScriptProperties().getProperty('GEMINI_API_KEY');

if (!apiKey) {

throw new Error("Gemini API key not found. Please run storeApiKey() first.");

}

const url = `https://generativelanguage.googleapis.com/v1beta/models/gemini-pro:generateContent?key=${apiKey}`;

const payload = {

"contents": [{

"parts": [{

"text": prompt

}]

}]

};

const options = {

'method': 'post',

'contentType': 'application/json',

'payload': JSON.stringify(payload),

'muteHttpExceptions': true // Prevents script from stopping on HTTP errors

};

const response = UrlFetchApp.fetch(url, options);

const responseCode = response.getResponseCode();

const responseBody = response.getContentText();

if (responseCode === 200) {

const jsonResponse = JSON.parse(responseBody);

// Navigate the JSON structure to get the generated text

return jsonResponse.candidates[0].content.parts[0].text.trim();

} else {

throw new Error(`API Error: ${responseCode} - ${responseBody}`);

}

}
Save the script. Reload your Google Sheet, and you should now see a new “Terraform Tools” menu. The engine is built and ready to run.
Step 3: Persisting and Versioning Your Generated HCL
Generating HCL dynamically is a powerful capability, but the output is ephemeral. For our automation to have any real-world value, we need a robust way to save, track, and manage the generated configuration files. This step bridges the gap between generation and execution, transforming a transient string of text in our script into a tangible, version-controlled artifact ready for your CI/CD pipeline.
We’ll explore two methods, starting with a simple approach that keeps everything within the Google ecosystem and then moving to a production-grade solution that integrates with a proper Git workflow.
Using DriveApp to Automatically Save Terraform Files
The most straightforward way to persist your HCL is to save it as a file in Google Drive. This method is excellent for rapid prototyping, simple use cases, or environments where you want to minimize external dependencies. [Architecting Multi Tenant AI Workflows in Building Modular Agentic Apps Script with Gemini Function Calling](https://votuduc.com/architecting-multi-tenant-ai-workflows-in-google-apps-script-p-20260321290501) provides the built-in DriveApp service, making this integration seamless.
The logic is simple: specify a folder in Google Drive, and have your script create or update a .tf file with the HCL generated by Gemini.
Here’s a function you can add to your Apps Script project to handle this process. It’s idempotent, meaning it will safely update an existing file or create a new one if it doesn’t exist.
/**

* Saves or updates a Terraform HCL file in a specific Google Drive folder.

*

* @param {string} hclContent The Terraform HCL configuration to save.

* @param {string} fileName The name of the file to create or update (e.g., "gke_clusters.tf").

* @param {string} folderId The ID of the Google Drive folder where the file should be saved.

*/

function saveHclToDrive(hclContent, fileName, folderId) {

try {

const folder = DriveApp.getFolderById(folderId);

const files = folder.getFilesByName(fileName);

let file;

if (files.hasNext()) {

// File already exists, so we'll update it.

file = files.next();

file.setContent(hclContent);

Logger.log(`Updated existing file: "${fileName}" in folder "${folder.getName()}".`);

} else {

// File does not exist, so we'll create it.

file = folder.createFile(fileName, hclContent, MimeType.PLAIN_TEXT);

Logger.log(`Created new file: "${fileName}" in folder "${folder.getName()}".`);

}

Logger.log(`File URL: ${file.getUrl()}`);

return file.getUrl();

} catch (e) {

Logger.log(`Error saving file to Drive: ${e.toString()}`);

// Optional: Re-throw the error to be handled by the calling function.

throw new Error(`Failed to save HCL to Google Drive. Details: ${e.message}`);

}

}

// --- Example Usage ---

function mainFunction() {

const generatedHcl = `

resource "google_container_cluster" "primary" {

name     = "my-gke-cluster"

location = "us-central1"

# ... other configuration ...

}`;

const TARGET_FOLDER_ID = "YOUR_GOOGLE_DRIVE_FOLDER_ID"; // <-- IMPORTANT: Replace this

const FILENAME = "generated_gke_clusters.tf";

saveHclToDrive(generatedHcl, FILENAME, TARGET_FOLDER_ID);

}
How it Works:
-
DriveApp.getFolderById(folderId): We target a specific folder using its unique ID. You can find this ID in the URL of the folder in your browser. -
folder.getFilesByName(fileName): We search within that folder for a file with the specified name. This returns an iterator. -
files.hasNext(): We check if the iterator found anything.
-
If
true, we get the file withfiles.next()and overwrite its contents withfile.setContent(hclContent). -
If
false, we create a new file withfolder.createFile(...).
- Logging: Clear log messages confirm whether the file was created or updated, providing visibility into the script’s execution.
While this method is simple and effective, it relies on Google Drive’s built-in version history, which lacks the explicit control, branching, and collaborative features of a dedicated version control system like Git. For any serious Infrastructure as Code (IaC) workflow, you’ll want to take the next step.
Advanced Integration: Pushing Directly to a Git Repository
Treating your infrastructure configuration as code means storing it in a Git repository. This is the industry standard and unlocks the full power of IaC: version history, pull requests for peer review, automated testing, and integration with CI/CD pipelines (like GitHub Actions or GitLab CI) that can automatically run terraform plan and terraform apply.
Google Apps Script can’t run git commands directly, but it can make HTTP requests. We can leverage this to interact with the APIs of Git providers like GitHub, GitLab, or Bitbucket. The following example demonstrates how to push your generated HCL directly to a GitHub repository.
Prerequisites:
-
A GitHub Repository: Create a repository to store your Terraform configurations.
-
A GitHub Personal Access Token (PAT):
-
Go to your GitHub Settings > Developer settings > Personal access tokens > Tokens (classic).
-
Generate a new token with the
reposcope. This grants the script permission to read and write to your repositories. -
Crucially, treat this token like a password. Do not hardcode it in your script. We will use Apps Script’s
PropertiesServiceto store it securely.
Step A: Store Your PAT Securely
Run this function once from the Apps Script editor to save your token as a script property.
function storeGitHubToken() {

const GITHUB_PAT = "ghp_YourPersonalAccessTokenHere"; // <-- PASTE YOUR TOKEN HERE

PropertiesService.getScriptProperties().setProperty('GITHUB_PAT', GITHUB_PAT);

Logger.log("GitHub PAT has been stored securely as a script property.");

}
After running this, you can and should delete the plain-text token from your script code.
Step B: The Function to Push to GitHub
This function uses UrlFetchApp to communicate with the GitHub API. The process involves checking if the file exists to get its SHA (a required field for updates) and then sending a PUT request to create or update it.
/**

* Creates or updates a file in a GitHub repository with the provided HCL content.

*

* @param {string} hclContent The Terraform HCL to commit.

* @param {string} repoOwner The owner of the repository (e.g., "your-username").

* @param {string} repoName The name of the repository (e.g., "terraform-configs").

* @param {string} filePath The full path to the file within the repository (e.g., "gke/main.tf").

* @param {string} commitMessage A descriptive message for the Git commit.

*/

function pushHclToGitHub(hclContent, repoOwner, repoName, filePath, commitMessage) {

const GITHUB_PAT = PropertiesService.getScriptProperties().getProperty('GITHUB_PAT');

if (!GITHUB_PAT) {

throw new Error("GitHub PAT not found. Please run storeGitHubToken() first.");

}

const GITHUB_API_URL = `https://api.github.com/repos/${repoOwner}/${repoName}/contents/${filePath}`;

const headers = {

"Authorization": `token ${GITHUB_PAT}`,

"Accept": "application/vnd.github.v3+json"

};

let fileSha = null;

// 1. Check if the file already exists to get its SHA for updating

try {

const existingFileResponse = UrlFetchApp.fetch(GITHUB_API_URL, {

method: "GET",

headers: headers,

muteHttpExceptions: true // Prevents script from stopping on 404 Not Found

});

if (existingFileResponse.getResponseCode() === 200) {

const fileData = JSON.parse(existingFileResponse.getContentText());

fileSha = fileData.sha;

Logger.log(`File "${filePath}" exists. Found SHA: ${fileSha}`);

} else if (existingFileResponse.getResponseCode() === 404) {

Logger.log(`File "${filePath}" does not exist. A new file will be created.`);

} else {

throw new Error(`Failed to check for file. Status: ${existingFileResponse.getResponseCode()}, Response: ${existingFileResponse.getContentText()}`);

}

} catch (e) {

Logger.log(`Error checking for existing file: ${e.toString()}`);

throw e;

}

// 2. Prepare the payload for the PUT request

const payload = {

message: commitMessage,

content: Utilities.base64Encode(hclContent, Utilities.Charset.UTF_8), // Content must be Base64 encoded

branch: "main" // Or your desired branch

};

// If we are updating an existing file, we MUST include its SHA

if (fileSha) {

payload.sha = fileSha;

}

// 3. Make the PUT request to create or update the file

try {

const response = UrlFetchApp.fetch(GITHUB_API_URL, {

method: "PUT",

headers: headers,

payload: JSON.stringify(payload),

contentType: "application/json",

muteHttpExceptions: true

});

const responseCode = response.getResponseCode();

const responseBody = response.getContentText();

if (responseCode === 200 || responseCode === 201) { // 201 for Created, 200 for Updated

Logger.log(`Successfully committed to GitHub. Response: ${responseBody}`);

const commitUrl = JSON.parse(responseBody).commit.html_url;

Logger.log(`View commit: ${commitUrl}`);

return commitUrl;

} else {

throw new Error(`GitHub API Error. Status: ${responseCode}, Body: ${responseBody}`);

}

} catch (e) {

Logger.log(`Error committing to GitHub: ${e.toString()}`);

throw e;

}

}

// --- Example Usage ---

function mainFunctionAdvanced() {

const generatedHcl = `

resource "google_container_cluster" "primary" {

name     = "my-gke-cluster-from-sheets"

location = "us-central1"

# ... other configuration generated by Gemini ...

}`;

pushHclToGitHub(

generatedHcl,

"your-github-username",      // <-- Replace

"iac-repository-name",       // <-- Replace

"gke/generated-clusters.tf", // <-- Replace

"feat(gke): Update GKE clusters from Google Sheet automation"

);

}
By integrating directly with a Git repository, you establish a professional, auditable, and automated workflow. Every change from your Google Sheet results in a new commit, creating a clear history of your infrastructure’s evolution. This is the foundation for a true GitOps approach, where your repository becomes the single source of truth for your infrastructure.
Practical Example: Generating a GCP Compute Engine Fleet
Theory is great, but let’s get our hands dirty. The true power of this technique is revealed when we apply it to a common, real-world task: deploying and managing a fleet of virtual machines. Manually writing HCL for dozens or hundreds of slightly different VMs is a recipe for typos, tedium, and configuration drift. This is where our Google Sheet -> Gemini -> Terraform pipeline becomes an indispensable force multiplier.
Our goal is to define a set of Google Compute Engine (GCE) instances in a simple spreadsheet and use Gemini to generate the corresponding Terraform code to deploy them.
Walkthrough of the Sample Google Sheet Configuration
The foundation of our automation is a well-structured Google Sheet. This sheet acts as our source of truth. It’s human-readable, easy for non-experts to update, and provides a clear inventory of our desired infrastructure.
For our GCE fleet, we’ve designed a sheet with columns that map directly to key Terraform arguments for the google_compute_instance resource.
Here’s what our sample sheet looks like:
| instance_name | machine_type | zone | image_project | image_family | network | subnetwork | tags |
| :--- | :--- | :--- | :--- | :--- | :--- | :--- | :--- |
| web-server-01 | e2-medium | us-central1-a | debian-cloud | debian-11 | default | default | ["web", "http-server"] |
| web-server-02 | e2-medium | us-central1-b | debian-cloud | debian-11 | default | default | ["web", "http-server"] |
| api-server-01 | n2-standard-2 | us-east1-b | ubuntu-os-cloud | ubuntu-2204-lts | default | default | ["api", "backend"] |
| db-replica-01 | e2-highmem-4 | us-east1-c | ubuntu-os-cloud | ubuntu-2204-lts | default | default | ["database", "replica"] |
Why these columns?
-
instance_name: The unique, human-readable name for the VM. This will become the primary identifier in GCP. -
machine_type: Defines the vCPU and memory allocation (e.g.,e2-medium). This is a primary driver of cost and performance. -
zone: Specifies the physical location where the VM will be provisioned (e.g.,us-central1-a), which is critical for latency and high availability. -
image_project&image_family: Together, these determine the operating system image. Using animage_familyensures we always get the latest patched version of that OS (e.g.,debian-11). -
network&subnetwork: Defines the VPC networking for the instance. -
tags: A crucial field for applying firewall rules and for organizational purposes. Note that we’ve formatted this as a JSON array string, which is easy for a model like Gemini to parse into a Terraform list.
By defining our fleet in this tabular format, we’ve abstracted away the complexity of HCL syntax. Adding a new server is as simple as adding a new row.
Analyzing the Gemini-Generated Terraform HCL Output
After feeding the data from our sheet (likely exported as a CSV and passed in the prompt) to Gemini Pro, we get back a clean, efficient, and idiomatic block of Terraform HCL. A well-crafted prompt will encourage the model to use best practices, such as leveraging for_each to avoid repetitive code.
Here is the kind of high-quality output you can expect:
# -----------------------------------------------------------------

# WARNING: This code was auto-generated by a Gemini Pro script.

# Review carefully before applying.

# Source of Truth: Google Sheet "GCP VM Fleet"

# -----------------------------------------------------------------

locals {

# Data is structured as a map for use with for_each.

# The key of the map is the instance name for a stable identifier.

vms = {

"web-server-01" = {

machine_type = "e2-medium"

zone         = "us-central1-a"

image        = "debian-cloud/debian-11"

network      = "default"

subnetwork   = "default"

tags         = ["web", "http-server"]

}

"web-server-02" = {

machine_type = "e2-medium"

zone         = "us-central1-b"

image        = "debian-cloud/debian-11"

network      = "default"

subnetwork   = "default"

tags         = ["web", "http-server"]

}

"api-server-01" = {

machine_type = "n2-standard-2"

zone         = "us-east1-b"

image        = "ubuntu-os-cloud/ubuntu-2204-lts"

network      = "default"

subnetwork   = "default"

tags         = ["api", "backend"]

}

"db-replica-01" = {

machine_type = "e2-highmem-4"

zone         = "us-east1-c"

image        = "ubuntu-os-cloud/ubuntu-2204-lts"

network      = "default"

subnetwork   = "default"

tags         = ["database", "replica"]

}

}

}

resource "google_compute_instance" "vm_fleet" {

# Use for_each to create an instance for each entry in the local map.

# This is the modern, preferred way to manage collections of resources.

for_each = local.vms

project      = "your-gcp-project-id" # Replace with your project ID

name         = each.key

machine_type = each.value.machine_type

zone         = each.value.zone

tags         = each.value.tags

boot_disk {

initialize_params {

image = each.value.image

}

}

network_interface {

network    = each.value.network

subnetwork = each.value.subnetwork

# Access config for external IP, can be omitted for internal-only VMs

access_config {}

}

# Ensure instances can be gracefully shut down

allow_stopping_for_update = true

}
Let’s break this down:
-
localsblock: Gemini has intelligently transformed our flat table into a nested map calledlocal.vms. This is a fantastic practice. It structures the data cleanly and makes it perfect for iteration. The key for each map entry is the instance name, which provides a stable, unique identifier for Terraform to track. -
resource "google_compute_instance" "vm_fleet": This is the single resource block that will manage our entire fleet. -
for_each = local.vms: This is the magic. Instead of four separateresourceblocks,for_eachtells Terraform to loop through thelocal.vmsmap and create one instance for each entry. -
each.keyandeach.value: Inside the resource block, we use theeachobject to access the data for the current iteration.each.keyrefers to the instance name (e.g.,"web-server-01"), andeach.valuerefers to the map of attributes (e.g.,{ machine_type = "e2-medium", ... }). This dynamically populates the arguments for each VM, ensuring each one is configured exactly as specified in our Google Sheet.
The generated code is not just functional; it’s clean, scalable, and follows modern Terraform conventions.
Executing terraform apply on the Auto-Generated Code
Now for the moment of truth. We take the HCL generated by Gemini, save it to a file (e.g., generated_fleet.tf), and run the standard Terraform workflow.
- Initialize Terraform:
First, we run terraform init in our directory to download the necessary GCP provider plugins.
- Review the Plan:
Next, the most critical step: terraform plan. This command is a dry run that shows us exactly what Terraform intends to do without making any actual changes to our cloud environment.
The output will look something like this:
$ terraform plan

Terraform will perform the following actions:

# google_compute_instance.vm_fleet["api-server-01"] will be created

+ resource "google_compute_instance" "vm_fleet" {

+ name         = "api-server-01"

+ machine_type = "n2-standard-2"

+ zone         = "us-east1-b"

# (other attributes hidden for brevity)

...

}

# google_compute_instance.vm_fleet["db-replica-01"] will be created

+ resource "google_compute_instance" "vm_fleet" {

+ name         = "db-replica-01"

+ machine_type = "e2-highmem-4"

+ zone         = "us-east1-c"

# (other attributes hidden for brevity)

...

}

# google_compute_instance.vm_fleet["web-server-01"] will be created

+ resource "google_compute_instance" "vm_fleet" {

+ name         = "web-server-01"

+ machine_type = "e2-medium"

+ zone         = "us-central1-a"

# (other attributes hidden for brevity)

...

}

# google_compute_instance.vm_fleet["web-server-02"] will be created

+ resource "google_compute_instance" "vm_fleet" {

+ name         = "web-server-02"

+ machine_type = "e2-medium"

+ zone         = "us-central1-b"

# (other attributes hidden for brevity)

...

}

Plan: 4 to add, 0 to change, 0 to destroy.
The plan confirms that Terraform understands our intent: it’s going to create four new GCE instances, with names and attributes matching our Google Sheet perfectly.
- Apply the Changes:
With the plan verified, we execute the changes with terraform apply.
$ terraform apply -auto-approve

google_compute_instance.vm_fleet["web-server-01"]: Creating...

google_compute_instance.vm_fleet["api-server-01"]: Creating...

google_compute_instance.vm_fleet["db-replica-01"]: Creating...

google_compute_instance.vm_fleet["web-server-02"]: Creating...

...

google_compute_instance.vm_fleet["web-server-01"]: Creation complete after 42s [id=...]

google_compute_instance.vm_fleet["web-server-02"]: Creation complete after 43s [id=...]

google_compute_instance.vm_fleet["api-server-01"]: Creation complete after 48s [id=...]

google_compute_instance.vm_fleet["db-replica-01"]: Creation complete after 55s [id=...]

Apply complete! Resources: 4 added, 0 changed, 0 destroyed.
Success! In a matter of minutes, we’ve gone from a simple spreadsheet definition to a fully provisioned fleet of virtual machines running in Google Cloud, all without writing a single line of HCL by hand. If we need to change a machine type or add a new server, we simply update a row in the Google Sheet, re-run our generation script, and let terraform apply handle the rest. This is data-driven Infrastructure as Code at its finest.
Beyond Automation: The Future of AI-Driven Cloud Architecture
The exercise of converting a structured Google Sheet into Terraform HCL is more than just a clever automation trick; it’s a glimpse into a profound paradigm shift. We are moving from a world where we explicitly code our infrastructure’s “how” to one where we simply declare our business “what.” This is the transition from Infrastructure as Code (IaC) to Intent-Driven Infrastructure, powered by the reasoning capabilities of advanced AI like Gemini.
Imagine describing your architectural needs in plain language: “Generate a resilient, three-tier web application architecture on GCP for a high-traffic e-commerce launch in Europe. It must be GDPR compliant, scale to handle 100,000 concurrent users, and prioritize cost-efficiency for non-production environments.”
In this future, the AI doesn’t just translate a table; it acts as a seasoned cloud architect. It would:
-
Reason about trade-offs: It might choose Google Kubernetes Engine (GKE) for scalability but suggest Cloud Run for a stateless microservice to optimize costs. It would select appropriate machine types, weigh the benefits of Cloud SQL versus Spanner based on transactional needs, and configure VPCs and firewall rules that align with security best practices.
-
Generate Well-Architected Code: The resulting HCL wouldn’t just be syntactically correct; it would be architecturally sound, embedding principles of reliability, security, and operational excellence directly into the code.
-
Enable Self-Optimizing Systems: This AI-driven approach extends beyond initial creation. An AI model could continuously monitor performance metrics and cost data, suggesting or even automatically applying Terraform changes to optimize the architecture over time. It could identify an underutilized database and recommend downsizing, or flag a network egress anomaly and suggest a more efficient configuration.
This isn’t about replacing DevOps engineers or cloud architects. It’s about augmenting them with a powerful copilot that handles the toil, codifies best practices, and allows human experts to focus on the high-level strategic decisions that truly drive business value. The Google Sheets example is the proof-of-concept; the AI-architect is the destination.
Key Takeaways and Business Impact
Moving from this specific implementation to a broader vision, it’s crucial to understand the tangible outcomes. This isn’t just a technical curiosity; it’s a strategic business advantage waiting to be unlocked.
Key Takeaways:
-
**From Imperative to Intent: The fundamental shift is from telling the system how to build something (writing every resource and attribute) to telling it what you want to achieve.
-
AI as an Expert System: Generative AI can be trained on massive datasets of documentation, tutorials, and well-architected framework principles, acting as a force multiplier for your team’s expertise.
-
Automation is the First Step, Not the Last: While automating HCL generation is a powerful efficiency gain, the real transformation comes from using AI to design, secure, and optimize the architecture itself.
Business Impact:
-
Radical Acceleration: Reduce the time to provision complex, production-ready environments from weeks or months to mere hours or minutes. This dramatically shortens development cycles and accelerates time-to-market for new products and features.
-
Democratization of Expertise: Empower junior engineers to build infrastructure with the wisdom of a senior architect embedded in the AI model. This raises the skill floor for the entire organization and reduces dependency on a small number of key experts.
-
**Proactive Cost Governance: Move beyond reactive cost reports. AI can analyze proposed infrastructure before it’s deployed, flagging expensive configurations and suggesting more cost-effective alternatives, embedding FinOps principles directly into the development workflow.
-
Bulletproof Security and Compliance: Automatically generate infrastructure that is secure and compliant by design. The AI can check against frameworks like CIS, SOC 2, or HIPAA during the generation phase, drastically reducing the risk of human error and misconfiguration.
Ready to Scale Your Architecture? Book Your Discovery Call
The future we’ve outlined—one of intelligent, intent-driven cloud architecture—is not a distant dream. The building blocks are here today. The journey from a simple automation script to a fully AI-augmented infrastructure lifecycle is a strategic one, requiring a partner who understands the intersection of cloud engineering, DevOps, and artificial intelligence.
If you’re ready to stop just managing infrastructure and start commanding outcomes, let’s have a conversation. Let’s explore how these principles can be applied to your unique challenges to build a more agile, cost-effective, and secure cloud foundation.
Book Your Complimentary Discovery Call with Our Experts Today and let’s start designing your future-proof, AI-driven architecture.


Stop Doing Manual Work. Scale with AI.
Want to turn these blog concepts into production-ready reality for your team?
Table Of Contents
Portfolios
Related Posts
Quick Links
Legal Stuff