
Building a Serverless RAG Pipeline on Google Drive with Vertex AI


Your organization’s most valuable knowledge is buried in Google Drive, and traditional search is failing to find it. Learn how to transform your sprawling archive into a dynamic, conversational knowledge base that provides precise answers on demand.

The Challenge: Unlocking Knowledge Buried in Google Drive
For countless organizations, Google Drive isn’t just a file storage service; it’s the central nervous system. It’s the repository for project plans, financial reports, marketing briefs, technical documentation, and years of institutional knowledge. This digital treasure trove holds the answers to critical business questions, but there’s a fundamental problem: the treasure is buried, and the map is often just a keyword. While we’ve meticulously stored our data, we’ve struggled to make it truly accessible and intelligent. The challenge lies not in storage, but in retrieval and synthesis. How do we transform this sprawling archive of static files into a dynamic, conversational knowledge base that can provide precise, context-aware answers on demand?
Why Traditional Search Fails with Unstructured Enterprise Data
At first glance, Google Drive’s built-in search seems powerful. It can index text within documents, filter by owner, and find files by name with impressive speed. For finding a specific, known document—“Q4 2023 Marketing Report”—it works beautifully. However, when faced with conceptual or exploratory questions, this traditional, keyword-based (or lexical) search model shows its limitations.
Consider these common scenarios:
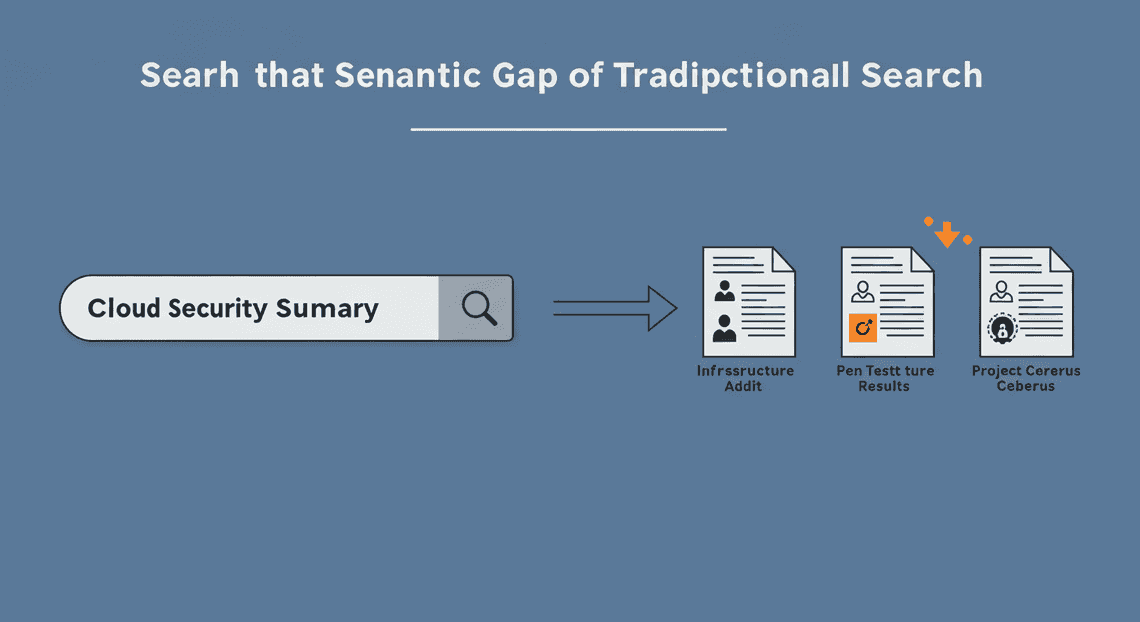
- The Semantic Gap: A user might search for “summary of our cloud security posture,” but the key information is located in documents titled “Annual Infrastructure Audit,” “Penetration Test Results,” and a presentation called “Project Cerberus Debrief.” Keyword search will likely miss these because the exact phrasing doesn’t match. It doesn’t understand intent or meaning, only literal character strings.
-
The Synthesis Problem: The answer to a complex question like, “What were the key takeaways from the Project Phoenix launch and what was the associated marketing spend?” is rarely contained in a single document. The answer might be fragmented across a Google Doc (post-mortem), a Google Sheet (budget), and a Google Slides deck (launch presentation). Traditional search returns a list of links, forcing the user to act as a human synthesizer—opening multiple files, reading through them, and piecing together the answer.
-
The “Answer vs. Document” Dilemma: Traditional search is fundamentally a document retrieval engine, not an answer engine. It points you to a potential source, but it doesn’t give you the specific answer. The cognitive load of finding the relevant paragraph within a 50-page PDF remains entirely on the user.
This friction means that despite having the data, teams waste countless hours searching for information, re-creating work that already exists, or making decisions based on incomplete knowledge. The data is there, but it isn’t working for us.
Introducing Retrieval-Augmented Generation (RAG) as the Solution
This is where Retrieval-Augmented Generation (RAG) fundamentally changes the game. RAG is an architectural pattern for AI applications that bridges the gap between the immense reasoning capabilities of Large Language Models (LLMs) and your specific, private data. It transforms an LLM from a generic, albeit brilliant, conversationalist into a true subject matter expert on your organization’s knowledge.
RAG operates on a simple yet powerful two-step principle:
-
Retrieval (Find): First, instead of just asking an LLM a question directly, the system retrieves relevant information from your knowledge base (in our case, Google Drive). This isn’t a keyword search. It uses a technique called semantic search, powered by vector embeddings. Every document or chunk of text is converted into a numerical representation (a vector) that captures its semantic meaning. When you ask a question, your question is also converted into a vector, and the system finds the text chunks with the closest vectors—the ones that are most contextually and conceptually relevant, regardless of the exact keywords used.
-
Augmentation & Generation (Answer): Second, the retrieved text snippets are “augmented” to the original prompt and sent to an LLM like Google’s Gemini. The prompt effectively becomes: “Using ONLY the following context [insert retrieved text from Google Drive here], answer this user’s question: [insert original user question here].”
This approach provides the best of both worlds. The LLM handles the “generation”—synthesizing the retrieved information and formulating a coherent, natural language answer. The “retrieval” step ensures the answer is grounded in the factual reality of your documents, dramatically reducing the risk of “hallucinations” or fabricated information and making the system’s output verifiable. It’s no longer just finding documents; it’s providing direct, synthesized, and trustworthy answers.
Architectural Overview: A Serverless Approach with Apps Script and Vertex AI
To bring this powerful RAG concept to life on Google Drive, we will construct a robust, scalable, and cost-effective pipeline using a fully serverless architecture on Google Cloud. This eliminates the need to manage servers, virtual machines, or containers, allowing us to focus purely on the logic.
Here are the core components of our solution:
-
Google Drive: The source of truth. This is our corpus of unstructured data (Docs, Slides, PDFs, etc.) that we want to make searchable.
-
[AI Powered Cover Letter [Automated Job Creation in Real Time Jobber and Google Sheets Integration from Gmail](https://votuduc.com/Automated-Job-Creation-in-Jobber-from-Gmail-p115606) Engine](https://votuduc.com/AI-Powered-Cover-Letter-Automated Quote Generation and Delivery System for Jobber-Engine-p111092): The serverless orchestrator and connective tissue. Natively integrated with [Automatically create new folders in Google Drive, generate templates in new folders, fill out text automatically in new files, and save info in [Automated Web Scraping with [Multilingual Text-to-Speech Tool with SocialSheet Streamline Your Social Media Posting 123](https://votuduc.com/Multilingual-Text-to-Speech-Tool-with-Google-Workspace-p809282)](https://votuduc.com/Automated-Web-Scraping-with-Google-Sheets-p292968)](https://workspace.google.com/marketplace/app/auto_create_folder_and_files/430076014869), Apps Script is the perfect tool to automate our pipeline. We will use it to:
-
Scan Google Drive for new or modified files.
-
Extract text content from these files using its built-in services.
-
Act as a client to call the powerful APIs of Vertex AI.
-
Provide a simple web interface for users to ask questions.
-
Vertex AI: Google Cloud’s unified AI platform, which provides the machine learning muscle for our RAG pipeline. We will leverage three key services:
-
Text Embedding API (
textembedding-gecko): This model will be used to convert our text chunks from Google Drive into the high-dimensional vector embeddings required for semantic search. -
Vertex AI Vector Search: A high-performance, scalable vector database. This is where we will store all the embeddings from our documents. When a user asks a question, Vector Search will perform the ultra-fast similarity search to find the most relevant context in milliseconds.
-
Generative AI Models (Gemini Pro): This is the LLM that will receive the user’s query plus the context retrieved from Vector Search. It will then generate the final, human-readable answer.
The flow is elegant and efficient: an Apps Script trigger periodically inventories Drive, processes files, creates embeddings via the Vertex AI API, and stores them in Vector Search. When a user queries our application, the request flows through Apps Script to Vertex AI, which retrieves context and generates a grounded answer, all without a single server to provision or patch.
Prerequisites and Environment Setup
Alright, before we start assembling our serverless pipeline, we need to lay the groundwork. Think of this as preparing the workshop: we need to gather our tools, unlock the necessary supply cabinets, and grant ourselves the right permissions. Getting this setup right is critical and will save you from a world of IAM-related headaches down the road. Let’s get our hands dirty.
Configuring Your Google Cloud Project and IAM Permissions
Everything in Google Cloud lives inside a project. This is our foundational container for all the resources we’ll create, from Cloud Functions to Vertex AI models.
1. Select or Create a Google Cloud Project
First, you’ll need a Google Cloud project with billing enabled. The services we’re using, particularly Vertex AI, are not all on the free tier, so this is non-negotiable.
-
If you have an existing project you’d like to use, navigate to the Google Cloud Console and select it from the project dropdown at the top of the page.
-
If you’re starting fresh, create a new project. Give it a descriptive name like
serverless-drive-rag.
2. Create a Dedicated Service Account
While you could run everything as your own user, it’s a security best practice to create a dedicated service account for our application. This identity will have a minimal, specific set of permissions to execute its tasks. We’ll use this service account as the identity for our Cloud Function later.
You can create the service account using the Cloud Console or the gcloud CLI.
Using the Cloud Console:
-
Navigate to IAM & Admin -> Service Accounts.
-
Click + CREATE SERVICE ACCOUNT.
-
Give it a name (e.g.,
rag-pipeline-invoker) and a description. The Service account ID will be generated for you. Click CREATE AND CONTINUE. -
Now, let’s grant it the necessary roles. Add the following roles:
-
Vertex AI User (
roles/aiplatform.user): Allows the service account to make predictions and access Vertex AI models. -
Service Account User (
roles/iam.serviceAccountUser): A subtle but important permission that allows resources (like Cloud Functions) to act as this service account.
- Click CONTINUE, then DONE.
Using the gcloud CLI:
Execute the following commands in your terminal or Cloud Shell, replacing your-gcp-project-id with your actual project ID.
# Set your project context

gcloud config set project your-gcp-project-id

# Create the service account

gcloud iam service-accounts create rag-pipeline-invoker \

--display-name="Service Account for Drive RAG Pipeline"

# Grant the necessary IAM roles

gcloud projects add-iam-policy-binding your-gcp-project-id \

--member="serviceAccount:[email protected]" \

--role="roles/aiplatform.user"

gcloud projects add-iam-policy-binding your-gcp-project-id \

--member="serviceAccount:[email protected]" \

--role="roles/iam.serviceAccountUser"
Enabling the Vertex AI and Google Drive APIs
By default, most Google Cloud APIs are not active. We need to explicitly enable the APIs that our RAG pipeline will depend on. This action “switches on” the services for our specific project.
We need two primary APIs for this solution:
-
Vertex AI API (
aiplatform.googleapis.com): The core of our intelligence layer, giving us access to embedding models and LLMs. -
Google Drive API (
drive.googleapis.com): The bridge to our data source, allowing our Apps Script to read file content.
Using the Cloud Console (Easy Method):
The simplest way is to use these direct links, which will take you to the enablement page for your currently selected project:
Just click “Enable” on each page and you’re good to go.
Using the gcloud CLI:
For those who prefer the command line:
gcloud services enable aiplatform.googleapis.com drive.googleapis.com
This single command will enable both APIs. You’ll see a confirmation once the operation is complete.
Setting Up the Apps Script Project and Required Scopes
Genesis Engine AI Powered Content to Video Production Pipeline is our secret weapon here. It acts as the serverless trigger mechanism within AC2F Streamline Your Google Drive Workflow, natively connecting to Drive and giving us a way to call out to our Google Cloud services.
1. Create a New Apps Script Project
-
Navigate to the Apps Script dashboard: script.google.com.
-
Click New project in the top-left corner.
-
Give your project a meaningful name by clicking on “Untitled project”. Let’s call it
Drive RAG Ingestion Trigger.
2. Link to Your Google Cloud Project
This is a crucial step that associates your Apps Script project with the Google Cloud project we just configured. This allows Apps Script to use the enabled APIs and permissions under that project’s umbrella.
-
In the Apps Script editor, click the Project Settings (⚙️) icon on the left sidebar.
-
Scroll down to the Google Cloud Platform (GCP) Project section.
-
Click Change project.
-
Paste in your GCP Project Number. You can find this on the main dashboard of your Google Cloud project (console.cloud.google.com).
-
Click Set project.
3. Configure OAuth Scopes in the Manifest
We need to explicitly declare the permissions our script requires. This is done by defining OAuth scopes in the manifest file. When a user authorizes the script, they are granting it these specific permissions.
-
In Project Settings (⚙️), check the box for Show “appsscript.json” manifest file in editor.
-
Go back to the Editor (
<>) view. You will now see anappsscript.jsonfile. -
Replace the entire content of this file with the following JSON. This defines the scopes we need to read from Drive and make external HTTP requests to our Cloud Function.
{

"timeZone": "America/New_York",

"dependencies": {},

"exceptionLogging": "STACKDRIVER",

"runtimeVersion": "V8",

"oauthScopes": [

"https://www.googleapis.com/auth/script.external_request",

"https://www.googleapis.com/auth/drive.readonly"

]

}
-
script.external_request: Allows the script to call our Cloud Function’s HTTP endpoint. -
drive.readonly: Allows the script to read the metadata and content of files in the user’s Google Drive. We usereadonlyto adhere to the principle of least privilege.
Save the manifest file (Ctrl+S or Cmd+S). With our environment now properly configured, we’re ready to start building the core components of the pipeline.
Step 1: Data Ingestion and Chunking from Google Drive
Alright, let’s get our hands dirty. The foundation of any RAG pipeline is the “R” — Retrieval. And to retrieve anything, we first need to ingest and process our source knowledge. In our case, that knowledge base is a chaotic, beautiful mess of files living in a Google Drive folder.
Our tool of choice for this task is Google Apps Script. Why? Because it’s the ultimate serverless insider. It lives within the Automated Client Onboarding with Google Forms and Google Drive. ecosystem, speaks natively to services like Drive, Docs, and Slides, and requires zero infrastructure setup. It’s the perfect glue to pull data from Drive before we hand it off to the Vertex AI powerhouse.
Our mission in this step is twofold:
-
Ingest: Systematically scan a target Google Drive folder (and all its subfolders) to find our source documents.
-
Chunk: Break down the content of these documents into smaller, semantically meaningful pieces that an embedding model can understand and a Large Language Model (LLM) can use as context.
Let’s dive in.
Using DriveApp to Recursively Scan and Read Files
First, we need a way to crawl through our knowledge base. A simple script that only reads files in the top-level folder is brittle; real-world knowledge is almost always organized into a nested hierarchy of folders. We need a recursive function that can burrow into every nook and cranny of our target directory.
This is where the DriveApp service in Apps Script becomes our best friend. It provides a straightforward API to interact with files and folders.
Here’s the basic scaffolding for a recursive scanner. You can paste this directly into a new Apps Script project.
// The ID of the root folder in Google Drive you want to process.

// Find this in the URL of the folder: docs.google.com/drive/folders/[THIS_IS_THE_ID]

const ROOT_FOLDER_ID = "YOUR_ROOT_FOLDER_ID_HERE";

/**

* Main function to kick off the processing.

*/

function startIngestion() {

if (ROOT_FOLDER_ID === "YOUR_ROOT_FOLDER_ID_HERE") {

Logger.log("ERROR: Please set the ROOT_FOLDER_ID variable in the script.");

return;

}

const rootFolder = DriveApp.getFolderById(ROOT_FOLDER_ID);

Logger.log(`Starting ingestion from root folder: "${rootFolder.getName()}"`);

processFolder(rootFolder);

Logger.log("Ingestion scan complete.");

}

/**

* Recursively processes a folder, its files, and its subfolders.

* @param {GoogleAppsScript.Drive.Folder} folder The folder to process.

*/

function processFolder(folder) {

// Process all files in the current folder

const files = folder.getFiles();

while (files.hasNext()) {

const file = files.next();

// We'll build this function out in the next sections

processFile(file);

}

// Recursively call this function for all subfolders

const subFolders = folder.getFolders();

while (subFolders.hasNext()) {

const subFolder = subFolders.next();

Logger.log(`Descending into subfolder: "${subFolder.getName()}"`);

processFolder(subFolder);

}

}

/**

* Placeholder for the file processing logic.

* @param {GoogleAppsScript.Drive.File} file The file to process.

*/

function processFile(file) {

// We will implement the text extraction and chunking here.

Logger.log(`Found file: "${file.getName()}" (MIME Type: ${file.getMimeType()})`);

}
How it works:
-
startIngestion()is our entry point. It grabs the top-level folder object using its unique ID. -
processFolder()is the recursive workhorse. It first iterates through all files in the given folder, passing each one to aprocessFilehelper.
Then, it iterates through all the subfolders and—this is the key—calls itself* for each one, effectively diving deeper into the directory tree until every folder has been visited.
When you first run this, Apps Script will prompt you for permissions to read your Google Drive files. This is a critical security step; you are explicitly granting your script the authority to act on your behalf.
Implementing a Smart Chunking Strategy in Apps Script
Now that we can find our files, we need to break them down. You can’t just feed a 50-page document directly into an LLM’s context window or an embedding model. It’s like trying to drink from a firehose. We need to serve up manageable, contextually relevant “chunks” of text.
A naive approach is to split the text every X characters. This is fast but terrible. You’ll constantly slice sentences and ideas in half, destroying the semantic meaning. A much better, yet still simple, approach is to use natural delimiters—like paragraphs.
Our strategy will be:
-
Split the document’s text by paragraphs.
-
If a paragraph is under our
MAX_CHUNK_SIZE, treat it as a single chunk. -
If a paragraph is too long, split it further by sentences, then group those sentences into chunks that fit under the size limit.
-
We’ll also add a small
CHUNK_OVERLAP(in sentences) between larger chunks to ensure context isn’t lost at the boundaries.
Here’s the chunking function:
const MAX_CHUNK_SIZE = 1500; // Max characters per chunk

const CHUNK_OVERLAP = 1;     // Number of sentences to overlap between chunks

/**

* Splits a long text into smaller, semantically coherent chunks.

* @param {string} text The full text content of a document.

* @param {object} metadata An object containing metadata like file name and ID.

* @return {Array<object>} An array of chunk objects.

*/

function chunkText(text, metadata) {

const chunks = [];

// 1. Split by paragraphs first

const paragraphs = text.split(/\n\s*\n/).filter(p => p.trim() !== "");

for (const paragraph of paragraphs) {

if (paragraph.length <= MAX_CHUNK_SIZE) {

chunks.push({

metadata: { ...metadata, type: 'paragraph' },

content: paragraph

});

} else {

// 2. If a paragraph is too long, split by sentences

const sentences = paragraph.match(/[^.!?]+[.!?]+/g) || [paragraph];

let currentChunk = "";

for (let i = 0; i < sentences.length; i++) {

const sentence = sentences[i];

if ((currentChunk.length + sentence.length) <= MAX_CHUNK_SIZE) {

currentChunk += sentence;

} else {

chunks.push({

metadata: { ...metadata, type: 'sentence_group' },

content: currentChunk.trim()

});

// 3. Add overlap for context preservation

const overlapStartIndex = Math.max(0, i - CHUNK_OVERLAP);

currentChunk = sentences.slice(overlapStartIndex, i + 1).join(" ");

}

}

// Add the last remaining chunk

if (currentChunk.trim() !== "") {

chunks.push({

metadata: { ...metadata, type: 'sentence_group' },

content: currentChunk.trim()

});

}

}

}

return chunks;

}
This function is the heart of our preprocessing. It takes the raw text and transforms it into a structured array of chunks, each with its source metadata. This metadata is invaluable; it allows us to cite our sources when the RAG pipeline generates an answer.
Handling Different File Types (Docs, PDFs, Slides)
This is where the rubber meets the road. A Google Drive folder is a menagerie of file types. We need to be able to extract clean text from the most common ones: Google Docs, Google Slides, and PDFs.
We’ll expand our processFile function into a controller that inspects a file’s MIME type and delegates to the appropriate text extraction logic.
// Enable the advanced Drive API service in Apps Script:

// In the editor, click "Services" (+), select "Drive API", and add it.

/**

* Processes a single file by extracting its text and chunking it.

* @param {GoogleAppsScript.Drive.File} file The file to process.

*/

function processFile(file) {

const fileName = file.getName();

const fileId = file.getId();

const mimeType = file.getMimeType();

let textContent = "";

try {

switch (mimeType) {

case MimeType.GOOGLE_DOCS:

Logger.log(`-> Processing Google Doc: "${fileName}"`);

textContent = DocumentApp.openById(fileId).getBody().getText();

break;

case MimeType.GOOGLE_SLIDES:

Logger.log(`-> Processing Google Slides: "${fileName}"`);

textContent = SlidesApp.openById(fileId)

.getSlides()

.map(slide => slide.getShapes().map(shape => shape.getText().asString()).join("\n"))

.join("\n\n");

break;

case MimeType.PDF:

Logger.log(`-> Processing PDF with OCR: "${fileName}"`);

// This uses the advanced Drive API's OCR capability

const blob = file.getBlob();

const resource = { title: file.getName(), mimeType: blob.getContentType() };

const ocrFile = Drive.Files.insert(resource, blob, { ocr: true, ocrLanguage: 'en' });

textContent = DocumentApp.openById(ocrFile.id).getBody().getText();

DriveApp.getFileById(ocrFile.id).setTrashed(true); // Clean up the temporary OCR file

break;

default:

// We also handle plain text and CSV as a bonus

if (mimeType.startsWith('text/')) {

Logger.log(`-> Processing Text File: "${fileName}"`);

textContent = file.getBlob().getDataAsString();

} else {

Logger.log(`-- Skipping unsupported file type: "${fileName}" (${mimeType})`);

return;

}

}

if (textContent.trim().length > 0) {

const metadata = {

source: 'google_drive',

fileId: fileId,

fileName: fileName,

fileMimeType: mimeType,

driveUrl: file.getUrl()

};

const chunks = chunkText(textContent, metadata);

// In the next step of our blog post, we'll send these chunks to a

// Cloud Function to be embedded and stored in Vertex AI Vector Search.

// For now, we just log the output.

Logger.log(`   ...Extracted and chunked into ${chunks.length} pieces.`);

// console.log(JSON.stringify(chunks, null, 2)); // Uncomment for detailed debugging

} else {

Logger.log(`   ...File was empty or contained no extractable text.`);

}

} catch (e) {

Logger.log(`   !!! ERROR processing file "${fileName}": ${e.toString()}`);

}

}
Key Implementation Details:
-
Google Docs (
MimeType.GOOGLE_DOCS): This is the most direct.DocumentAppcan open the file by its ID and simply grab the body’s text content. Easy. -
Google Slides (
MimeType.GOOGLE_SLIDES): This requires a bit more work. We have to iterate through each slide, then through each “shape” on the slide (like text boxes), and extract the text from each one, concatenating it all together. -
PDFs (
MimeType.PDF): This is the clever part. Apps Script can’t natively read PDF text. However, we can use the advanced Drive API (which you must enable in your project) to perform Optical Character Recognition (OCR). We instruct the Drive API to create a new file by reading our PDF blob withocr: true. This implicitly creates a temporary Google Doc containing the recognized text. We then read the text from that temp Doc and immediately trash it to keep our Drive clean. It’s a powerful, serverless way to handle PDFs without external libraries.
With this code in place, we now have a robust ingestion and chunking engine running entirely within Apps Script. It can navigate a complex folder structure, intelligently extract text from multiple common file formats, and break that text into semantically useful chunks ready for the next stage: embedding.
Step 2: Generating Embeddings with Vertex AI
With our documents meticulously chunked, we’ve transformed a wall of text into a manageable collection of bite-sized pieces. But to a computer, these chunks are still just meaningless strings of characters. Our next task is to translate them into a language that machines understand for semantic search: the language of vectors. This is where we bring in the power of Vertex AI’s embedding models to convert each text chunk into a rich, numerical representation.
Understanding Text Embeddings for Semantic Meaning
Before we write a single line of code, let’s demystify what a “text embedding” actually is. Think of it as a sophisticated coordinate system for meaning. In the same way that a GPS coordinate (latitude, longitude) pinpoints a specific location on Earth, a text embedding—a long list of numbers called a vector—pinpoints the meaning of a piece of text within a vast, high-dimensional “meaning space.”
The magic lies in the model that generates these vectors. Models like Google’s text-embedding-004 are trained on colossal amounts of text from the internet. Through this training, they learn the subtle relationships, contexts, and nuances between words and concepts. The result is that text chunks with similar semantic meaning will have vectors that are “close” to each other in this meaning space.
This is the foundation of our RAG pipeline’s retrieval mechanism. When a user asks a question, we’ll generate an embedding for their question. Then, we can mathematically compare the question’s vector to the vectors of all our document chunks. The chunks whose vectors are closest to the question’s vector are the most semantically relevant, even if they don’t share the exact same keywords. This is a quantum leap beyond simple keyword searching.
For our pipeline, we’ll use the text-embedding-004 model. It’s a powerful, multilingual model that produces a 768-dimension vector for each piece of text, capturing a deep level of semantic detail.
Authenticating and Calling the Vertex AI Embedding API from Apps Script
Now for the fun part: making the API call from our serverless home in Google Apps Script. One of the beautiful things about operating within the Google ecosystem is the streamlined authentication. We don’t need to mess around with service account keys or complex auth libraries. Apps Script can leverage the identity of the user running the script.
Here’s the process:
-
Permissions: The user executing the script must have the appropriate IAM role in the Google Cloud project, such as
Vertex AI User(roles/aiplatform.user), to access the model. -
OAuth Token: We’ll use the built-in
ScriptApp.getOAuthToken()method. This fetches a short-lived OAuth 2.0 access token that grants the script the necessary permissions to make the API call on the user’s behalf. -
API Call: We’ll use
UrlFetchAppto make a standard HTTPS POST request to the Vertex AI API endpoint.
Let’s see what this looks like in code. This function takes a single text chunk and returns its embedding vector.
/**

* Generates an embedding for a single piece of text using the Vertex AI API.

*

* @param {string} text The text content to embed.

* @param {string} projectId Your Google Cloud Project ID.

* @param {string} location The Google Cloud region (e.g., "us-central1").

* @returns {Array<number>} The 768-dimension embedding vector.

*/

function getEmbedding(text, projectId, location) {

const modelId = "text-embedding-004";

const apiEndpoint = `https://${location}-aiplatform.googleapis.com/v1/projects/${projectId}/locations/${location}/publishers/google/models/${modelId}:predict`;

// Get the OAuth token to authenticate the request

const accessToken = ScriptApp.getOAuthToken();

// Prepare the request payload in the format Vertex AI expects

const payload = {

instances: [

{

content: text

}

]

};

// Set up the options for the UrlFetchApp call

const options = {

method: "post",

contentType: "application/json",

headers: {

"Authorization": "Bearer " + accessToken

},

payload: JSON.stringify(payload),

muteHttpExceptions: true // Important for custom error handling

};

try {

const response = UrlFetchApp.fetch(apiEndpoint, options);

const responseCode = response.getResponseCode();

const responseBody = response.getContentText();

if (responseCode === 200) {

const jsonResponse = JSON.parse(responseBody);

// The embedding is nested within the response structure

return jsonResponse.predictions[0].embeddings.values;

} else {

console.error(`Error calling Vertex AI API. Status: ${responseCode}, Body: ${responseBody}`);

throw new Error(`Vertex AI API request failed with status ${responseCode}`);

}

} catch (e) {

console.error(`Failed to fetch embedding: ${e.message}`);

throw e;

}

}
Batch Processing Chunks for Efficiency and Cost Management
Calling the function above for every single chunk would work, but it would be painfully slow and inefficient. Each API call has network latency overhead. If you have 1,000 chunks, you’d be making 1,000 separate round trips to Google’s servers.
A much smarter approach is to batch our requests. The Vertex AI Embedding API is designed for this; it can accept multiple text inputs in a single call. This drastically reduces the number of HTTP requests and speeds up the entire process.
It’s also crucial for managing API quotas. While you’re unlikely to hit them with a few documents, a production-scale system must respect rate limits. The text-embedding-004 model allows up to 250 text instances per API request. We’ll use a slightly smaller, safer batch size to be conservative.
Here’s a wrapper function that takes an array of all our text chunks and processes them in efficient batches.
/**

* Processes an array of text chunks in batches to generate embeddings efficiently.

*

* @param {Array<string>} chunks An array of text strings to embed.

* @param {string} projectId Your Google Cloud Project ID.

* @param {string} location The Google Cloud region (e.g., "us-central1").

* @returns {Array<Array<number>>} An array of embedding vectors, one for each chunk.

*/

function generateEmbeddingsInBatches(chunks, projectId, location) {

const BATCH_SIZE = 100; // A safe batch size, well within the API limit of 250

const allEmbeddings = [];

console.log(`Starting embedding generation for ${chunks.length} chunks in batches of ${BATCH_SIZE}...`);

for (let i = 0; i < chunks.length; i += BATCH_SIZE) {

const batch = chunks.slice(i, i + BATCH_SIZE);

// Construct the payload with multiple instances for the batch

const payload = {

instances: batch.map(chunk => ({ content: chunk }))

};

// The API endpoint and auth logic remain the same

const modelId = "text-embedding-004";

const apiEndpoint = `https://${location}-aiplatform.googleapis.com/v1/projects/${projectId}/locations/${location}/publishers/google/models/${modelId}:predict`;

const accessToken = ScriptApp.getOAuthToken();

const options = {

method: "post",

contentType: "application/json",

headers: {

"Authorization": "Bearer " + accessToken

},

payload: JSON.stringify(payload),

muteHttpExceptions: true

};

try {

console.log(`Processing batch ${Math.floor(i / BATCH_SIZE) + 1}...`);

const response = UrlFetchApp.fetch(apiEndpoint, options);

const responseCode = response.getResponseCode();

const responseBody = response.getContentText();

if (responseCode === 200) {

const jsonResponse = JSON.parse(responseBody);

const embeddings = jsonResponse.predictions.map(p => p.embeddings.values);

allEmbeddings.push(...embeddings);

} else {

console.error(`Error processing batch. Status: ${responseCode}, Body: ${responseBody}`);

// For simplicity, we stop on error. A more robust solution might retry.

throw new Error(`Failed on batch starting at index ${i}.`);

}

} catch (e) {

console.error(`Exception during batch processing: ${e.message}`);

throw e;

}

}

console.log(`Successfully generated ${allEmbeddings.length} embeddings.`);

return allEmbeddings;

}
By adopting this batching strategy, we’ve built a function that is not only functional but also scalable and robust, respecting both our time and the platform’s limits. We are now ready to take these numerical representations and store them for fast retrieval.
Step 3: Indexing Vectors with Vertex AI Vector Search
We’ve successfully transformed our Google Drive documents into a collection of numerical representations—embeddings. But a giant list of vectors isn’t useful on its own. Searching through millions of them to find the “closest” match for a user’s query would be computationally expensive and painfully slow. This is where the magic of a dedicated vector database comes in.
Enter Vertex AI Vector Search (formerly Matching Engine). It’s a high-performance, managed service designed for one core purpose: finding the most similar vectors to a query vector from a massive corpus in milliseconds. It uses Approximate Nearest Neighbor (ANN) algorithms to achieve this incredible speed, making it the perfect engine for the “Retrieval” step in our RAG pipeline.
Creating a Vector Search Index for Fast Retrieval
The first step is to create an “Index,” which is a specialized data structure that organizes our vectors for efficient searching. Think of it as the index in the back of a textbook, but for a multi-dimensional vector space.
When creating an index, you need to define its core architecture. These parameters are critical, as they dictate how the index will store and retrieve your data.
Key Configuration Parameters:
-
Dimensions: This is non-negotiable. The dimensionality of your index must exactly match the dimensionality of the embeddings produced by your chosen model. For Google’s
textembedding-gecko@003, this is 768. A mismatch here will cause the entire process to fail. -
Distance Measure: This defines how “similarity” is calculated. For text embeddings generated by transformer-based models,
COSINE_DISTANCEis almost always the best choice. It measures the angle between two vectors, which corresponds well to semantic similarity, regardless of vector magnitude.DOT_PRODUCT_DISTANCEis also a viable option. -
Approximate Nearest Neighbor Count: This is the default number of neighbors to retrieve for each query. You can override this at query time, but it’s good to set a reasonable default, like
10or20. -
Index Type: You have two main choices:
-
Batch Index: Optimized for static datasets that are updated infrequently. The index is built in a batch process, which results in higher recall (accuracy). This is a great starting point for our use case, where we might index the entire Drive once.
-
Streaming Index: Designed for dynamic data. It allows you to add or update individual vectors in near real-time. This comes at the cost of a slight dip in recall until the index self-compacts over time. This would be ideal if we were to extend our pipeline to index new files as they are created.
You can create an index via the Cloud Console, but using the gcloud CLI is repeatable and scriptable.
# First, create the index configuration JSON file

cat <<EOF > rag_drive_index_config.json

{

"displayName": "rag-google-drive-index",

"description": "Vector index for Google Drive documents",

"metadata": {

"contentsDeltaUri": "gs://YOUR_GCS_BUCKET/vector-data/",

"config": {

"dimensions": 768,

"approximateNeighborsCount": 10,

"distanceMeasureType": "COSINE_DISTANCE",

"algorithmConfig": {

"treeAhConfig": {

"leafNodeEmbeddingCount": 1000,

"leafNodesToSearchPercent": 7

}

}

}

}

}

EOF

# Now, create the index

gcloud ai indexes create \

--metadata-file=rag_drive_index_config.json \

--project=YOUR_PROJECT_ID \

--region=us-central1
Once the index is created, you need to expose it through an Index Endpoint. The endpoint is a publicly accessible HTTP endpoint that hosts your index and serves search queries. You can deploy multiple indexes to the same endpoint.
Structuring and Uploading Your Embedding Data and Metadata
With an empty index ready, it’s time to populate it. Vector Search ingests data from JSON files stored in a Google Cloud Storage (GCS) bucket. The structure of these files is specific and crucial for enabling powerful search capabilities.
Each line in your input file must be a self-contained JSON object with the following fields:
-
id: A unique string identifier for each vector. This should be the ID of the document chunk we created earlier. -
embedding: An array of floating-point numbers—the actual vector from the Vertex AI Embedding API. -
restricts: An optional but highly recommended field for metadata. This is a game-changer for RAG. It allows you to pre-filter your search based on metadata before the vector similarity search even happens. This is where we’ll store information about the source document.
The restricts field is a list of objects, each with a namespace and an allow_list. Think of a namespace as a category or a key (e.g., file_id, owner, mime_type) and the allow_list as the possible values for that key.
Here’s what a single line in our embeddings.jsonl file should look like:
{

"id": "1aBcD...xYz-chunk-001",

"embedding": [0.0123, -0.0456, ..., 0.0789],

"restricts": [

{

"namespace": "file_id",

"allow_list": ["1aBcDeFgHiJkLmNoPqRsTuVwXyZ"]

},

{

"namespace": "file_name",

"allow_list": ["Project Phoenix Q3 Strategy.gdoc"]

},

{

"namespace": "mime_type",

"allow_list": ["application/vnd.google-apps.document"]

}

]

}
After generating this JSONL file containing all your chunks and their metadata, upload it to the GCS bucket you specified in the index configuration (gs://YOUR_GCS_BUCKET/vector-data/).
Finally, trigger the indexing process by “updating” the index. This tells Vector Search to read the data from GCS and build the search structure.
# Note: Get the ID of the index you created in the previous step

INDEX_ID="1234567890123456789"

gcloud ai indexes update $INDEX_ID \

--metadata-file=rag_drive_index_config.json \

--project=YOUR_PROJECT_ID \

--region=us-central1
This will kick off a long-running job. You can monitor its progress in the Vertex AI section of the Google Cloud Console. Depending on the volume of data, this can take anywhere from a few minutes to several hours.
Best Practices for Index Configuration and Updates
Building a production-ready RAG system requires thinking beyond the initial setup. Here are some best practices for managing your Vector Search index.
-
Plan Your Metadata Schema: The
restrictsfield is incredibly powerful but inflexible. You cannot change the namespaces after the data is indexed. Plan ahead! Think about all the ways you might want to filter your data. For our Google Drive use case,file_id,owner_email,mime_type, andlast_modified_dateare excellent candidates. This allows for powerful queries like “find relevant information in documents owned by ‘[email protected]’ that are Google Docs.” -
Understand the Batch vs. Streaming Trade-off:
-
Batch Updates (using
gcloud ai indexes update) are ideal for the initial bulk load and for periodic, large-scale refreshes. They rebuild the index from scratch, ensuring the highest possible recall. A good strategy is to run a full batch update weekly or monthly to incorporate all changes and maintain index health. -
Streaming Updates (using the API’s
upsert-datapointsmethod) are perfect for keeping the index fresh. When a new file is added to Drive or an existing one is modified, you can generate its embeddings and push them to the index in seconds. This provides near real-time search capabilities for new content. -
Implement a Hybrid Update Strategy: The most robust solution combines both methods. Use a batch job for the initial load and periodic rebuilds. In parallel, have your Cloud Function (from the previous step) use streaming updates to add new or changed documents to the index as they happen. This gives you the best of both worlds: high overall recall and low data latency.
-
Tune for Performance: The
treeAhConfigin our initial setup is an implementation of the ScaNN algorithm. TheleafNodesToSearchPercentparameter directly controls the trade-off between recall and latency. Increasing this percentage makes the search more exhaustive (higher recall) but also slower (higher latency). The default is a good starting point, but you should benchmark with your own data and performance requirements to find the optimal value. -
Manage Costs: Vector Search is not free. You are charged for the nodes hosting your index endpoint and the amount of data stored. To manage costs during development, use the smallest machine type for your endpoint and remember to undeploy the index from the endpoint when it’s not in active use. You can always redeploy it later without having to rebuild the index itself.
Step 4: Orchestrating the RAG Flow for Prompt Augmentation
With our knowledge base indexed and ready, we’ve reached the core of our RAG pipeline. This is where we intercept a user’s query, retrieve relevant information from our Google Drive documents, and use it to generate a contextually-aware answer. Our orchestrator, Google Apps Script, will manage this entire sequence, making calls to two key Vertex AI services: Vector Search for retrieval and the Gemini API for generation.
Querying the Vector Search Index to Find Relevant Context
The first step in the RAG flow is “Retrieval.” When a user asks a question, we can’t just search for keywords. We need to find the document chunks that are semantically closest to the user’s intent. This is precisely what Vector Search was built for.
The process involves two API calls:
-
Generate an Embedding for the Query: We use the exact same
text-embedding-004model to convert the user’s query string into a vector embedding. This ensures we’re comparing apples to apples—the query vector and the document vectors exist in the same “meaning space.” -
Find Nearest Neighbors: We then send this query vector to our Vector Search Index Endpoint. The endpoint performs an Approximate Nearest Neighbor (ANN) search, rapidly scanning billions of vectors to find the ones closest to our query vector based on a distance metric (like cosine similarity).
Here’s how you can implement this in Apps Script. We’ll create a function that takes the user’s query, gets its embedding, and then uses that embedding to find matching document chunks.
/**

* Finds the most relevant document chunks from Vector Search for a given query.

*

* @param {string} query The user's question.

* @param {string} accessToken A valid OAuth2 access token.

* @return {Array<string>} An array of the text content of the most relevant chunks.

*/

function findRelevantContext(query, accessToken) {

const PROJECT_ID = 'your-gcp-project-id';

const LOCATION = 'us-central1'; // e.g., us-central1

const INDEX_ENDPOINT_ID = 'your-vector-search-index-endpoint-id';

const DEPLOYED_INDEX_ID = 'your-deployed-index-id';

const NUM_NEIGHBORS = 3; // How many context chunks to retrieve

// 1. Get the embedding for the user's query

const queryEmbedding = getEmbedding(query, accessToken);

if (!queryEmbedding) {

console.error("Failed to generate embedding for the query.");

return [];

}

// 2. Query Vector Search to find nearest neighbors

const vsEndpoint = `https://${LOCATION}-aiplatform.googleapis.com/v1/projects/${PROJECT_ID}/locations/${LOCATION}/indexEndpoints/${INDEX_ENDPOINT_ID}:findNeighbors`;

const requestBody = {

"deployedIndexId": DEPLOYED_INDEX_ID,

"queries": [{

"datapoint": {

"datapointId": "query-id", // A temporary ID for this query

"featureVector": queryEmbedding

},

"neighborCount": NUM_NEIGHBORS

}]

};

const options = {

'method': 'post',

'contentType': 'application/json',

'headers': {

'Authorization': 'Bearer ' + accessToken

},

'payload': JSON.stringify(requestBody),

'muteHttpExceptions': true

};

try {

const response = UrlFetchApp.fetch(vsEndpoint, options);

const responseData = JSON.parse(response.getContentText());

if (response.getResponseCode() !== 200) {

console.error('Vector Search API Error:', responseData);

return [];

}

// The API returns a list of neighbors for each query. We only sent one query.

const neighbors = responseData.nearestNeighbors[0].neighbors;

console.log(`Found ${neighbors.length} neighbors.`);

// The 'datapointId' of each neighbor is the Firestore Document ID we stored earlier.

// We now need to fetch the actual text content from Firestore.

const contextChunks = neighbors.map(neighbor => {

const firestoreDocId = neighbor.datapoint.datapointId;

// In a real implementation, you would call a function here to fetch

// the document chunk text from Firestore using the firestoreDocId.

// For this example, we'll assume a function `getTextFromFirestore(id)` exists.

return getTextFromFirestore(firestoreDocId);

});

return contextChunks.filter(chunk => chunk != null); // Filter out any failed lookups

} catch (e) {

console.error('Error querying Vector Search:', e);

return [];

}

}

// NOTE: You would need to implement `getEmbedding()` and `getTextFromFirestore()`

// The `getEmbedding` function would be nearly identical to the one used for indexing.

// The `getTextFromFirestore` function would use the Apps Script Firestore library

// to retrieve a document by its ID.
The response from the findNeighbors endpoint includes a list of matching vectors, their distance from the query vector, and—most importantly—the datapointId we assigned during indexing. Because we cleverly used our Firestore Document ID as the datapointId, we can now perform a quick lookup to retrieve the original text chunk associated with each matching vector.
Constructing a Dynamic Prompt for Gemini with Retrieved Chunks
This is the “Augmentation” step. Simply passing the user’s query to Gemini would ignore our entire knowledge base. Instead, we use a technique called “prompt engineering” to provide Gemini with the relevant context it needs to formulate a high-quality, factual answer.
Our goal is to construct a single, comprehensive prompt that includes:
-
A System Instruction: Tells the model how to behave (e.g., “You are a helpful assistant…”).
-
The Retrieved Context: The text chunks we just pulled from Vector Search and Firestore.
-
The User’s Original Question: The query we need the model to answer.
A robust prompt template is key to controlling the model’s output and preventing it from “hallucinating” or using its general knowledge instead of our provided documents.
Here’s an Apps Script function to build this dynamic prompt:
/**

* Constructs a prompt for Gemini using the RAG pattern.

*

* @param {string} originalQuery The user's original question.

* @param {Array<string>} contextChunks An array of relevant text chunks from Vector Search.

* @return {string} The fully constructed prompt ready to be sent to Gemini.

*/

function constructRAGPrompt(originalQuery, contextChunks) {

if (!contextChunks || contextChunks.length === 0) {

// If no context is found, we can either ask Gemini directly or return a default message.

// For this implementation, we'll just pass the query along.

return originalQuery;

}

// Combine the individual chunks into a single block of text.

const contextString = contextChunks.join('\n---\n');

// This is our prompt template. It strictly instructs the model.

const promptTemplate = `

You are an expert assistant for our organization. Your task is to answer the user's question based ONLY on the provided context below.

- Do not use any external knowledge.

- If the answer cannot be found within the provided context, you must state: "I could not find an answer in the provided documents."

- Synthesize the information from the context into a clear and concise answer.

CONTEXT:

${contextString}

QUESTION:

${originalQuery}

ANSWER:

`;

return promptTemplate;

}
This template clearly delineates the context from the question and gives the model explicit instructions on how to behave, significantly improving the reliability and factuality of the generated response.
Executing the End-to-End RAG Call via Apps Script
We have all the pieces. Now we just need to put them together in a final function that calls the Gemini API with our augmented prompt. This function will serve as the main entry point for our RAG pipeline.
The process is straightforward:
-
Get an OAuth token.
-
Call our
findRelevantContext()function to get the document chunks. -
Use
constructRAGPrompt()to build the final prompt. -
Send the prompt to the Vertex AI Gemini API endpoint.
-
Parse the response and return the generated text to the user.
/**

* Main function to perform an end-to-end RAG search and generation.

*

* @param {string} query The user's question from the Google Doc/Sheet.

* @return {string} The generated answer from Gemini.

*/

function performRAGSearch(query) {

const accessToken = ScriptApp.getOAuthToken();

const PROJECT_ID = 'your-gcp-project-id';

const LOCATION = 'us-central1'; // Or your preferred region

const MODEL_ID = 'gemini-1.5-flash-001'; // A powerful and cost-effective model

// Step 1: Retrieve relevant context

console.log("Finding relevant context for query:", query);

const context = findRelevantContext(query, accessToken);

// Step 2: Construct the augmented prompt

console.log("Constructing RAG prompt...");

const ragPrompt = constructRAGPrompt(query, context);

// Step 3: Call the Gemini API for generation

console.log("Sending prompt to Gemini...");

const geminiEndpoint = `https://${LOCATION}-aiplatform.googleapis.com/v1/projects/${PROJECT_ID}/locations/${LOCATION}/publishers/google/models/${MODEL_ID}:generateContent`;

const requestBody = {

"contents": [{

"parts": [{

"text": ragPrompt

}]

}],

"generationConfig": {

"temperature": 0.2, // Lower temperature for more factual, less creative answers

"topP": 0.95,

"maxOutputTokens": 1024,

}

};

const options = {

'method': 'post',

'contentType': 'application/json',

'headers': {

'Authorization': 'Bearer ' + accessToken

},

'payload': JSON.stringify(requestBody),

'muteHttpExceptions': true

};

try {

const response = UrlFetchApp.fetch(geminiEndpoint, options);

const responseData = JSON.parse(response.getContentText());

if (response.getResponseCode() !== 200) {

console.error('Gemini API Error:', responseData);

return "An error occurred while generating the answer.";

}

// Extract the generated text from the complex response object

const generatedText = responseData.candidates[0].content.parts[0].text;

console.log("Gemini Response:", generatedText);

return generatedText.trim();

} catch (e) {

console.error('Error calling Gemini API:', e);

return "Failed to connect to the AI service.";

}

}
And there you have it. The performRAGSearch function is the complete, serverless orchestration engine. When triggered from a Google Doc, it seamlessly fetches knowledge from your Drive files via Vector Search and uses Gemini to generate an intelligent, context-aware answer, effectively giving your Automated Discount Code Management System a custom-trained brain.
Practical Implementation and Code Walkthrough
Alright, let’s get our hands dirty. The architectural diagrams are great, but the real magic happens when code meets the cloud. In this section, we’ll dissect the Google Apps Script code that acts as the serverless engine for our RAG pipeline. We’ll build the core functions for each stage, assemble them into a working Q&A chatbot inside a Google Sheet, and then critically analyze the performance of our setup.
Core Apps Script Functions for Each Pipeline Stage
Google Apps Script is the unsung hero here, acting as the connective tissue between Google Drive, Google Sheets, and Vertex AI. It allows us to orchestrate the entire workflow without provisioning a single server.
First, ensure you’ve enabled the “Google Docs API” and “Vertex AI API” in your Google Cloud Project and linked that project to your Apps Script project.
1. Ingestion and Chunking
Our pipeline starts by pulling text from a source document in Google Drive. For this example, we’ll use a Google Doc. We then need to break it down into smaller, semantically manageable chunks. A simple paragraph-based chunking strategy is a great starting point.
// File: RAG_Pipeline.gs

/**

* Reads a Google Doc and splits its content into text chunks by paragraph.

* @param {string} docId The ID of the Google Doc file.

* @returns {Array<string>} An array of text chunks.

*/

function ingestAndChunkDocument(docId) {

try {

const doc = DocumentApp.openById(docId);

const body = doc.getBody();

const text = body.getText();

// A simple chunking strategy: split by one or more newlines.

// For production, consider more advanced strategies (e.g., fixed token size).

const chunks = text.split(/\n+/).filter(chunk => chunk.trim() !== '');

console.log(`Ingested and chunked document ${docId} into ${chunks.length} chunks.`);

return chunks;

} catch (e) {

console.error(`Failed to ingest document ${docId}. Error: ${e.toString()}`);

return [];

}

}
2. Embedding Generation with Vertex AI
With our text chunks ready, we need to convert them into numerical representations (vectors) using a Vertex AI embedding model. We’ll use UrlFetchApp to make a direct REST API call, authenticating with an OAuth token provided by Apps Script.
// File: RAG_Pipeline.gs

// --- Add these constants to the top of your file ---

const GCP_PROJECT_ID = 'your-gcp-project-id'; // <--- UPDATE THIS

const GCP_PROJECT_LOCATION = 'us-central1'; // <--- UPDATE THIS

const EMBEDDING_MODEL = 'text-embedding-004'; // Or another supported model

/**

* Gets embeddings for an array of text chunks from the Vertex AI API.

* @param {Array<string>} textChunks The text chunks to embed.

* @returns {Array<Array<number>>} An array of embedding vectors.

*/

function getEmbeddings(textChunks) {

const url = `https://` +

`${GCP_PROJECT_LOCATION}-aiplatform.googleapis.com/v1/projects/` +

`${GCP_PROJECT_ID}/locations/${GCP_PROJECT_LOCATION}/publishers/google/models/` +

`${EMBEDDING_MODEL}:predict`;

const token = ScriptApp.getOAuthToken();

// Vertex AI API expects a specific JSON payload structure.

const instances = textChunks.map(chunk => ({ content: chunk }));

const payload = { instances: instances };

const options = {

method: 'post',

contentType: 'application/json',

headers: {

Authorization: 'Bearer ' + token,

},

payload: JSON.stringify(payload),

muteHttpExceptions: true, // Important for debugging API errors

};

try {

const response = UrlFetchApp.fetch(url, options);

const responseCode = response.getResponseCode();

const responseBody = response.getContentText();

if (responseCode === 200) {

const jsonResponse = JSON.parse(responseBody);

console.log(`Successfully generated ${jsonResponse.predictions.length} embeddings.`);

return jsonResponse.predictions.map(pred => pred.embeddings.values);

} else {

console.error(`Vertex AI API Error: ${responseCode} - ${responseBody}`);

return [];

}

} catch (e) {

console.error(`Failed to call Vertex AI API. Error: ${e.toString()}`);

return [];

}

}
3. Vector Storage in Google Sheets
Where do we store these embeddings? For our serverless, low-infrastructure approach, a Google Sheet is a surprisingly effective “poor man’s vector database.” It’s simple, auditable, and requires zero setup.
// File: RAG_Pipeline.gs

// --- Add this constant to the top of your file ---

const VECTOR_SHEET_ID = 'your-google-sheet-id'; // <--- UPDATE THIS

/**

* Stores text chunks and their corresponding embeddings in a Google Sheet.

* @param {string} sourceDocId The ID of the original document.

* @param {Array<string>} chunks The original text chunks.

* @param {Array<Array<number>>} embeddings The embedding vectors.

*/

function storeEmbeddingsInSheet(sourceDocId, chunks, embeddings) {

if (chunks.length !== embeddings.length) {

console.error('Mismatch between number of chunks and embeddings. Aborting store.');

return;

}

const sheet = SpreadsheetApp.openById(VECTOR_SHEET_ID).getSheetByName('VectorStore');

if (!sheet) {

console.error('Could not find the "VectorStore" sheet.');

return;

}

// Clear existing content for simplicity, or implement an update/append logic.

// sheet.clear();

// sheet.appendRow(['ChunkID', 'SourceDocID', 'ChunkText', 'Embedding']);

const rows = chunks.map((chunk, i) => {

const chunkId = `chunk_${sourceDocId}_${i}`;

// Store embedding as a JSON string for easy retrieval.

const embeddingString = JSON.stringify(embeddings[i]);

return [chunkId, sourceDocId, chunk, embeddingString];

});

// Write all rows in a single batch operation for efficiency.

sheet.getRange(sheet.getLastRow() + 1, 1, rows.length, 4).setValues(rows);

console.log(`Successfully stored ${rows.length} vectors in the Google Sheet.`);

}
4. Retrieval via Similarity Search
This is the core of the “Retrieval” step. When a user asks a question, we first embed their query. Then, we iterate through our stored vectors in the Google Sheet, calculate the cosine similarity between the query vector and each stored vector, and find the chunks with the highest similarity score.
// File: RAG_Pipeline.gs

/**

* Calculates the cosine similarity between two vectors.

* @param {Array<number>} vecA The first vector.

* @param {Array<number>} vecB The second vector.

* @returns {number} The cosine similarity score.

*/

function cosineSimilarity(vecA, vecB) {

let dotProduct = 0.0;

let normA = 0.0;

let normB = 0.0;

for (let i = 0; i < vecA.length; i++) {

dotProduct += vecA[i] * vecB[i];

normA += vecA[i] * vecA[i];

normB += vecB[i] * vecB[i];

}

return dotProduct / (Math.sqrt(normA) * Math.sqrt(normB));

}

/**

* Finds the top N most relevant text chunks from the VectorStore sheet for a given query.

* @param {string} query The user's question.

* @param {number} topN The number of chunks to retrieve.

* @returns {string} The concatenated context from the top N chunks.

*/

function findSimilarChunks(query, topN = 3) {

const queryEmbedding = getEmbeddings([query])[0];

if (!queryEmbedding) {

console.error('Could not generate embedding for the query.');

return '';

}

const sheet = SpreadsheetApp.openById(VECTOR_SHEET_ID).getSheetByName('VectorStore');

const data = sheet.getRange(2, 3, sheet.getLastRow() - 1, 2).getValues(); // Get ChunkText and Embedding

const similarities = data.map((row, index) => {

const text = row[0];

const storedEmbedding = JSON.parse(row[1]);

const similarity = cosineSimilarity(queryEmbedding, storedEmbedding);

return { index, text, similarity };

});

similarities.sort((a, b) => b.similarity - a.similarity);

const topChunks = similarities.slice(0, topN);

console.log(`Top ${topN} chunks found with similarities: ${topChunks.map(c => c.similarity.toFixed(4)).join(', ')}`);

// Concatenate the text of the top chunks to form the context.

return topChunks.map(chunk => chunk.text).join('\n\n---\n\n');

}
5. Generation with Augmented Context
Finally, we take the user’s original query and the relevant context we just retrieved and package them into a prompt for a generative model like Gemini. This “Augmented” prompt guides the model to answer based on the provided information, drastically reducing hallucinations.
// File: RAG_Pipeline.gs

// --- Add this constant to the top of your file ---

const GENERATIVE_MODEL = 'gemini-1.0-pro';

/**

* Generates an answer using a generative model, augmented with retrieved context.

* @param {string} query The original user query.

* @param {string} context The relevant context retrieved from the vector store.

* @returns {string} The generated answer from the LLM.

*/

function generateAnswer(query, context) {

const url = `https://` +

`${GCP_PROJECT_LOCATION}-aiplatform.googleapis.com/v1/projects/` +

`${GCP_PROJECT_ID}/locations/${GCP_PROJECT_LOCATION}/publishers/google/models/` +

`${GENERATIVE_MODEL}:generateContent`;

const token = ScriptApp.getOAuthToken();

const prompt = `

You are a helpful assistant. Answer the following question based ONLY on the provided context.

If the answer is not found in the context, say "I could not find an answer in the provided documents."

CONTEXT:

${context}

QUESTION:

${query}

ANSWER:

`;

const payload = {

contents: [{

parts: [{ text: prompt }]

}]

};

const options = {

method: 'post',

contentType: 'application/json',

headers: {

Authorization: 'Bearer ' + token,

},

payload: JSON.stringify(payload),

muteHttpExceptions: true,

};

const response = UrlFetchApp.fetch(url, options);

const responseBody = response.getContentText();

if (response.getResponseCode() === 200) {

const jsonResponse = JSON.parse(responseBody);

const answer = jsonResponse.candidates[0].content.parts[0].text;

console.log('Successfully generated answer.');

return answer;

} else {

console.error(`Vertex AI (Gemini) API Error: ${response.getResponseCode()} - ${responseBody}`);

return 'Error: Could not generate an answer.';

}

}
Example Use Case: Building a Q&A Chatbot in a Google Sheet
Now, let’s wire these functions into a user-friendly interface directly within Google Sheets.
Setup:
-
Create a new Google Sheet.
-
Rename the first tab to
Chatbot. -
Create a second tab named
VectorStore. -
In the
VectorStoretab, add the headers in row 1:ChunkID,SourceDocID,ChunkText,Embedding. -
In the
Chatbottab, make cellA1bold and typeYour Question:. Make cellA3bold and typeAnswer:. We’ll useB1for input andB3for the output.
The Orchestrator Script:
We’ll create a main function that runs the entire RAG pipeline and a custom menu to trigger it.
// File: UI.gs (or add to your main .gs file)

/**

* Creates a custom menu in the Google Sheet UI to run the RAG pipeline.

*/

function onOpen() {

SpreadsheetApp.getUi()

.createMenu('AI Assistant')

.addItem('Ingest Document', 'runIngestion')

.addItem('Answer Question', 'runQnA')

.addToUi();

}

/**

* UI-triggered function to ingest a document. Asks the user for a Document ID.

*/

function runIngestion() {

const ui = SpreadsheetApp.getUi();

const result = ui.prompt(

'Ingest New Document',

'Please enter the Google Doc ID:',

ui.ButtonSet.OK_CANCEL);

if (result.getSelectedButton() == ui.Button.OK) {

const docId = result.getResponseText();

ui.alert(`Starting ingestion for Doc ID: ${docId}. This may take a moment.`);

const chunks = ingestAndChunkDocument(docId);

if (chunks && chunks.length > 0) {

const embeddings = getEmbeddings(chunks);

if (embeddings && embeddings.length > 0) {

storeEmbeddingsInSheet(docId, chunks, embeddings);

ui.alert('Ingestion complete! Knowledge base has been updated.');

} else {

ui.alert('Failed to generate embeddings.');

}

} else {

ui.alert('Failed to ingest or chunk the document.');

}

}

}

/**

* UI-triggered function that runs the full RAG pipeline based on the user's question in the sheet.

*/

function runQnA() {

const sheet = SpreadsheetApp.getActiveSpreadsheet().getSheetByName('Chatbot');

const query = sheet.getRange('B1').getValue();

if (!query || query.trim() === '') {

SpreadsheetApp.getUi().alert('Please enter a question in cell B1.');

return;

}

sheet.getRange('B3').setValue('Thinking...');

SpreadsheetApp.flush(); // Force the UI to update

const context = findSimilarChunks(query, 3);

if (context && context.trim() !== '') {

const answer = generateAnswer(query, context);

sheet.getRange('B3').setValue(answer);

} else {

sheet.getRange('B3').setValue('Could not find relevant information to answer the question.');

}

}
Now, refresh your Google Sheet. You’ll see a new “AI Assistant” menu. You can ingest a document by providing its ID, and then ask questions in cell B1 and run “Answer Question” to see the magic happen in B3.
Analyzing Performance and Identifying Potential Bottlenecks
This Automated Email Journey with Google Sheets and Google Analytics-native RAG pipeline is powerful, but it’s not a silver bullet. Understanding its limitations is key to knowing when to scale up.
-
Latency: The user experience is directly tied to latency.
-
API Round-trips: Each step (
getEmbeddings,generateAnswer) involves a network call to Vertex AI. While fast, they add up. Batching embedding requests during ingestion is crucial. -
The O(n) Vector Search: This is the single biggest bottleneck. Our
findSimilarChunksfunction reads every single embedding from the sheet and performs a calculation. This is perfectly fine for a few hundred or even a couple of thousand vectors. It will become unusably slow as you approach tens of thousands of vectors. -
Apps Script Cold Starts: While generally warm, Apps Script can have a slight “cold start” delay on the first execution after a period of inactivity.
-
Scalability:
-
Google Sheets is Not a Database: A 10 million cell limit sounds like a lot, but with 768-dimension embeddings, you’ll hit limits faster than you think. More importantly, it lacks indexing, transactional integrity, and efficient querying capabilities. Concurrent writes can also be problematic.
-
The Path to Production: For any serious application, the Google Sheet vector store must be replaced. The clear upgrade path is Vertex AI Vector Search (formerly Matching Engine). It provides a managed, scalable, and low-latency Approximate Nearest Neighbor (ANN) service designed for exactly this purpose. Migrating would involve changing the
findSimilarChunksfunction to query the Vector Search index API instead of scanning the Sheet. -
Execution Limits & Cost:
-
Apps Script Quotas: Standard Gmail accounts have a 6-minute script execution limit; Automated Google Slides Generation with Text Replacement accounts have 30 minutes. A massive ingestion job could time out. You’d need to re-architect it to process in batches using time-based triggers.
-
Cost-Effectiveness: The beauty of this model is its cost profile. Apps Script execution is free. You only pay for the Vertex AI API calls you make. This is incredibly efficient for internal tools or applications with sporadic usage. The cost is predictable and directly tied to consumption.
By leveraging Apps Script, we’ve built a functional, end-to-end RAG pipeline with zero infrastructure overhead. While the Google Sheet vector store is a brilliant starting point for demos and smaller-scale projects, recognizing its performance ceiling is the first step toward building a truly scalable, production-grade solution on Google Cloud.
Conclusion: Scaling Your Enterprise Knowledge Base
We’ve journeyed from a simple concept—unlocking the vast, unstructured knowledge within Google Drive—to a fully functional, serverless RAG pipeline. By orchestrating Google Cloud’s powerful services, we’ve built a system that doesn’t just answer questions but actively learns and stays current with your organization’s evolving data landscape. This isn’t just a technical exercise; it’s a foundational step toward transforming your internal documentation from a passive archive into an active, intelligent collaborator.
Recap: The Power of a Fully Automated RAG System in Workspace
Let’s take a moment to appreciate what’s been accomplished. We have constructed a system that is:
-
Event-Driven and Automated: The entire pipeline kicks off the moment a user adds or modifies a file in a designated Google Drive folder. This hands-off approach eliminates manual data ingestion and ensures the knowledge base is always fresh, reflecting the latest information without human intervention.
-
Completely Serverless: By leveraging Cloud Functions, Cloud Run, and Vertex AI, we’ve entirely bypassed the need to provision or manage servers. This architecture is not only cost-effective—paying only for what you use—but also scales seamlessly from a handful of documents to millions, without requiring any architectural changes.
-
Natively Integrated: The solution lives and breathes within the Google ecosystem. It uses Google Drive as its source, Google Cloud for its brain, and can be easily extended to interact with other Workspace tools like Google Chat. This tight integration reduces friction and leverages the tools your teams already use daily.
-
Powered by State-of-the-Art AI: With Vertex AI’s text-embedding models and generative LLMs at its core, the system can understand the semantic meaning of your documents, providing nuanced, context-aware answers that go far beyond simple keyword matching.
This combination of Automated Work Order Processing for UPS, serverless scalability, and native integration transforms your Google Drive from a simple file repository into a dynamic and queryable enterprise brain.
Considerations for Production Deployment and Maintenance
Moving this proof-of-concept into a production environment requires a shift in focus towards robustness, security, and observability. Here are critical areas to address:
-
Security and IAM:
-
Principle of Least Privilege: Scrutinize the IAM roles assigned to your service accounts. Ensure your Cloud Function and Cloud Run services have only the precise permissions they need to read from specific buckets, trigger parsers, and call Vertex AI endpoints. Avoid using basic roles like
Editorin production. -
Secret Management: Store API keys, service account credentials, and other sensitive information in Secret Manager instead of hardcoding them or using environment variables in plain text.
-
VPC Service Controls: For maximum security in an enterprise setting, use VPC Service Controls to create a service perimeter around your project, preventing data exfiltration by restricting API access to authorized networks.
-
Scalability and Cost Management:
-
Vector Database: While a simple FAISS index stored in a Cloud Storage bucket is great for a PoC, it doesn’t scale for low-latency production queries. The definitive next step is migrating to Vertex AI Vector Search (formerly Matching Engine). It’s a fully managed, high-performance vector database built for serving billions of embeddings with millisecond latency.
-
Chunking Strategy: The quality of your RAG system is highly dependent on your document chunking strategy. Experiment with different chunk sizes and overlap values. A production system might even employ multiple chunking strategies for different document types.
-
Cost Monitoring: Set up detailed billing alerts and budgets. Closely monitor your spend on Vertex AI API calls (embeddings and generation), Cloud Run instance hours, and Cloud Functions invocations to avoid surprises.
-
Observability and Error Handling:
-
Structured Logging: Implement structured logging (e.g., JSON payloads) in your Cloud Functions and Cloud Run services. This makes querying and analyzing logs in Cloud Logging significantly easier.
-
Monitoring and Alerting: Use Cloud Monitoring to create dashboards that track key metrics like document processing latency, error rates (e.g., parsing failures, API errors), and API usage. Set up alerts to be notified immediately of any anomalies.
-
Dead-Letter Queues: For the Pub/Sub topic that triggers the processing pipeline, configure a dead-letter queue (DLQ). This will capture messages for files that repeatedly fail to process, allowing you to debug the issue without halting the entire pipeline.
Next Steps: From Proof-of-Concept to Enterprise-Grade Solution
This pipeline is a powerful foundation. Here’s how you can build upon it to create a truly enterprise-grade solution that becomes indispensable to your organization:
-
Enhance the Retrieval Strategy:
-
Metadata Filtering: When creating embeddings, store relevant metadata alongside the vectors (e.g.,
file_name,owner,creation_date,document_type). Vertex AI Vector Search supports metadata filtering, allowing you to narrow down searches before the similarity search even happens (e.g., “find information about ‘Project Q4’ in documents created by ‘[email protected]’�”). -
Hybrid Search: Combine dense vector search with a traditional sparse keyword search (like BM25). This provides the best of both worlds, excelling at both semantic understanding and matching specific acronyms, product codes, or jargon.
-
Re-ranking: Implement a two-stage retrieval process. First, fetch a larger set of candidate documents (e.g., top 20) using your primary retrieval method. Then, use a more powerful, cross-encoder model to re-rank these candidates for relevance before passing the best few (e.g., top 3-5) to the LLM.
-
Build an Evaluation Framework:
-
You can’t improve what you can’t measure. Build a small, curated dataset of questions and their known-good answers (a “golden set”).
Regularly run this evaluation set against your pipeline to calculate RAG-specific metrics like* faithfulness** (is the answer supported by the context?), answer relevancy, and context precision. This allows you to objectively measure the impact of any changes you make.
-
Create a User Feedback Loop:
-
Integrate a simple feedback mechanism into your user interface (e.g., a thumbs-up/thumbs-down button on each generated answer).
-
Log this feedback. Analyzing which answers are rated poorly provides invaluable insight into the weaknesses of your system, guiding your efforts to improve chunking, retrieval, or prompting strategies.
By systematically addressing these production considerations and exploring these advanced features, you can evolve this project from an impressive demo into a mission-critical asset that truly democratizes access to your organization’s collective knowledge.


Stop Doing Manual Work. Scale with AI.
Want to turn these blog concepts into production-ready reality for your team?
Table Of Contents
Portfolios
Related Posts
Quick Links
Legal Stuff