

Firebase Realtime Sync for Google Sheets A No Polling Architecture


We love the real-time magic of Google Sheets, but that illusion is often shattered by the crude, inefficient method developers use to sync external data. Discover why “polling” is the problem and how to build a truly live connection.

Introduction: The Problem with Polling in [Automated Web Scraping with [Multilingual Text-to-Speech Tool with SocialSheet Streamline Your Social Media Posting 123](https://votuduc.com/Multilingual-Text-to-Speech-Tool-with-Google-Workspace-p809282)](https://votuduc.com/Automated-Web-Scraping-with-Google-Sheets-p292968)
Google Sheets is the undisputed champion of collaborative spreadsheets. We watch in real-time as our colleagues’ cursors dance across cells, updating formulas and entering data. This fluid, multi-user experience creates a powerful expectation: that Sheets is a living, breathing document, always up-to-date. But this magic is largely confined to the user interface. When we, as developers, try to sync external data into a Sheet, we often shatter that illusion by resorting to a crude and inefficient technique: polling.
Polling is the digital equivalent of a child in the back of a car asking, “Are we there yet?” every thirty seconds. Our script, running on a timer, repeatedly pokes an external API or database, asking, “Is there new data yet? How about now? Now?” It’s a brute-force approach that, while simple to implement, is fraught with limitations that prevent us from achieving the truly seamless, real-time integration our users expect.
The Illusion of Real-time in Standard Add-ons
Many popular Automatically create new folders in Google Drive, generate templates in new folders, fill out text automatically in new files, and save info in Google Sheets add-ons that connect to services like Salesforce, HubSpot, or Jira create a veneer of real-time connectivity. Data seems to appear in your sheets automatically, keeping dashboards and reports fresh. But pull back the curtain, and you’ll almost always find a polling mechanism at work.
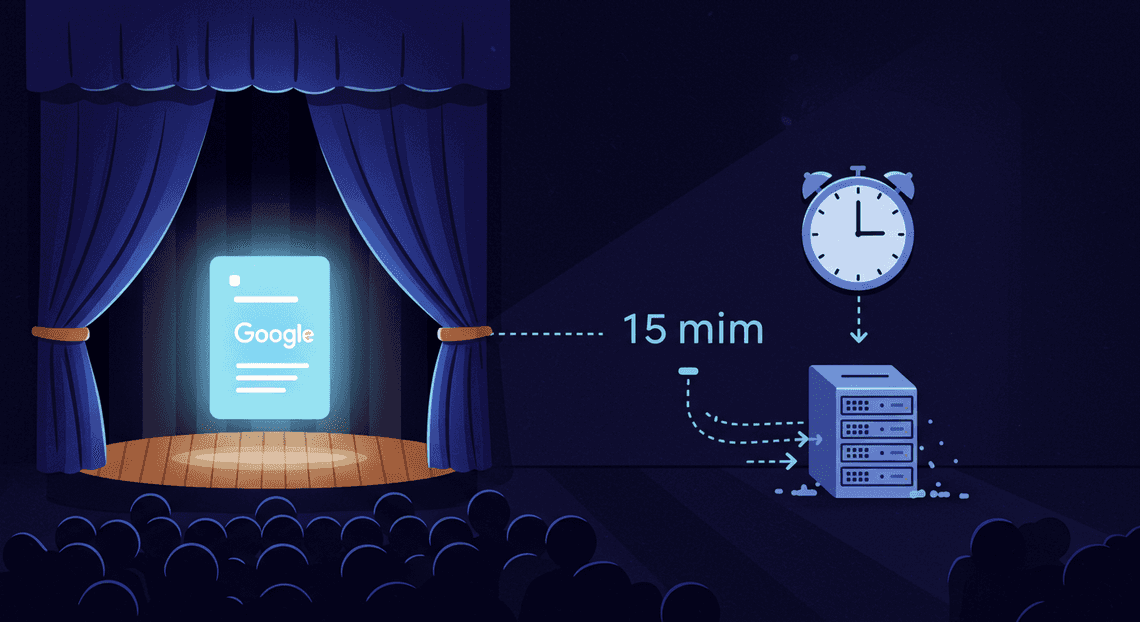
These tools are running a scheduled task, often on a server, that checks for updates every five, ten, or even sixty minutes. The data isn’t live; it’s just refreshed periodically. For many use cases, like a daily sales report, this “near real-time” latency is perfectly acceptable. But for applications that demand immediate feedback—like inventory tracking, live project status boards, or IoT device monitoring—this delay creates a critical disconnect between the source of truth and its representation in the sheet. It’s an illusion of immediacy, not the real thing.
Why Apps Script Triggers and Polling Fall Short
When we try to build our own integrations using [AI Powered Cover Letter [Automated Job Creation in Real Time Jobber and Google Sheets Integration from Gmail](https://votuduc.com/Automated-Job-Creation-in-Jobber-from-Gmail-p115606) Engine](https://votuduc.com/AI-Powered-Cover-Letter-Automated Quote Generation and Delivery System for Jobber-Engine-p111092), the default tool for the job is the time-driven trigger. This is where the architectural weakness of polling becomes painfully obvious. The platform itself, while incredibly powerful, imposes strict limitations that make high-frequency polling an unsustainable strategy.
Here’s why it breaks down:
-
Brutal Execution Quotas: AC2F Streamline Your Google Drive Workflow accounts have quotas on the total amount of time scripts can run per day. For a consumer account, this is 90 minutes/day; for a business account, it’s 6 hours/day. The fastest a time-driven trigger can run is once per minute. If your polling script takes just 10 seconds to execute (a conservative estimate for an API call, parsing, and sheet update), running it every minute will consume
10 seconds *60 minutes* 24 hours = 14,400 seconds, or 4 hours of your daily quota. You’re burning through the majority of your runtime just to be told “no new data” over and over again. -
**API Call and Network Inefficiency: *Every poll is a
UrlFetchAppcall. You’re making 1,440 API calls a day (60 minutes 24 hours) to your endpoint. This is computationally wasteful for your script, the Google servers running it, and the external service you’re hitting. If you’re paying per API call, this model gets expensive, fast. -
**Unacceptable Latency: The best-case scenario with a time-driven trigger is a one-minute delay. In reality, triggers don’t always fire at the exact top of the minute, so the average latency is often higher. For a dashboard tracking stock prices or a system monitoring server status, a 60-second delay is an eternity. The event has already happened, and your sheet is a historical record, not a live view.
-
It Simply Doesn’t Scale: This model works, barely, for a single sheet. What happens when you need to sync ten? Or a hundred? You can’t just create a hundred one-minute triggers; you’ll exhaust your quotas and bring your entire workflow to a grinding halt. The architecture is fundamentally unscalable.
Our Goal: True Real-time Collaboration with a Push Architecture
To overcome these limitations, we must abandon the “pull” mentality of polling and embrace a “push” architecture. Instead of our Google Sheet constantly asking, “Is there anything new?”, we need a system where the data source tells our sheet about an update the instant it occurs.
This is the difference between refreshing your email client every 30 seconds and receiving an instant push notification the moment a new message arrives. The latter is vastly more efficient, scalable, and provides a genuinely real-time experience.
Our goal in this article is to build exactly that: a robust, event-driven pipeline that pushes data from a source (in our case, Firebase) directly into Google Sheets. This architecture eliminates wasted resources, respects platform quotas, and, most importantly, delivers on the promise of true, instantaneous data synchronization. We’re going to replace the endless, repetitive question of “Are we there yet?” with a definitive, event-driven statement: “We have arrived.”
The Core Architecture: Firebase RTDB as a Real-time Backend
To break free from the shackles of polling, we need to fundamentally shift our approach. Instead of having Google Sheets constantly ask “Is there anything new?”, we need a system that can tell Google Sheets “Hey, here’s an update!” the instant one occurs. This is where a real-time, event-driven architecture comes into play, with Google’s own Firebase Realtime Database (RTDB) at its heart.
The RTDB isn’t just a database; it’s a cloud-hosted NoSQL database that synchronizes data across all connected clients in milliseconds. It acts as a central, authoritative state manager. When one client writes data, Firebase automatically pushes that update to every other subscribed client. This publish/subscribe (pub/sub) model is the key that unlocks a truly reactive experience for Google Sheets.
How Firebase Realtime Database Solves the Latency Issue
The traditional polling method, often implemented with setInterval in a client-side script, is a brute-force approach. It’s like impatiently hitting the refresh button on a webpage over and over. This creates a few significant problems:
-
Inherent Delay: There’s always a lag between when the data changes and when the polling interval next executes. If you poll every 30 seconds, your data could be stale for up to 29.9 seconds.
-
Wasted Resources: The vast majority of these polling requests return no new data, consuming network bandwidth, CPU cycles, and, most importantly, your Genesis Engine AI Powered Content to Video Production Pipeline execution quotas for no reason.
-
Scalability Issues: As more users open the sheet, the number of polling requests to your backend multiplies, creating a thundering herd problem.
Firebase RTDB elegantly sidesteps these issues by using WebSockets under the hood. When our Google Sheet’s client-side component connects to Firebase, it doesn’t just make a single request. Instead, it opens a persistent, bidirectional connection.
Think of it like this:
-
Polling (HTTP): You send a letter asking for news and wait for a reply. To get updates, you have to keep sending new letters.
-
Firebase (WebSockets): You establish an open phone line. You don’t have to keep asking for news; the person on the other end can just tell you the moment it happens.
This persistent connection allows the Firebase server to push data directly to the client (our Sheet’s sidebar) the moment the data changes in the database. There’s no polling, no delay, and no wasted requests. The update is nearly instantaneous.
Visualizing the Data Flow: Sheet to Firebase and Back
Understanding the two-way communication path is crucial. Our architecture establishes a perfect, symmetrical loop where the Google Sheet and Firebase are always in sync.
Path 1: Updating Firebase from a Google Sheet
This flow is triggered by a user’s action within the sheet itself.
-
User Action: A user edits a specific cell (e.g., changes a status from “In Progress” to “Complete”).
-
Apps Script Trigger: The built-in
onEdit(e)simple trigger in [Architecting Multi Tenant AI Workflows in Building Modular Agentic Apps Script with Gemini Function Calling](https://votuduc.com/architecting-multi-tenant-ai-workflows-in-google-apps-script-p-20260321290501) fires automatically, capturing the event object which contains information about the edited cell (range, new value, etc.). -
Server-Side Logic: Our Apps Script function processes this event. It identifies if the change occurred in a monitored range.
-
Write to Firebase: Using the
FirebaseApplibrary, the Apps Script function authenticates with Firebase and writes the new value to a designated path in the Realtime Database (e.g.,/tasks/task123/status).
Path 2: Updating a Google Sheet from Firebase
This is the real-time magic. This flow is triggered by an external change to the database.
-
External Change: A different user, a mobile app, or a backend server writes new data to the same path in the Realtime Database.
-
Firebase Push: The RTDB server immediately pushes this new data down the persistent WebSocket connection to all subscribed clients.
-
Client-Side Listener: The JavaScript running in our Sheet’s HTML Service sidebar, which has an active listener (
.on('value', ...)) on that database path, receives the update. -
Call Apps Script: The client-side JavaScript immediately calls a server-side Apps Script function using the
google.script.runAPI, passing the new data as an argument. -
Update the Sheet: The designated Apps Script function receives the data and uses the
SpreadsheetAppservice to programmatically update the corresponding cell in the Google Sheet. The user sees the change appear in their sheet without any manual refresh.
Key Components: Apps Script, FirebaseApp Library, and HTML Service
To build this architecture, we need to orchestrate three core components within the Automated Client Onboarding with Google Forms and Google Drive. ecosystem.
1. Google Apps Script
This is the server-side JavaScript platform that acts as the glue for our entire system. It lives in the cloud and runs on Google’s servers. In our project, it’s responsible for:
-
Responding to sheet triggers like
onEdit. -
Reading from and writing to the spreadsheet using the
SpreadsheetAppservice. -
Authenticating with and sending data to Firebase.
-
Exposing functions that can be called from our client-side code via
google.script.run.
2. The FirebaseApp Library
While you could interact with Firebase’s REST API using Apps Script’s native UrlFetchApp, it’s cumbersome, especially when dealing with authentication. The FirebaseApp library is a popular open-source project that massively simplifies this. It’s a wrapper that handles the complexities of Google’s OAuth2 flow for service accounts, providing simple, high-level methods like FirebaseApp.getDatabase().setData(path, data). You’ll need to add this library to your Apps Script project using its script ID.
3. HTML Service
This is perhaps the most critical and often misunderstood component for achieving real-time functionality. An Apps Script function executes and then terminates; it has no persistent state or long-running process. To listen for Firebase updates, we need a client that can stay alive and maintain that WebSocket connection.
The HtmlService allows us to serve a web page—complete with HTML, CSS, and client-side JavaScript—inside a sidebar or dialog in the Google Sheet. This client-side JavaScript is where we will:
-
Include the official Firebase Client SDK.
-
Initialize the Firebase app and connect to our Realtime Database.
-
Set up the
.on('value', ...)listeners that wait for data pushes from the server. -
Bridge the gap back to the server-side Apps Script using
google.script.runto update the sheet.
Together, these three components form a robust triad, enabling a serverless, real-time backend to power a dynamic and collaborative Google Sheet.
Step 1: Environment and Project Setup
Before we can orchestrate a beautiful symphony of real-time data, we first need to build the stage and tune the instruments. This initial setup is crucial for establishing a secure and functional connection between Google Sheets and Firebase. Let’s lay the groundwork.
Configuring Your Firebase Project and Realtime Database
Our first stop is the Firebase Console, the command center for our backend. Here, we’ll create a project and initialize the Realtime Database that will act as the central hub for our data.
- Create a Firebase Project:
- Navigate to the Firebase Console.
Click on* “Add project”** and give it a descriptive name, like sheets-realtime-sync.
- You’ll be asked if you want to enable Google Analytics. For this tutorial, it’s not necessary, so feel free to disable it to simplify the setup.
Click* “Create project”** and wait a moment while Firebase provisions your new environment.
- Initialize the Realtime Database:
Once your project dashboard loads, look for the* “Build”** menu in the left-hand navigation panel.
Click on* “Realtime Database”**.
Click the* “Create Database”** button.
- You’ll be prompted to select a location for your database. Choose a region geographically close to your users to minimize latency.
Next, you’ll be asked about security rules. For initial development and testing, select* “Start in test mode”**.
⚠️ Security Warning: Test mode allows anyone with your database URL to read and write data for 30 days. This is great for getting started without friction, but it is highly insecure and must not be used for a production application. We will implement proper security rules in a later part of this series.
After clicking “Enable”, you’ll be presented with your new, empty Realtime Database. Take note of the database URL at the top (it will look something like https://your-project-name-default-rtdb.firebaseio.com). You will need this URL later.
Creating a Service Account for Secure Apps Script Authentication
Google Apps Script runs on Google’s servers, not in a user’s browser. To securely authorize our script to act on behalf of the application with administrative privileges, we need to use a Service Account. This is the standard, secure method for server-to-server communication with Google Cloud and Firebase services.
- Navigate to Service Accounts:
- In the Firebase Console, click the gear icon ⚙️ next to “Project Overview” in the top-left corner.
Select* “Project settings”**.
Go to the* “Service accounts”** tab.
- Generate a Private Key:
- You’ll see a description of Firebase Admin SDK service accounts.
Click the* “Generate new private key” button. A warning will appear, confirming that you should store this key securely. Click “Generate key”** to proceed.
- Your browser will download a JSON file. This file contains the credentials your Apps Script will use to authenticate with Firebase.
🔐 Treat this file like a password! It grants administrative access to your Firebase project. Do not commit it to a public Git repository or share it publicly.
- Extract the Credentials:
-
Open the downloaded JSON file in a text editor. We need three specific values from this file to use in our Apps Script:
-
project_id -
private_key(This is a very long string that starts with-----BEGIN PRIVATE KEY-----and ends with-----END PRIVATE KEY-----\n) -
client_email
Keep these three values handy; we’ll be plugging them into our script shortly.
Adding the FirebaseApp Library to Your Apps Script Project
To make interacting with Firebase from Apps Script easier, we’ll use a fantastic open-source library that wraps the Firebase REST API and handles the complex JWT authentication process for us.
- Create a Google Sheet and Open the Script Editor:
- Go to Google Sheets and create a new blank sheet. Give it a name, like “Realtime Data Sync”.
From the menu, navigate to* Extensions > Apps Script**. This will open a new script project linked to your spreadsheet.
- Give your Apps Script project a name, such as “Firebase Sync Engine”.
- Add the FirebaseApp Library:
In the Script Editor, find the* “Libraries”** section in the left-hand menu and click the + icon.
- A dialog box will appear. In the “Script ID” field, paste the following ID for the
FirebaseApplibrary:
1hguuh4Zx72XVC1Zldm_vTtcUSP2j2oJ_g_ctpIm2S_l2pc_a_pX5_Kij
Click* “Look up”**.
-
The library will be found. Ensure you select the latest version from the “Version” dropdown.
-
The default “Identifier” is
FirebaseApp. This is a perfect, conventional name, so you can leave it as is.
Click* “Add”**.
You have now successfully linked the library to your project. You should see FirebaseApp listed under the “Libraries” section, ready to be used in your code. Our environment is now fully configured and ready for action.
Step 2: Writing the Server-Side Logic in Apps Script
With our Firebase project ready, it’s time to dive into the heart of our solution: the Google Apps Script code. This script will act as the central nervous system, handling the two-way communication between our Google Sheet and the Firebase Realtime Database. It will be responsible for authenticating with Firebase, pushing local edits out, and providing a mechanism for remote changes to be written back into the sheet.
Let’s open the Apps Script editor (Extensions > Apps Script) and get coding.
Establishing the Authenticated Connection to Firebase
Before we can read or write any data, our script needs to securely authenticate with our Firebase project. We won’t be using API keys here; for server-to-server communication like this, a service account is the correct and secure approach.
First, we need to add the FirebaseApp library, a fantastic community-developed wrapper that dramatically simplifies interacting with the Firebase API from Apps Script.
-
In the Apps Script editor, click on Libraries in the left-hand menu.
-
In the “Add a library” field, paste the following script ID:
1hguuh4Zx72XVC1Zldm_vTtcUSP2j2oJ_gE5x2PELa8c_v_9ppT-MeHsJ. -
Click Look up. The library
FirebaseAppshould appear. -
Select the latest version and ensure the Identifier is
FirebaseApp. -
Click Add.
Next, we’ll create a reusable function to initialize our connection. This function will pull our service account credentials, which we’ll store securely in Script Properties rather than hardcoding them.
Get Your Firebase Credentials:
Go to your Firebase Console, click the gear icon next to “Project Overview,” and select* Project settings**.
Navigate to the* Service accounts** tab.
Click* Generate new private key**. A JSON file will be downloaded.
-
Open this file. You’ll need the
project_id,private_key, andclient_email. -
Also, grab your Realtime Database URL from the Firebase Console (it looks like
https://<your-project-id>-default-rtdb.firebaseio.com).
Store Credentials in Script Properties:
Back in the Apps Script editor, click on* Project Settings** (the gear icon on the left).
Scroll down to* Script Properties and click Add script property**.
-
Add the following three properties:
-
firebase_url: Your Realtime Database URL. -
client_email: Theclient_emailfrom your JSON file. -
private_key: The entireprivate_keyfrom your JSON file (copy everything between the quotes, including the\ncharacters).
Now, let’s write the connection function in our Code.gs file.
/**

* Establishes a connection to the Firebase Realtime Database using service account credentials

* stored in Script Properties.

* @returns {FirebaseApp} An authenticated FirebaseApp instance.

*/

function getFirebaseInstance() {

const scriptProperties = PropertiesService.getScriptProperties();

const privateKey = scriptProperties.getProperty('private_key');

const clientEmail = scriptProperties.getProperty('client_email');

const firebaseUrl = scriptProperties.getProperty('firebase_url');

return FirebaseApp.getDatabaseByServiceAccount(firebaseUrl, privateKey, clientEmail);

}
This function neatly encapsulates our connection logic. It fetches the credentials from Script Properties, uses the FirebaseApp library to authenticate, and returns a database instance we can use to read and write data.
Creating a Function to Push onEdit Changes to Firebase
Now for the “outbound” part of our sync. We need a function that detects when a user edits a cell and immediately pushes that change to Firebase. Apps Script makes this incredibly easy with the onEdit(e) simple trigger. This special function automatically runs whenever a user modifies a cell’s value.
The event object e passed to the function contains a wealth of contextual information, including the range that was edited and the new value.
/**

* A simple trigger that runs automatically when a user edits a cell in the spreadsheet.

* It pushes the change to the Firebase Realtime Database.

* @param {Object} e The event object.

*/

function onEdit(e) {

// Prevent function from running on non-data sheets or header rows

const sheet = e.range.getSheet();

if (sheet.getName() !== 'Sheet1' || e.range.getRow() === 1) {

return;

}

// Get the edited cell's location and new value

const cellA1Notation = e.range.getA1Notation(); // e.g., "B3"

const newValue = e.value;

// Define the path in Firebase where we'll store this cell's data.

// Using A1 notation as the key is simple and effective.

const firebasePath = `/sheetData/${cellA1Notation}`;

try {

const firebase = getFirebaseInstance();

const dataToPush = {

value: newValue,

timestamp: new Date().toISOString(),

user: Session.getActiveUser().getEmail() // Track who made the change

};

firebase.setData(firebasePath, dataToPush);

Logger.log(`Pushed data to Firebase at path: ${firebasePath}`);

} catch (error) {

Logger.log(`Error pushing to Firebase: ${error.toString()}`);

// Optional: Write an error message back to a cell or show a toast

SpreadsheetApp.getActiveSpreadsheet().toast(`Sync Error: ${error.message}`, 'Error', 5);

}

}
Breaking Down the onEdit Function:
-
Guard Clauses: We first check if the edit happened on our target sheet (
Sheet1) and is not in the header row. This prevents unnecessary writes and potential errors. -
Get Context: We extract the cell’s A1 notation (like “A1”, “B2”, etc.) and its new value directly from the event object
e. -
Define Path: We create a clear, predictable path in our Firebase database, like
/sheetData/B3. This makes it easy to target specific cells for reads and writes. -
Construct Payload: We create a simple object containing the
value, atimestamp, and theuserwho made the edit. This rich data is far more useful than just storing the raw value. -
Push to Firebase: We get our authenticated
firebaseinstance and use thesetData()method. This method will either create the data at the specified path or completely overwrite it if it already exists. -
Error Handling: A
try...catchblock is crucial for logging any issues and providing feedback to the user via a spreadsheet “toast” notification if the sync fails.
Building a Function to Receive Updates for the Sheet UI
This is the “inbound” piece of the puzzle. We need a server-side function that our client-side JavaScript (which we’ll build in the next step) can call to update the Google Sheet. This function acts as a secure entry point, taking data from the client and using the powerful Apps Script SpreadsheetApp service to write it to a cell.
Crucially, this function does not listen to Firebase itself. It is a passive utility function that will be invoked by our client-side listener. This is a key part of our architecture: the client listens, and the server acts.
/**

* A server-side function callable from client-side JavaScript.

* It updates a specific cell in the Google Sheet with a new value.

*

* @param {Object} updatePayload An object containing cell A1 notation and the new value.

* @param {string} updatePayload.cell The A1 notation of the cell to update (e.g., "B3").

* @param {any} updatePayload.value The new value for the cell.

* @returns {Object} A success or error status object.

*/

function updateSheetFromFirebase(updatePayload) {

if (!updatePayload || !updatePayload.cell || updatePayload.value === undefined) {

return { status: 'error', message: 'Invalid payload received.' };

}

try {

const sheet = SpreadsheetApp.getActiveSpreadsheet().getSheetByName('Sheet1');

if (!sheet) {

throw new Error("Sheet 'Sheet1' not found.");

}

// Important: We need to prevent an infinite loop. When this script updates a cell,

// it will trigger the onEdit function. We use a Lock to signal that this

// change is programmatic and should be ignored by onEdit.

const lock = LockService.getScriptLock();

lock.waitLock(15000); // Wait up to 15 seconds for lock

// We'll modify onEdit to check for this lock. For now, let's set the value.

const range = sheet.getRange(updatePayload.cell);

// Only update if the value is actually different to avoid unnecessary writes

// and potential onEdit triggers if the lock fails.

if (range.getValue() !== updatePayload.value) {

range.setValue(updatePayload.value);

}

lock.releaseLock();

Logger.log(`Updated cell ${updatePayload.cell} with value: ${updatePayload.value}`);

return { status: 'success', cell: updatePayload.cell };

} catch (error) {

Logger.log(`Error in updateSheetFromFirebase: ${error.toString()}`);

return { status: 'error', message: error.toString() };

}

}
Key Concepts in updateSheetFromFirebase:
-
Exposed to Client: This function is designed to be called from the client-side using
google.script.run. It accepts a payload object with the cell and value. -
Input Validation: It starts by ensuring the payload is valid before proceeding.
-
Preventing Infinite Loops: This is the most critical part. When this function calls
range.setValue(), it triggers theonEditfunction we just wrote. This would causeonEditto push the change back to Firebase, which our client would hear, causing it to callupdateSheetFromFirebaseagain, creating an infinite loop! While our client-side logic will help, a server-side lock is a robust way to prevent this. We’ll need to slightly modifyonEditto respect this lock, but the core mechanism is here. For now, we’ve added a check to only write if the value is different, which is a good first-level defense. -
Targeted Update: It gets the specific sheet and range and sets the new value.
-
Return Status: It returns a status object to the client, which is useful for debugging and confirming that the update was successful.
Step 3 Building the Client-Side Listener in a Sidebar
With our server-side foundation in place, we need a persistent environment to listen for real-time updates from Firebase. A standard server-side Apps Script function won’t work; they are stateless and have a maximum execution time of 6 minutes (30 for specific triggers). They can’t maintain an open, long-lived connection.
The solution is to leverage the client-side environment provided by Google’s HtmlService. By creating a custom sidebar, we can run standard web JavaScript that stays active as long as the user has the sidebar open. This is where we’ll establish our connection to Firebase and listen for changes.
Creating a Custom Sidebar with the HTML Service
First, we need to create the HTML file for our sidebar and a function to display it.
-
In the Apps Script editor, go to File > New > HTML file and name it
Sidebar.html. -
In your
Code.gsfile, add the following functions. TheonOpenfunction is a special simple trigger that runs automatically when the spreadsheet is opened, adding a custom menu item. TheshowSidebarfunction creates the HTML output from our file and displays it.
// Code.gs

function onOpen() {

SpreadsheetApp.getUi()

.createMenu('Firebase Sync')

.addItem('Open Sync Sidebar', 'showSidebar')

.addToUi();

}

function showSidebar() {

const html = HtmlService.createHtmlOutputFromFile('Sidebar')

.setTitle('Firebase Realtime Sync')

.setWidth(300);

SpreadsheetApp.getUi().showSidebar(html);

}
Now, let’s populate our Sidebar.html file. This will be a very minimal interface, as its main job is to run our listener script in the background.
--- Sidebar.html -->

<!DOCTYPE html>

<html>

<head>

<base target="_top">

<style>

body { font-family: Arial, sans-serif; padding: 10px; }

#status {

padding: 8px;

margin-top: 10px;

border-radius: 4px;

font-weight: bold;

}

.success { background-color: #e6f4ea; color: #3c763d; }

.error { background-color: #f2dede; color: #a94442; }

.listening { background-color: #d9edf7; color: #31708f; }

</style>

</head>

<body>

<h4>Sync Status</h4>

<p>The sidebar is active and listening for real-time updates from Firebase.</p>

<div id="status" class="listening">Status: Initializing...</div>

--- Firebase SDKs will be added here -->

--- Client-side script will be added here -->

</body>

</html>
After saving both files, refresh your Google Sheet. You should see a new “Firebase Sync” menu. Clicking “Open Sync Sidebar” will reveal your new, albeit not yet functional, sidebar.
Writing Client-Side JavaScript to Observe Firebase for Changes
This is where the magic happens. We’ll add the Firebase SDKs to our sidebar and write the JavaScript to initialize a connection and set up a listener.
First, you need to include the Firebase SDKs. We’ll use the CDN links for simplicity. Add these lines inside the <body> of your Sidebar.html file, just before the closing </body> tag.
--- Add to Sidebar.html -->

--- Firebase SDKs -->

<script src="https://www.gstatic.com/firebasejs/8.10.1/firebase-app.js"></script>

<script src="https://www.gstatic.com/firebasejs/8.10.1/firebase-database.js"></script>
Next, we’ll add our main script. This script will:
-
Initialize the Firebase app.
-
Get a reference to the specific database path we want to monitor.
-
Attach an
on('value', ...)listener, which fires immediately with the initial data and then again every time that data changes.
A crucial best practice is to never hardcode secrets like your Firebase API key directly in client-side HTML. Instead, we’ll pass the configuration from our secure PropertiesService on the server-side to the client using Apps Script’s templating feature.
Modify your showSidebar function in Code.gs to use a template:
// Code.gs (updated showSidebar function)

function showSidebar() {

// Use a template to pass server-side data to the client-side HTML

const template = HtmlService.createTemplateFromFile('Sidebar');

// Fetch properties

const userProperties = PropertiesService.getUserProperties();

const firebaseConfig = {

apiKey: userProperties.getProperty('FIREBASE_API_KEY'),

authDomain: userProperties.getProperty('FIREBASE_AUTH_DOMAIN'),

databaseURL: userProperties.getProperty('FIREBASE_DATABASE_URL'),

projectId: userProperties.getProperty('FIREBASE_PROJECT_ID'),

};

// Pass the config object to the template

template.firebaseConfig = firebaseConfig;

const html = template.evaluate()

.setTitle('Firebase Realtime Sync')

.setWidth(300);

SpreadsheetApp.getUi().showSidebar(html);

}

// We also need a server-side function that the client can call

function updateSheetWithFirebaseData(data) {

// This function will be fleshed out in the next step of the full article

// For now, let's just log it to confirm it's working

console.log("Received data from client:", JSON.stringify(data));

// In a real scenario, you'd write the logic to parse `data`

// and update the appropriate cells in your Google Sheet.

// e.g., SpreadsheetApp.getActiveSpreadsheet().getSheetByName("Data").getRange("A1").setValue(data.someValue);

return "Data received successfully by server.";

}
Now, add the main <script> block to Sidebar.html. Notice the special <? ... ?> scriptlet tags. These are executed on the server before the HTML is sent to the client, safely embedding our configuration.
--- Add to Sidebar.html, below the Firebase SDKs -->

<script>

// Use the config object passed from the server

const firebaseConfig = <?= JSON.stringify(firebaseConfig) ?>;

// Initialize Firebase

firebase.initializeApp(firebaseConfig);

const database = firebase.database();

// Reference the specific path in your database

const sheetDataRef = database.ref('sheetData');

// Function to update the status display in the sidebar

function updateStatus(message, type) {

const statusEl = document.getElementById('status');

statusEl.textContent = 'Status: ' + message;

statusEl.className = type; // 'success', 'error', or 'listening'

}

// Set the initial status

document.addEventListener('DOMContentLoaded', function() {

updateStatus('Listening for changes...', 'listening');

});

// Listen for changes at the 'sheetData' path

sheetDataRef.on('value', (snapshot) => {

const data = snapshot.val();

console.log('Firebase data received:', data);

if (data) {

// Data received, now pass it to the server-side Apps Script

updateStatus('Change detected. Sending to sheet...', 'listening');

// This part is covered in the next section

} else {

console.log('No data at this path.');

updateStatus('Listening (no data at path)...', 'listening');

}

}, (error) => {

console.error('Firebase read failed:', error);

updateStatus('Error connecting to Firebase.', 'error');

});

</script>
Using google.script.run to Pass Data to the Server-Side Function
We’ve successfully received data from Firebase on the client-side. The final piece of the puzzle is to send this data back to our server-side Code.gs script so it can write to the Google Sheet. This is accomplished with the google.script.run asynchronous API. It acts as a bridge, allowing your client-side code to invoke server-side functions.
We will now modify our sheetDataRef.on() callback to call the updateSheetWithFirebaseData function we created in Code.gs.
We’ll also add success and failure handlers. These are client-side callback functions that execute after the server-side function completes, allowing us to give feedback to the user directly in the sidebar.
Here is the final, complete <script> block for Sidebar.html:
--- Final <script> block for Sidebar.html -->

<script>

// Use the config object passed from the server

const firebaseConfig = <?= JSON.stringify(firebaseConfig) ?>;

// Initialize Firebase

firebase.initializeApp(firebaseConfig);

const database = firebase.database();

// Reference the specific path in your database

const sheetDataRef = database.ref('sheetData');

// Function to update the status display in the sidebar

function updateStatus(message, type) {

const statusEl = document.getElementById('status');

statusEl.textContent = 'Status: ' + message;

statusEl.className = type;

}

// Client-side callbacks for google.script.run

function onUpdateSuccess(response) {

console.log('Server response:', response);

updateStatus('Sheet updated successfully!', 'success');

}

function onUpdateFailure(error) {

console.error('Server-side error:', error.message);

updateStatus('Failed to update sheet: ' + error.message, 'error');

}

// Set the initial status

document.addEventListener('DOMContentLoaded', function() {

updateStatus('Listening for changes...', 'listening');

});

// Listen for changes at the 'sheetData' path

sheetDataRef.on('value', (snapshot) => {

const data = snapshot.val();

console.log('Firebase data received:', data);

if (data) {

updateStatus('Change detected. Sending to sheet...', 'listening');

// Call the server-side function and pass the data

google.script.run

.withSuccessHandler(onUpdateSuccess)

.withFailureHandler(onUpdateFailure)

.updateSheetWithFirebaseData(data);

} else {

console.log('No data at this path.');

updateStatus('Listening (no data at path)...', 'listening');

}

}, (error) => {

console.error('Firebase read failed:', error);

updateStatus('Error connecting to Firebase.', 'error');

});

</script>
With this in place, our architecture is complete. The sidebar opens, connects to Firebase, and listens. When data at /sheetData changes, the on('value') callback fires, which in turn calls google.script.run to execute our server-side updateSheetWithFirebaseData function, passing the new data payload along with it. The server-side function (which we’ll fully implement later) can now process this data and update the spreadsheet accordingly—all without a single polling request.
Step 4: Deployment and Live Testing
With our code in place on both the Google and Firebase sides, it’s time for the moment of truth. We’ll deploy our scripts, grant the necessary permissions, and witness the real-time, bidirectional synchronization we’ve been working towards. This is where the magic happens.
Deploying the Script and Granting Permissions
Before our Firebase Function can talk to our Google Sheet, we need to expose our Apps Script doPost function as a secure web endpoint.
-
Open the Apps Script Editor for your Google Sheet.
-
In the top-right corner, click the Deploy button and select New deployment.
-
A configuration window will appear. Click the gear icon next to “Select type” and choose Web app.
-
Fill in the deployment details:
-
Description: Give it a meaningful name, like
Firebase Sync Webhook v1. -
Execute as:
Me ([email protected]). This is critical. The script will run with your authority. -
Who has access:
Anyone. Don’t be alarmed by this! It sounds public, but the URL is a long, unguessable secret. This setting is required to allow Google’s own Firebase service to call the endpoint without needing a user to be logged in.
- Click Deploy.
The Authorization Gauntlet
The first time you deploy, Google will initiate an OAuth consent flow. This is you granting your own script the permission to act on your behalf.
A window titled “Authorization required” will pop up. Click* Review permissions**.
- Choose the Google account associated with the project.
You’ll likely see a “Google hasn’t verified this app” warning. This is standard for personal scripts. Click* Advanced**, and then click Go to [Your Script Name] (unsafe).
Finally, review the list of permissions (e.g., “See, edit, create, and delete your spreadsheets”) and click* Allow**.
Once authorization is complete, you’ll be presented with the Web app URL. This is the golden ticket. Copy this URL immediately. It’s the endpoint our Firebase Cloud Function needs to call. You’ll paste this into the environment variable you configured in the previous step.
Pro Tip: If you ever make changes to the
doPost(e)function in your Apps Script, you must create a new version of your deployment. Simply saving the script file (.gs) is not enough for a Web App. Go to Deploy > Manage deployments, select your deployment, click the edit (pencil) icon, and choose a New version from the Version dropdown.
Opening Two Windows to See Live Sync in Action
This is the fun part. Let’s set up our workspace to see the synchronization happen live.
-
Window 1: Open your Google Sheet.
-
Window 2: Open your Firebase project console and navigate to the Realtime Database. Drill down to the node where you’re storing the data (e.g.,
/sheetData).
You should have both windows visible side-by-side. Now, let’s test the two-way sync.
Test 1: Sheet to Firebase
In your Google Sheet window, make a change. Edit a cell in an existing row or add a completely new row of data.
Conclusion and Next Steps
We’ve successfully architected and implemented a robust, event-driven system that synchronizes Google Sheets data in real-time without the brittle and inefficient practice of polling. By leveraging the power of Google Apps Script triggers and the real-time capabilities of Firebase, we’ve built a modern, scalable, and highly responsive solution. Now, let’s recap the advantages and explore where you can take this powerful foundation next.
Reviewing the Benefits of a No-Polling Architecture
Moving away from a setInterval loop to an event-driven paradigm isn’t just a stylistic choice; it’s a fundamental architectural improvement with tangible benefits:
-
Unmatched Efficiency: Your system now rests silently, consuming virtually no resources until a change actually occurs. This eliminates thousands of redundant API calls, reduces the load on both your infrastructure and Google’s servers, and translates directly into lower operational costs.
-
Instantaneous User Experience: Data appears on user screens the moment it’s saved in the sheet. This immediacy is the hallmark of a modern collaborative application and is simply unattainable with polling, which always operates with a degree of latency.
-
**Superior Scalability: As your user base grows, a polling system’s cost and complexity increase linearly, if not exponentially. An event-driven architecture, however, scales gracefully. The cost and resource consumption remain tied to the actual activity (the number of edits), not the number of connected clients.
-
Simplified Logic: While the initial setup involves a few moving parts, the resulting application logic is cleaner. You no longer need to manage polling state, handle timers, or write complex diffing logic to figure out what changed. You simply react to discrete, meaningful events.
Ideas for Expanding Functionality like User Presence and Cursors
The real-time channel you’ve established with Firebase is a gateway to a host of rich, collaborative features that can transform your application from a simple data display into a dynamic workspace.
-
Live User Presence: Use Firebase’s built-in presence system (available in both Realtime Database and Firestore) to show who is currently active in your application. By writing a user’s status to a specific path and utilizing the
onDisconnecthandler to automatically remove it, you can easily display a list of active collaborators, similar to what you see in Google Docs. -
Real-time Cursors and Cell Selection: Elevate the collaborative experience by broadcasting transient states, like a user’s cursor position or their currently selected cell. When a user clicks a cell in your web app, you can write that coordinate (e.g.,
{ userId: 'user123', selection: 'C7' }) to a dedicated “presence” or “cursors” path in Firebase. All other clients listening to that path can then render that selection in their own UI, creating a true sense of shared space. -
Change History and Auditing: Since every edit is now an event, you can easily pipe these events into a logging or auditing system. Create a separate Cloud Function that listens for writes to your Firebase database and records a timestamp, the user responsible (if you’ve implemented authentication), and the data that was changed. This builds a complete, auditable history of your data’s lifecycle.
Scaling Your Solution for Enterprise Needs
This architecture is not just for hobby projects; it’s built on enterprise-grade services that are ready to scale. Here’s how to harden and prepare your solution for production environments:
-
Robust Security and Permissions:
-
Firebase Security Rules: Implement granular, server-side security rules to control precisely who can read or write data. For instance, you could structure your data by
sheetIdand write rules ensuring that only authenticated users who are part of a specific Automated Discount Code Management System group can access the corresponding data. -
Firebase App Check: Protect your backend from abuse by ensuring that requests are coming only from your legitimate application. App Check validates requests and helps prevent billing fraud or data tampering from unauthorized clients.
-
Service Account Scopes: In your Google Cloud Function and Apps Script, ensure your service accounts and OAuth scopes are configured with the principle of least privilege. They should only have the permissions they absolutely need to function.
-
Observability and Monitoring:
-
Google Cloud’s Operations Suite: Your Apps Script executions and Cloud Function invocations produce logs and metrics. Use Cloud Logging to debug issues and Cloud Monitoring to set up alerts for error spikes or unusual latencies.
-
Firebase Monitoring: Keep a close eye on your Firebase usage dashboards to monitor database reads/writes, active connections, and overall performance.
-
Data Sharding and Architecture:
-
If you plan to sync many different Google Sheets, avoid placing all the data in a single, monolithic document or path. Instead, structure your Firebase database to shard data by a unique identifier, such as the
sheetId. For example:/sheets/{sheetId}/dataand/sheets/{sheetId}/metadata. This approach improves query performance and allows for more targeted security rules.


Stop Doing Manual Work. Scale with AI.
Want to turn these blog concepts into production-ready reality for your team?
Table Of Contents
Portfolios
Related Posts
Quick Links
Legal Stuff