

Automate PagerDuty Incident Response from Google Chat with Apps Script


While everyone focuses on resolution time, the real battle is won or lost in the critical seconds it takes for a human to simply acknowledge an alert.

The High Cost of Latency in Incident Response
In the world of digital services, time is more than just money—it’s user trust, system stability, and brand reputation. When an incident occurs, every second that passes between detection and resolution magnifies the potential impact. This initial period, often characterized by a flurry of notifications and a scramble for context, is where the most critical battles are won or lost. Latency in your response process isn’t just an inconvenience; it’s a direct threat to your Service Level Objectives (SLOs) and, ultimately, your business.
Why Mean Time to Acknowledge (MTTA) is a Critical SRE Metric
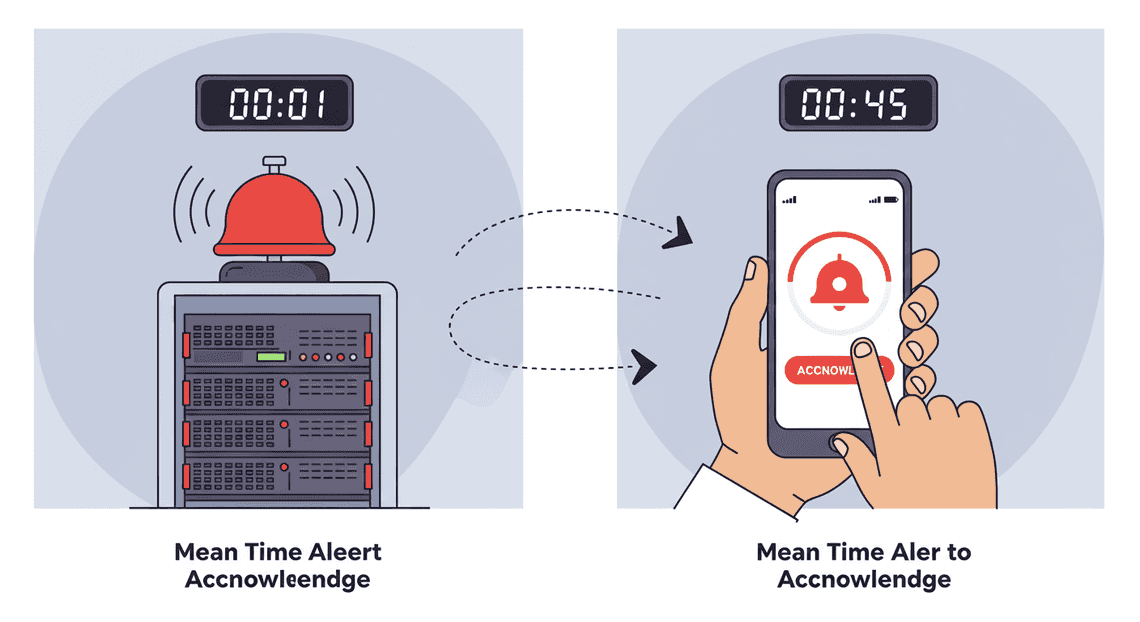
Before an incident can be resolved (MTTR), it must first be seen and owned. This is the essence of Mean Time to Acknowledge (MTTA). It measures the average time from when an alert is first triggered to when a human responder formally acknowledges it, signaling, “I’m on it.”
While MTTR often gets the spotlight, MTTA is arguably the more foundational metric for evaluating the health of an on-call process. Here’s why it’s so critical:
- It’s the Starting Gun for Resolution: The resolution clock doesn’t truly start until someone takes ownership. A high MTTA directly inflates your MTTR, as diagnosis and mitigation can’t begin on an ignored alert. Think of it as a fire alarm: the time it takes for the fire department to get the call and dispatch a truck is a critical component of the total time it takes to put out the fire.
-
It Measures Alerting Effectiveness: A consistently high MTTA can be a symptom of deeper problems. Are your alerts too noisy, leading to notification fatigue? Are they being routed to the wrong person or team? Are the on-call engineers equipped with the right tools to receive and process alerts efficiently, regardless of where they are?
-
It Reflects Team Responsiveness: MTTA is a direct measure of your team’s ability to react. It quantifies the friction in your initial response workflow. Reducing this friction is a key lever for improving overall incident management performance and reducing on-call burnout.
In short, minimizing MTTA is the first and most impactful step you can take to shorten the lifecycle of an incident.
The Challenge of Manual Alert Triage and Escalation
Let’s trace the journey of a typical PagerDuty alert in a manual workflow. An alert fires at 2 AM. A notification hits the on-call engineer’s phone. They wake up, find their phone, and see the alert. To do anything meaningful, they need more context. This requires them to find their laptop, open it, log in, navigate to the PagerDuty UI, and perhaps open several other dashboards for metrics and logs.
This manual process is riddled with inherent delays and friction points:
-
Context Switching: The engineer must shift from a state of rest (or deep work on another task) into a high-stakes, analytical mindset. This cognitive load takes time.
-
Tool Sprawl: The necessary information is often scattered across multiple systems—PagerDuty for the alert, Slack or Chat for communication, Grafana for metrics, and Kibana for logs. Each jump between tools adds precious seconds and increases the chance of missing a key piece of information.
-
Mobile Bottlenecks: While acknowledging an alert from a mobile app is simple, performing any real triage is cumbersome. The small screen and lack of a proper keyboard make it difficult to query logs or analyze complex dashboards.
-
Escalation Delays: If the first responder determines they need help, a new manual process begins. They have to look up who to escalate to, decide on the best way to contact them (another PagerDuty trigger? A direct message?), and then manually transfer all the context they’ve gathered so far.
Each of these steps introduces latency, turning what could be a 30-second acknowledgment into a 5- or 10-minute ordeal. When your service is down, those minutes are an eternity.
Our Solution: A Serverless [Automated Job Creation in Real Time Jobber and Google Sheets Integration from Gmail](https://votuduc.com/Automated-Job-Creation-in-Jobber-from-Gmail-p115606) Using [Automatically create new folders in Google Drive, generate templates in new folders, fill out text automatically in new files, and save info in [Automated Web Scraping with [Multilingual Text-to-Speech Tool with SocialSheet Streamline Your Social Media Posting 123](https://votuduc.com/Multilingual-Text-to-Speech-Tool-with-Google-Workspace-p809282)](https://votuduc.com/Automated-Web-Scraping-with-Google-Sheets-p292968)](https://workspace.google.com/marketplace/app/auto_create_folder_and_files/430076014869) and PagerDuty
To slash MTTA and streamline the entire incident response lifecycle, we need to bring the tools to the engineer, not the other way around. Our solution tackles this problem head-on by building a serverless Automated Quote Generation and Delivery System for Jobber that deeply integrates PagerDuty with Google Chat, powered by [AI Powered Cover Letter Automated Work Order Processing for UPS Engine](https://votuduc.com/AI-Powered-Cover-Letter-Automation-Engine-p111092).
Here’s the high-level architecture:
-
PagerDuty Webhooks: When an incident is triggered in PagerDuty, it sends a webhook payload containing all the critical incident data.
-
Genesis Engine AI Powered Content to Video Production Pipeline Web App: A simple, serverless web app built in Apps Script acts as the endpoint for the PagerDuty webhook. It requires no server management and lives entirely within the AC2F Streamline Your Google Drive Workflow ecosystem.
-
Google Chat API: Upon receiving the webhook, the Apps Script function parses the data and uses the Chat API to construct a rich, interactive card message. This card is then posted to a dedicated incident response room in Google Chat.
This approach transforms the workflow. Instead of a simple notification, the on-call engineer receives a message in Google Chat containing:
-
Key Incident Details: Service name, incident title, severity, and a summary.
-
Deep Links: Direct links to the PagerDuty incident and relevant monitoring dashboards.
-
Interactive Buttons: Actionable buttons to Acknowledge, Escalate, or Resolve the incident directly from the chat interface.
By embedding these actions within the collaboration tool where the team is already communicating, we eliminate the friction of context switching and tool sprawl. Acknowledgment becomes a single click, immediately stopping the MTTA clock and signaling to the entire team that the incident is being handled. This is the foundation for a faster, more efficient, and less stressful incident response process.
System Architecture: The End-to-End Alerting Flow
Before we dive into the code, let’s zoom out and look at the big picture. A solid understanding of the architecture is crucial for building, debugging, and extending any system. Our solution is a classic example of a “glue code” integration, connecting three distinct services into a seamless workflow. It’s elegant, serverless, and surprisingly powerful.
At its core, the system translates a human-readable command in a chat interface into a machine-readable API call that triggers a formal incident response process. Let’s break down the three key components that make this possible.
Component 1: Google Chat as the Human Interface
This is where the entire process begins. For our purposes, Google Chat is more than just a messaging platform; it’s our command-line interface (CLI) for incident management.
-
The Trigger: The workflow is initiated by a user typing a specific slash command (e.g.,
/pagerduty create ...) into a Google Chat room where our bot is installed. -
The Interface: The bot provides immediate feedback, posting confirmation messages, error details, or interactive cards directly into the chat stream. This keeps the entire interaction contextual and visible to the whole team.
-
The Payload: When a user invokes a slash command, Google Chat doesn’t just send the text. It packages the entire interaction—including information about the user, the chat space, and the command parameters—into a structured JSON object called an “Interaction Event.” This event payload is then sent via an HTTP POST request to a pre-configured endpoint, which leads us to our next component.
Component 2: [Architecting Multi Tenant AI Workflows in Building Modular Agentic Apps Script with Gemini Function Calling](https://votuduc.com/architecting-multi-tenant-ai-workflows-in-google-apps-script-p-20260321290501) as the Serverless Middleware
Google Apps Script is the heart of our operation. It’s the serverless “glue” that listens for events from Google Chat and orchestrates the actions with PagerDuty. Think of it as a dedicated, highly-specialized translator and router.
-
Serverless Function: We will deploy our Apps Script code as a “Web App.” This provides us with a unique URL that acts as a public HTTPS endpoint. We don’t need to provision servers, manage runtimes, or worry about scaling—Google handles it all.
-
The Event Handler: This Web App URL is what we’ll register with our Google Chat App. When a user interacts with our bot, Google Chat sends its JSON event payload directly to this URL, triggering our script’s main
doPost(e)function. -
The Logic Core: Inside the script, we’ll write JavaScript code to:
-
Parse: Read and validate the incoming JSON payload from Google Chat.
-
Transform: Extract the necessary details (like incident title, service, and urgency) from the user’s command.
-
Authenticate: Securely retrieve the PagerDuty API key (which we’ll store in Apps Script’s secure Properties Service).
-
Communicate: Construct and send a formatted REST API request to PagerDuty.
-
Respond: Process the response from PagerDuty and formulate a clear, concise message to send back to the Google Chat room, closing the feedback loop.
Component 3: PagerDuty API as the Incident Management Endpoint
PagerDuty is our system of record for on-call schedules, escalation policies, and incident tracking. We’ll interact with it programmatically through its robust REST API.
-
The Endpoint: Our Apps Script will be making a
POSTrequest to the PagerDuty/incidentsendpoint. This is the standard way to programmatically trigger a new incident. -
Authentication: The PagerDuty API is protected. Every request we send must include a valid API key in the authorization headers. We will generate a key with the appropriate permissions within the PagerDuty UI.
-
The Contract: To create an incident, we must send a JSON payload that conforms to PagerDuty’s specifications. This payload will contain the incident’s
title, theserviceit affects, itsurgency, and a descriptivebody, all of which are sourced from the original Google Chat command. PagerDuty takes this data, creates the incident, and kicks off the associated alert notifications and escalation policies.
Visualizing the Data Flow from Message to Alert
To tie it all together, let’s walk through the complete, step-by-step data flow from a user’s keystroke to a PagerDuty alert.
-
User Input: An engineer types
/pagerduty create "API latency is high" --service "Checkout API"into a Google Chat room. -
Chat Webhook: Google Chat sends an
INTERACTIONevent payload (a JSON object) via HTTP POST to our published Apps Script Web App URL. -
Apps Script Triggered: The
doPost(e)function in our Apps Script is executed. -
Payload Parsing: The script parses the JSON to identify the command (
create) and its arguments ("API latency is high","Checkout API"). -
API Request Construction: The script builds a new JSON object for the PagerDuty API, like
{ "incident": { "type": "incident", "title": "API latency is high", "service": { "id": "P123ABC", "type": "service_reference" } } }. It also adds theAuthorization: Token token=...header using a stored API key. -
Call to PagerDuty: Apps Script’s
UrlFetchAppservice sends this request tohttps://api.pagerduty.com/incidents. -
Incident Creation: PagerDuty receives the request, validates the API key, creates the incident, and begins notifying the on-call engineer for the “Checkout API” service.
-
API Response: PagerDuty sends a
201 Createdsuccess response back to Apps Script, including the ID and URL of the newly created incident. -
Feedback Formatting: Our script receives this success response and formats a user-friendly message, such as
"✅ Incident PD-451 created successfully. View on PagerDuty: [link]". -
Response to Chat: The script returns this message as a JSON response to the initial webhook from Google Chat.
-
UI Update: Google Chat renders this message as a new post from the bot in the room, confirming to the user and the team that the action was completed successfully.
Prerequisites and Environment Setup
Before we jump into the fun part—writing the code—we need to get our digital house in order. This involves setting up the necessary accounts, generating the API keys, and configuring the webhooks that will serve as the communication channels between Google Chat and PagerDuty. Let’s roll up our sleeves and get these foundational pieces in place.
Required Accounts and Permissions (Google Cloud, PagerDuty)
First, ensure you have the right access to the platforms we’ll be integrating.
-
Google Cloud / Automated Client Onboarding with Google Forms and Google Drive.:
-
You’ll need a Google Account (either a personal
@gmail.comaccount or a Automated Discount Code Management System account).
This account must have access to* Google Chat and Google Apps Script**. Apps Script is typically enabled by default, but in some corporate environments, a Workspace administrator may need to enable it for your organizational unit.
-
You need permission to create a new Google Chat space (or use an existing one) and add apps/integrations to it. If you can create a space and see the “Apps & integrations” option, you’re good to go.
-
PagerDuty:
-
You need an active PagerDuty account. A free trial account works perfectly for building and testing this integration.
You must have permissions to create and manage services and their integrations. Typically, users with an* Admin or Manager** base role, or a Team Manager with appropriate permissions, can perform these actions. If you’re unsure, check with your PagerDuty account administrator.
Generating a PagerDuty Events API v2 Integration Key
The PagerDuty Events API is how external tools can trigger, acknowledge, and resolve incidents. We need to create a specific integration on a PagerDuty service to get a unique key for our script. This key authorizes our script to create incidents.
-
Log in to your PagerDuty account.
-
Navigate to Services -> Service Directory.
-
You can either use an existing service or, for a cleaner setup, create a new one. Let’s create a new one:
Click the* New Service** button.
Give it a clear* Name**, like Google Chat Triage, and a Description.
Assign it to an existing* Escalation Policy**.
Click* Create Service**.
-
Once you are on your service’s page, click the Integrations tab.
-
Click the Add an integration button.
-
On the “Add an Integration” screen, search for and select Events API V2.
-
Give your new integration a descriptive name, such as
Google Chat Apps Script Integration, and click Add. -
The page will refresh, and you’ll see your new integration listed. The crucial piece of information here is the Integration Key.
Step-by-Step Implementation Guide
Alright, let’s roll up our sleeves and translate our plan into code. This is where the magic happens. We’ll build our solution piece by piece, starting with a blank script and ending with a fully deployed web app ready to receive events from Google Chat.
Step 1: Creating the Google Apps Script Project
First things first, we need a place to write our code. Google Apps Script provides a cloud-based IDE that’s perfect for this.
-
Navigate to the Google Apps Script dashboard: script.google.com.
-
Click on New project in the top-left corner.
-
You’ll be greeted with a clean editor containing a file named
Code.gsand an emptymyFunction. Let’s give our project a more descriptive name. Click on “Untitled project” and rename it to something like “PagerDuty ChatOps Bot”.
Your initial setup should look like this:
function myFunction() {

}
We can delete the default myFunction as we won’t be using it. Instead, we’ll create the primary function that will act as the endpoint for our web app. For a Google Chat bot, this function must be named doPost(e). This special function is automatically triggered whenever an HTTP POST request is sent to our script’s URL.
Let’s replace the content of Code.gs with our initial doPost handler. This initial version will simply receive the event from Google Chat, log it for inspection, and return a valid response.
/**

* Responds to POST requests from Google Chat.

*

* @param {Object} e The event parameter.

* @return {Object} a ContentService JSON response.

*/

function doPost(e) {

// Parse the incoming event data from Google Chat

const event = JSON.parse(e.postData.contents);

// Log the event payload for debugging purposes.

// You can view these logs in the "Executions" tab of the Apps Script editor.

console.log(JSON.stringify(event, null, 2));

// For now, we'll just return an empty JSON object.

// This acknowledges the event without posting a reply.

// Later, we will build a proper response message here.

return ContentService.createTextOutput(JSON.stringify({}))

.setMimeType(ContentService.MimeType.JSON);

}
This code is our foundation. The e parameter contains all the information about the request, including the JSON payload sent by Google Chat in e.postData.contents. We parse this JSON and log it so we can see exactly what data we’re receiving when a user interacts with our bot. Finally, we return an empty JSON object, which is the simplest valid response to acknowledge the event.
With our initial code in place, it’s time to deploy it.
Step 2: Deploying the Script as a Web App
To allow Google Chat to send events to our script, we must deploy it as a web app. This generates a unique URL that will serve as our bot’s endpoint.
-
Click the Deploy button in the top-right corner of the editor and select New deployment.
-
A dialog box will appear. Click the gear icon next to “Select type” and choose Web app.
-
In the configuration fields:
-
Description: Add a brief description, like “Version 1 - Initial PagerDuty Bot”.
-
Execute as: Select Me ([email protected]).
-
Who has access: This is a critical step. Set this to Anyone. This does not mean anyone can execute your script randomly; it means Google’s servers (acting on behalf of Google Chat) are authorized to invoke your
doPostfunction.
-
Click Deploy.
-
Google will ask you to authorize the script’s permissions. Click Authorize access, choose your Google account, and on the “Google hasn’t verified this app” screen, click Advanced and then Go to PagerDuty ChatOps Bot (unsafe). Finally, click Allow on the permissions screen.
-
Once the deployment is complete, you will be presented with a Web app URL. Copy this URL—we will need it in the next step to configure our bot in the Google Cloud Console.
Advanced Enhancements for Production Environments
A proof-of-concept is one thing; a production-ready tool is another. Our initial script works, but to rely on it during a real incident, we need to harden it. A production system must be resilient to failure, secure with its credentials, and deeply integrated into your existing workflows. Let’s elevate our script from a handy utility to a mission-critical piece of our response infrastructure.
Implementing Robust Error Handling and Logging
In the middle of an outage, the last thing you want is for your automation to fail silently. What happens if the PagerDuty API is temporarily unavailable, or a malformed command is sent from Chat? Without proper error handling, the script might simply stop, leaving your team in the dark.
We’ll implement this resilience using a standard try...catch block around our API calls. This ensures that if an error occurs, we can catch it, log it for later analysis, and provide immediate, useful feedback to the user in Google Chat.
For logging, Google Apps Script provides two primary methods: Logger.log() and console.log().
-
Logger.log(): Best for development. It writes logs that are easily viewable within the Apps Script editor’s execution log. However, these logs have a limited retention period. -
console.log(): The production standard. These logs are automatically sent to Google Cloud Logging, providing a powerful, searchable, and persistent logging solution where you can set up alerts and monitor long-term behavior.
Here’s how we can refactor our PagerDuty API call to be more robust:
function acknowledgePagerDutyIncident(incidentId, userEmail) {

const scriptProperties = PropertiesService.getScriptProperties();

const PAGERDUTY_API_KEY = scriptProperties.getProperty('PAGERDUTY_API_KEY');

const API_ENDPOINT = `https://api.pagerduty.com/incidents/${incidentId}`;

const payload = {

incident: {

type: 'incident_reference',

status: 'acknowledged'

}

};

const options = {

method: 'put',

contentType: 'application/json',

headers: {

'Authorization': `Token token=${PAGERDUTY_API_KEY}`,

'From': userEmail,

'Accept': 'application/vnd.pagerduty+json;version=2'

},

payload: JSON.stringify(payload),

muteHttpExceptions: true // This is crucial! It prevents the script from halting on non-2xx responses.

};

try {

const response = UrlFetchApp.fetch(API_ENDPOINT, options);

const responseCode = response.getResponseCode();

const responseBody = response.getContentText();

if (responseCode === 200) {

console.log(`Successfully acknowledged incident ${incidentId} for user ${userEmail}.`);

return { success: true, message: `Incident *${incidentId}* has been acknowledged.` };

} else {

// The API call was made, but PagerDuty returned an error.

console.error(`PagerDuty API Error for incident ${incidentId}. Status: ${responseCode}, Body: ${responseBody}`);

throw new Error(`PagerDuty API returned status ${responseCode}.`);

}

} catch (e) {

// A network error or other exception occurred.

console.error(`Failed to execute acknowledge request for incident ${incidentId}. Error: ${e.message}`);

console.error(e.stack); // Log the full stack trace for deep debugging.

return { success: false, message: `🚨 Error: Could not contact PagerDuty. Please check the logs or try again manually.` };

}

}
By setting muteHttpExceptions: true and checking the responseCode ourselves, we gain full control over the execution flow, allowing us to provide specific, helpful error messages directly in the Chat interface.
Securing API Keys with Apps Script’s Properties Service
Hardcoding API keys, tokens, or any other secrets directly into your source code is a major security risk. If the code is ever shared, checked into a public Git repository, or accessed by someone who shouldn’t have administrative privileges, your credentials are exposed.
The correct way to handle secrets in Apps Script is with the Properties Service, a built-in key-value store. We’ll use getScriptProperties(), which scopes the properties to the specific script project, making them inaccessible to other scripts and visible only to users with edit access.
To set up your script properties:
-
Open your Apps Script project.
-
Click on Project Settings (the gear icon ⚙️ on the left).
-
Scroll down to the Script Properties section and click Add script property.
-
Add the following key-value pairs:
-
Property:
PAGERDUTY_API_KEY| Value:u+AbcDefGHiJkL12345 -
Property:
PAGERDUTY_REQUESTER_EMAIL| Value:[email protected]
Now, you can access these values securely in your code:
// At the top of your script, or within the relevant function

function getPdApiKey() {

const scriptProperties = PropertiesService.getScriptProperties();

const apiKey = scriptProperties.getProperty('PAGERDUTY_API_KEY');

if (!apiKey) {

console.error('FATAL: PAGERDUTY_API_KEY script property is not set.');

throw new Error('PagerDuty API key is missing. Please configure it in Project Settings.');

}

return apiKey;

}

function getPdRequesterEmail() {

const scriptProperties = PropertiesService.getScriptProperties();

const email = scriptProperties.getProperty('PAGERDUTY_REQUESTER_EMAIL');

if (!email) {

console.error('FATAL: PAGERDUTY_REQUESTER_EMAIL script property is not set.');

throw new Error('PagerDuty requester email is missing. Please configure it in Project Settings.');

}

return email;

}

// Example usage in another function:

const PAGERDUTY_API_KEY = getPdApiKey();

const REQUESTER_EMAIL = getPdRequesterEmail();
This approach cleanly separates your configuration from your code, making your script more secure, maintainable, and portable.
Adding Two-Way Communication: Posting PagerDuty Updates Back to Chat
Our current integration is a one-way street: Chat commands trigger actions in PagerDuty. What if an engineer acknowledges an incident directly from the PagerDuty mobile app? Our Chat thread remains outdated, creating a fractured view of the incident’s status.
To achieve a true “single pane of glass,” we need two-way communication. We can accomplish this by deploying our Apps Script as a Web App and using PagerDuty webhooks to notify it of incident changes.
Step 1: Implement the doPost(e) function
When an Apps Script project is deployed as a web app, it requires a special doPost(e) (for POST requests) or doGet(e) (for GET requests) function to act as the entry point. PagerDuty webhooks use POST.
This function will parse the incoming webhook payload from PagerDuty, identify the event type (e.g., incident.acknowledge), and post an update to the corresponding Chat thread.
// This function handles incoming POST requests from PagerDuty webhooks

function doPost(e) {

try {

const payload = JSON.parse(e.postData.contents);

const event = payload.event; // PagerDuty v3 webhooks have a single event object

if (!event) {

console.warn('Received webhook with no event data.');

return ContentService.createTextOutput(JSON.stringify({ status: 'ignored' }));

}

const incidentId = event.data.id;

const incidentTitle = event.data.title;

// Find the Chat thread associated with this incident

const threadId = getChatThreadForIncident(incidentId);

if (!threadId) {

console.warn(`Received PagerDuty event for incident ${incidentId} but could not find a matching Chat thread.`);

return ContentService.createTextOutput(JSON.stringify({ status: 'no_thread_found' }));

}

let messageText;

switch (event.event_type) {

case 'incident.acknowledged':

const acknowledger = event.data.acknowledgements[0].acknowledger.summary;

messageText = `✅ Incident *${incidentTitle} *was acknowledged by* ${acknowledger}* via PagerDuty.`;

break;

case 'incident.resolved':

const resolver = event.data.assignments[0].assignee.summary; // Or find resolver from resolution event

messageText = `🎉 Incident *${incidentTitle} *was resolved by* ${resolver}* via PagerDuty.`;

break;

// Add more cases for other events like 'incident.annotated'

default:

return ContentService.createTextOutput(JSON.stringify({ status: 'event_not_handled' }));

}

postUpdateToChat(threadId, messageText);

return ContentService.createTextOutput(JSON.stringify({ status: 'success' }));

} catch (err) {

console.error(`Error processing PagerDuty webhook: ${err.toString()}`);

// Always return a 200 OK to PagerDuty to prevent it from retrying a failing webhook.

return ContentService.createTextOutput(JSON.stringify({ status: 'error', message: err.toString() }));

}

}

// Helper function to manage the incident-to-thread mapping

function storeChatThreadForIncident(incidentId, threadId) {

PropertiesService.getScriptProperties().setProperty(incidentId, threadId);

}

function getChatThreadForIncident(incidentId) {

return PropertiesService.getScriptProperties().getProperty(incidentId);

}
Step 2: Deploy as a Web App
-
In the Apps Script editor, click Deploy > New deployment.
-
Select Web app as the deployment type.
-
In the configuration:
-
Give it a description (e.g., “PagerDuty Webhook Handler”).
-
Execute as: “Me”.
-
Who has access: “Anyone” (PagerDuty’s servers need to be able to reach this URL without authentication). This is secure because the URL is long and unguessable.
- Click Deploy. Copy the provided Web app URL.
Step 3: Configure the Webhook in PagerDuty
-
In PagerDuty, go to Integrations > Generic Webhooks (v3).
-
Click New Webhook.
-
Paste the Web app URL you copied into the Webhook URL field.
-
Select the Scope (e.g., a specific service or the entire account).
-
Under Event Subscription, choose the events you want to be notified about, such as
incident.acknowledgedandincident.resolved. -
Click Add Webhook.
Now, when an incident is updated in PagerDuty, it will send a payload to your script, which will update the Google Chat thread, keeping everyone perfectly in sync.
Extending the Logic to Integrate with Jira for Ticket Creation
The final step in many incident response workflows is creating a follow-up ticket for a post-mortem, root cause analysis, or bug fix. We can embed this action directly into our Google Chat card.
This requires adding a new button to our card and writing a function to call the Jira Cloud REST API.
Step 1: Add Jira Credentials to Properties Service
Just like with PagerDuty, store your Jira credentials securely. You’ll need an API token generated from your Atlassian account settings.
-
JIRA_URL:https://your-domain.atlassian.net -
JIRA_USER_EMAIL:[email protected] -
JIRA_API_TOKEN:YourSuperSecretJiraApiToken -
JIRA_PROJECT_KEY:PROJ(The key for your Jira project)
Step 2: Write the Jira Ticket Creation Function
This function will construct and send a request to Jira’s /rest/api/3/issue endpoint.
function createJiraTicket(e) {

const incidentId = e.parameters.incidentId;

const incidentTitle = e.parameters.incidentTitle;

const scriptProperties = PropertiesService.getScriptProperties();

const JIRA_URL = scriptProperties.getProperty('JIRA_URL');

const JIRA_USER_EMAIL = scriptProperties.getProperty('JIRA_USER_EMAIL');

const JIRA_API_TOKEN = scriptProperties.getProperty('JIRA_API_TOKEN');

const JIRA_PROJECT_KEY = scriptProperties.getProperty('JIRA_PROJECT_KEY');

const endpoint = `${JIRA_URL}/rest/api/3/issue`;

const payload = {

fields: {

project: { key: JIRA_PROJECT_KEY },

summary: `[PD Incident] ${incidentTitle}`,

description: {

type: "doc",

version: 1,

content: [{

type: "paragraph",

content: [{

type: "text",

text: `This ticket was automatically created for PagerDuty incident ${incidentId}. Please conduct a root cause analysis and document follow-up actions.`

}]

}]

},

issuetype: { name: "Task" } // Or "Bug", "Story", etc.

}

};

const options = {

method: 'post',

contentType: 'application/json',

headers: {

'Authorization': 'Basic ' + Utilities.base64Encode(`${JIRA_USER_EMAIL}:${JIRA_API_TOKEN}`)

},

payload: JSON.stringify(payload),

muteHttpExceptions: true

};

try {

const response = UrlFetchApp.fetch(endpoint, options);

const responseCode = response.getResponseCode();

const responseBody = response.getContentText();

if (responseCode === 201) { // 201 Created is the success code for Jira issue creation

const responseData = JSON.parse(responseBody);

const ticketKey = responseData.key;

const ticketUrl = `${JIRA_URL}/browse/${ticketKey}`;

const message = `✅ Successfully created Jira ticket: <${ticketUrl}|${ticketKey}>`;

// We can even update the original card to replace the "Create Ticket" button

// with a link to the newly created ticket.

return { "actionResponse": { "type": "UPDATE_MESSAGE", "cardsV2": [ createUpdatedCardWithJiraLink(ticketUrl, ticketKey) ] } };

} else {

console.error(`Jira API Error. Status: ${responseCode}, Body: ${responseBody}`);

return { "text": `🚨 Failed to create Jira ticket. Status: ${responseCode}.` };

}

} catch (e) {

console.error(`Failed to execute Jira request. Error: ${e.message}`);

return { "text": `🚨 An error occurred while contacting Jira.` };

}

}
Step 3: Update Your Chat Card
Finally, add a button to your incident card that invokes this new function.
{

"widgets": [

{

"buttonList": {

"buttons": [

// ... your existing Acknowledge and Resolve buttons ...

{

"text": "Create Jira Ticket",

"onClick": {

"action": {

"function": "createJiraTicket",

"parameters": [

{ "key": "incidentId", "value": "P12345" },

{ "key": "incidentTitle", "value": "Database CPU is high" }

]

}

}

}

]

}

}

]

}
With this final piece, you’ve created a comprehensive, secure, and resilient incident management hub directly within Google Chat, bridging the gap between alerting, communication, and ticketing.
Conclusion: Slashing MTTA with ChatOps
You’ve just engineered a powerful bridge between your PagerDuty alerting and your team’s primary communication hub, Google Chat. This isn’t just a technical exercise; it’s a fundamental improvement to your incident response posture. By bringing critical actions directly into the conversation, you’ve laid the groundwork for a more efficient, less stressful on-call experience. The core principle of ChatOps is to manage infrastructure and operations through a chat-based interface, and you’ve successfully implemented a high-value piece of it. Let’s break down the impact and what comes next.
Measuring the Impact on Your Incident Response Workflow
A new tool is only as good as its measurable results. The automation you’ve built directly targets one of the most critical incident response metrics: Mean Time to Acknowledge (MTTA). But the benefits don’t stop there. To truly understand the ROI of this project, start tracking these key performance indicators (KPIs):
-
Mean Time to Acknowledge (MTTA): This is your primary success metric. Before this integration, how long did it take from the moment a PagerDuty alert fired to the moment an engineer acknowledged it? Compare your historical data with the data you collect over the next month. You should see a dramatic reduction as engineers can now acknowledge incidents with a single click, without ever leaving their chat client.
-
Mean Time to Resolve (MTTR): While this solution doesn’t automatically fix the underlying issue, it accelerates the entire response process. Faster acknowledgment means the right people are engaged sooner. The immediate creation of a dedicated incident space with relevant details reduces the initial scramble and context-switching, allowing your team to focus on diagnosis and resolution more quickly.
-
Engineer Toil and On-Call Health: This is a qualitative but crucial metric. Survey your on-call engineers. Are they experiencing less friction? Does the new workflow reduce the cognitive load of juggling multiple applications during a high-stress event? A happier, more focused on-call team is a more effective one. Reducing toil is key to preventing burnout and maintaining a sustainable operational tempo.
Recap of the Low-Cost, High-Impact Solution You Built
Let’s quickly revisit the elegance of this architecture. You’ve created a robust, event-driven system by connecting just a few key components, most of which you likely already use.
-
PagerDuty Webhooks: The reliable, real-time trigger that kicks off the entire process the moment an incident occurs.
-
Google Apps Script: The serverless, zero-infrastructure core of our solution. Deployed as a Web App, it acts as the intelligent middleware that receives the webhook, parses the data, and communicates with Google Chat. The beauty here is its cost-effectiveness—it runs on Google’s infrastructure and fits comfortably within the generous free tier for most teams.
-
Google Chat API: By leveraging interactive cards, you’ve transformed a simple notification into a dynamic control panel. This allows for rich, context-aware actions like Acknowledge, Resolve, and Add Responder, turning your chat room into a command center.
You didn’t need to spin up a new server, manage a container, or pay for a new SaaS platform. You leveraged the power of the tools already at your disposal to build a solution with an outsized impact on your team’s daily operations.
Ready to scale your architecture? Book a solution discovery call with Vo Tu Duc to audit your specific business needs.
The solution you’ve built is a fantastic and powerful starting point that will solve immediate pain points for many teams. But as your organization grows, your incident response needs will become more complex. You might start asking bigger questions:
-
How can we automatically update a public status page?
-
Can we trigger a diagnostic runbook directly from Google Chat?
-
How do we integrate this workflow with our ticketing system like Jira for post-mortem tracking?
-
What’s the best way to handle multi-service incidents or coordinate across different teams and time zones?
These challenges require a more holistic architectural approach, considering security, scalability, and integration with a wider ecosystem of tools. If you’re ready to take your operational automation to the next level, a tailored strategy is your best path forward.
Book a solution discovery call with Vo Tu Duc to get an expert audit of your specific business needs and build a roadmap for a truly world-class incident management platform.


Stop Doing Manual Work. Scale with AI.
Want to turn these blog concepts into production-ready reality for your team?
Table Of Contents
Portfolios
Related Posts
Quick Links
Legal Stuff