

Building an Enterprise RAG System with Google Drive and Vertex AI


Standard search is fundamentally broken for enterprise Google Drive, leaving your company’s most critical knowledge buried and inaccessible.

The Buried Knowledge Problem in Enterprise Google Drive
Every organization has one: a sprawling digital attic in the form of a Google Drive. It starts innocently enough—a few shared folders for a new project. Years later, it’s a labyrinth of nested directories, containing terabytes of documents, spreadsheets, presentations, and PDFs. This is the digital manifestation of your company’s collective brain, holding everything from Q3 2018 marketing post-mortems to the original engineering specs for your flagship product.
The problem? Standard search is fundamentally broken for this kind of knowledge discovery. A keyword search for “customer churn analysis” might return hundreds of documents. You’ll get the final report, the draft report, the presentation summarizing the report, ten different spreadsheets with raw data, and a dozen meeting notes where it was briefly mentioned. Finding the specific insight you need—the one sentence summarizing the key reason for churn in the EMEA region—is like finding a needle in a digital haystack. This isn’t just an inconvenience; it’s a massive, ongoing drain on productivity and a barrier to informed decision-making.
Why unstructured data in shared drives is an untapped asset
It’s tempting to view this digital clutter as a liability, but that’s the wrong perspective. This vast repository of unstructured data is one of your company’s most valuable, yet chronically underutilized, assets. Buried within those Docs, Slides, and PDFs is the very essence of your business:
-
Institutional Memory: Why was a critical decision made two years ago? The answer is likely in a meeting notes doc.
-
Strategic Insights: What did the competitive analysis from the last product launch reveal? It’s probably in a slide deck.
-
Technical Knowledge: How did the engineering team solve that obscure scaling issue? The solution is detailed in a design document.
-
Process and Policy: What is the official procedure for new vendor onboarding? It’s outlined in a PDF, somewhere.
The challenge isn’t a lack of information; it’s a lack of access. Traditional tools allow us to retrieve documents, but what we actually need is to retrieve answers. We need a system that can read, understand, and synthesize information from across this entire corpus to provide a single, coherent response to a natural language question.
Introducing Retrieval-Augmented Generation (RAG) as the solution
This is where Retrieval-Augmented Generation (RAG) enters the picture. RAG is not just another search tool; it’s a sophisticated architecture that bridges the gap between the raw power of Large Language Models (LLMs) and the specific, proprietary knowledge of your enterprise.
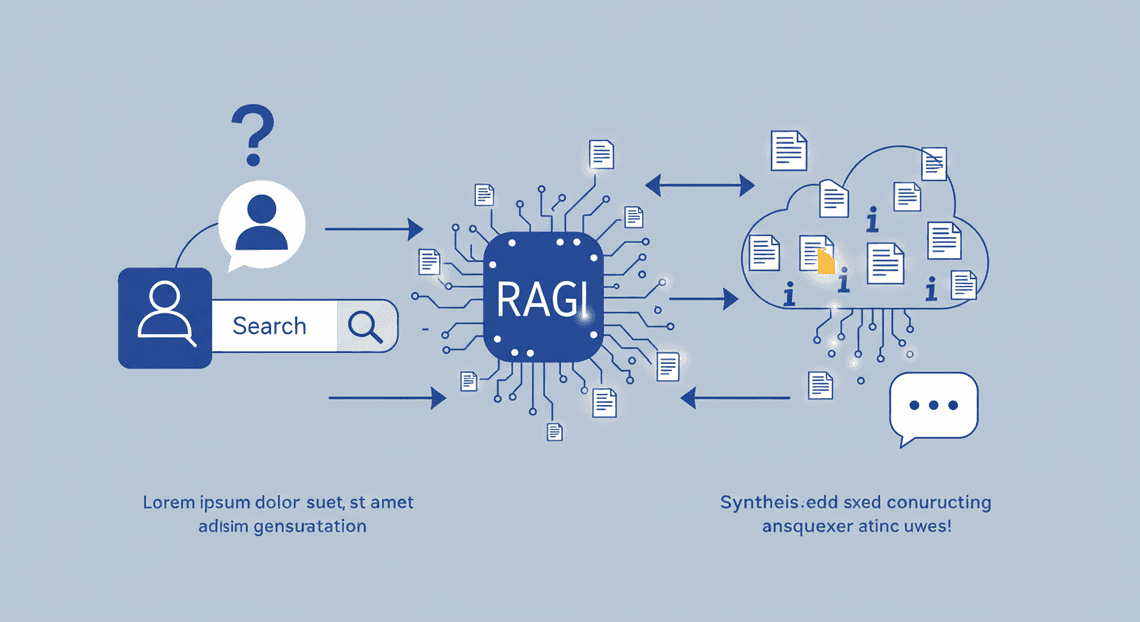
At its core, RAG transforms the interaction from “finding a document” to “having a conversation with your documents.”
-
**Retrieval: When you ask a question (e.g., “What were the key security concerns raised during the Project Phoenix launch?”), the system doesn’t just do a keyword search. It uses a technique called semantic search to find the most conceptually relevant chunks of text from all the documents in your Drive, even if they don’t contain your exact keywords.
-
Augmentation: The system then takes these relevant text snippets and packages them as context. It effectively tells the LLM, “Here is the user’s question. Before you answer, you MUST use the following information from our internal documents as your source of truth.”
-
Generation: The LLM, now grounded in your company’s specific data, generates a concise, accurate answer. Instead of hallucinating or providing generic public information, it synthesizes a response directly from the provided context, often with citations pointing back to the source documents.
The result is a powerful new capability: an expert assistant that has read every document your company has ever produced and can answer questions about them instantly.
Our technical blueprint: [AI Powered Cover Letter [Automated Job Creation in Real Time Jobber and Google Sheets Integration from Gmail](https://votuduc.com/Automated-Job-Creation-in-Jobber-from-Gmail-p115606) Engine](https://votuduc.com/AI-Powered-Cover-Letter-Automated Quote Generation and Delivery System for Jobber-Engine-p111092), Building Self Correcting Agentic Workflows with Vertex AI, and Drive
To turn this concept into a reality, we’ll build a robust, scalable system using a tightly integrated stack of Google technologies. This isn’t a theoretical exercise; it’s a practical blueprint for building a production-ready RAG pipeline.
Here are the core components and their roles in our architecture:
-
Google Drive: This is our knowledge base. It’s the source of truth containing all the unstructured documents we want to make searchable and conversational.
-
Genesis Engine AI Powered Content to Video Production Pipeline: This is the powerful, serverless “glue” that orchestrates our data pipeline. We’ll use it to programmatically scan Drive, extract text from documents (Docs, Slides, PDFs), and trigger the indexing process. Its native integration with the [Automatically create new folders in Google Drive, generate templates in new folders, fill out text automatically in new files, and save info in [Automated Web Scraping with [Multilingual Text-to-Speech Tool with SocialSheet Streamline Your Social Media Posting 123](https://votuduc.com/Multilingual-Text-to-Speech-Tool-with-Google-Workspace-p809282)](https://votuduc.com/Automated-Web-Scraping-with-Google-Sheets-p292968)](https://workspace.google.com/marketplace/app/auto_create_folder_and_files/430076014869) ecosystem makes it the perfect tool for the job.
-
Vertex AI: This is the AI/ML powerhouse at the heart of our system. We will leverage three key services:
-
Embedding Models (
text-embedding-gecko): This service will convert our chunks of text into numerical representations, or “vectors,” that capture their semantic meaning. -
Vector Search: A high-performance, managed vector database. We will store all our text vectors here, enabling lightning-fast semantic search to find the most relevant context for any given query.
-
Generative Models (Gemini): This is the LLM that will take the user’s question and the retrieved context from Vector Search to generate the final, human-readable answer.
By combining these services, we can build a secure and powerful system that unlocks the immense value buried within your Google Drive, transforming it from a passive storage archive into an active, intelligent knowledge resource.
Architecting the RAG Pipeline in AC2F Streamline Your Google Drive Workflow
Before we dive into writing a single line of code, let’s map out the architecture. Building a robust RAG system isn’t just about connecting an LLM to a data source; it’s about designing a thoughtful, efficient pipeline for how data flows from its source into the model’s “awareness.” In our case, this means bridging the gap between the collaborative, unstructured world of Google Drive and the powerful, structured intelligence of Vertex AI.
A high-level overview of the data ingestion and retrieval flow
Our architecture is best understood as two distinct, asynchronous processes: the Ingestion Pipeline (how we learn from your documents) and the Retrieval Pipeline (how we answer questions).
Phase 1: Data Ingestion & Indexing
This is the background process that continuously reads your Google Drive, processes the content, and stores it in a searchable format. The goal is to create a knowledge base that our AI can query in real-time.
-
Trigger & Scan: An automated process (e.g., a time-based [Architecting Multi Tenant AI Workflows in Building Modular Agentic Apps Script with Gemini Function Calling](https://votuduc.com/architecting-multi-tenant-ai-workflows-in-google-apps-script-p-20260321290501) trigger) initiates a scan of a designated Google Drive folder.
-
Content Extraction: The script identifies new or modified files (Google Docs, Sheets, Slides, PDFs, etc.) and extracts their raw text content.
-
Chunking: The extracted text from each document is broken down into smaller, semantically coherent chunks. This is critical because LLMs have context limits, and searching over smaller chunks yields more precise results.
-
Embedding Generation: Each text chunk is sent to a Vertex AI text-embedding model (like
text-embedding-004). The model converts the text into a high-dimensional numeric vector, capturing its semantic meaning. -
Upsert to Vector Store: The text chunk and its corresponding vector embedding are “upserted” (updated or inserted) into a specialized database, Vertex AI Vector Search. This database is optimized for lightning-fast similarity searches on these vectors.
Phase 2: Querying & Generation
This is the interactive process that happens when a user asks a question.
-
User Query: A user submits a question through a front-end application (which could be a simple web app, a Google Chat bot, or even a tool integrated into a Google Sheet).
-
**Query Embedding: The user’s question is sent to the same Vertex AI embedding model used in the ingestion phase to convert it into a vector.
-
Similarity Search: This query vector is used to search the Vertex AI Vector Search index. The database returns the
kmost similar document chunks (e.g., the top 5 chunks whose vectors are closest to the query vector). This is the “Retrieval” in RAG. -
Prompt Augmentation: The original user query and the retrieved text chunks are combined into a carefully crafted prompt. For example:
"Based on the following context, answer the user's question. Context: [Chunk 1 Text] [Chunk 2 Text]... Question: [User's Original Question]". -
LLM Generation: This augmented prompt is sent to a powerful generative model in Vertex AI, like Gemini 1.0 Pro. The model uses the provided context to formulate a comprehensive, accurate answer. This is the “Generation” in RAG.
-
Response Delivery: The final answer is sent back to the user, ideally with citations or links back to the source Google Drive documents from which the context was retrieved.
Key components: DriveApp for access, Vertex AI for intelligence
This entire architecture hinges on the seamless integration of two core Google ecosystems.
-
Google Apps Script (
DriveApp): This is the connective tissue of our pipeline. Apps Script is a serverless JavaScript platform that lives inside Automated Client Onboarding with Google Forms and Google Drive.. It gives us native, authenticated access to services like Google Drive, Docs, and Sheets. We’ll useDriveAppto orchestrate the entire ingestion pipeline—iterating through files, reading their content, and managing metadata—without needing to manage complex OAuth 2.0 flows from an external server. It’s the perfect tool for securely interacting with our enterprise data at its source. -
Vertex AI: This is the powerhouse of our system, providing the machine learning capabilities needed for state-of-the-art RAG. We’ll specifically leverage three of its core services:
-
Text Embedding Models: These foundational models are the key to semantic understanding. They turn words and sentences into vectors, allowing us to find documents based on conceptual similarity, not just keyword matching.
-
Vector Search: This is our high-performance memory. A fully managed vector database built for speed and scale, it allows us to store millions of document embeddings and find the most relevant ones in milliseconds.
-
Generative LLMs (Gemini): This is the reasoning engine. After retrieving the relevant context from Vector Search, we hand it off to a model like Gemini to synthesize, summarize, and formulate a final, human-readable answer that directly addresses the user’s query.
Prerequisites: Setting up your Google Cloud and Workspace environment
Before you can start building, you need to ensure your digital workspace is properly configured. This involves setting up resources in both Google Cloud (for the AI) and Automated Discount Code Management System (for the data).
Google Cloud Platform (GCP) Setup
-
Active GCP Project: You’ll need a Google Cloud project with billing enabled. Many of the Vertex AI services we’ll use are not covered by the free tier.
-
Enable APIs: In your GCP project, navigate to the API Library and enable the Vertex AI API.
-
Create a Service Account: To allow Google Apps Script to securely call Vertex AI APIs, you need to create a service account.
-
Navigate to “IAM & Admin” > “Service Accounts”.
-
Create a new service account.
Grant it the* Vertex AI User** role. This provides sufficient permissions to generate embeddings and query models.
- Create and download a JSON key for this service account. Treat this file like a password; you will need its contents to authenticate from Apps Script.
Automated Email Journey with Google Sheets and Google Analytics Setup
-
Google Drive Folder: Create a dedicated folder in Google Drive. This folder will be the source of truth for your RAG system. Populate it with a few sample documents (e.g., Google Docs, PDFs) to use for testing.
-
Google Apps Script Project: Create a new, standalone Apps Script project by visiting
script.google.com. This is where we will write the code to orchestrate the ingestion pipeline. No special configuration is needed at this stage, but you must have the necessary permissions within your organization to create and run scripts.
Step 1 Ingesting and Chunking Drive Content with Apps Script
Our journey begins at the source: Google Drive. To build an effective RAG system, we first need a robust pipeline to extract text from our enterprise documents. Google Apps Script is the perfect tool for this job. It’s a serverless JavaScript platform that runs directly within the Automated Google Slides Generation with Text Replacement ecosystem, giving us native, authenticated access to services like Drive and Docs without the hassle of managing OAuth 2.0 flows.
In this step, we’ll write an Apps Script function that acts as our ingestion engine. It will scan a designated Drive folder, parse the content from various file types, and break that content down into digestible, embedding-ready chunks.
Using DriveApp to iterate through target files and folders
The cornerstone of our script is the DriveApp service, Apps Script’s built-in library for interacting with Google Drive. Our goal is to create a recursive function that can start at a specific “root” folder and systematically process every file and subfolder it contains. This ensures that our RAG system can ingest knowledge from a complex, nested directory structure, which is typical in an enterprise setting.
First, you’ll need to create a new Apps Script project. You can do this by going to script.google.com.
Here’s the foundational code for iterating through your Drive content. We’ll define a main function ingestDriveFolder and a recursive helper processFolder.
// The ID of the root folder in Google Drive you want to ingest.

// To get this, open the folder in Drive and copy the ID from the URL.

// e.g., https://drive.google.com/drive/folders/1a2b3c4d5e6f7g8h9i0j

const ROOT_FOLDER_ID = "YOUR_ROOT_FOLDER_ID_HERE";

/**

* Main function to kick off the ingestion process.

*/

function ingestDriveFolder() {

if (ROOT_FOLDER_ID === "YOUR_ROOT_FOLDER_ID_HERE") {

Logger.log("ERROR: Please set the ROOT_FOLDER_ID variable.");

return;

}

try {

const rootFolder = DriveApp.getFolderById(ROOT_FOLDER_ID);

const processedData = processFolder(rootFolder);

// In a full pipeline, you would send this data to be embedded and stored.

// For now, we'll just log the count.

Logger.log(`Processing complete. Total chunks generated: ${processedData.length}`);

// Logger.log(JSON.stringify(processedData, null, 2)); // Uncomment to inspect the output

} catch (e) {

Logger.log(`An error occurred: ${e.toString()}`);

}

}

/**

* Recursively processes a folder, extracting text from files and traversing subfolders.

* @param {GoogleAppsScript.Drive.Folder} folder The folder to process.

* @return {Array<Object>} An array of chunk objects.

*/

function processFolder(folder) {

let allChunks = [];

Logger.log(`Processing folder: "${folder.getName()}"`);

// Process all files in the current folder

const files = folder.getFiles();

while (files.hasNext()) {

const file = files.next();

const fileChunks = processFile(file); // We'll define processFile next

if (fileChunks) {

allChunks = allChunks.concat(fileChunks);

}

}

// Recursively process all subfolders

const subfolders = folder.getFolders();

while (subfolders.hasNext()) {

const subfolder = subfolders.next();

allChunks = allChunks.concat(processFolder(subfolder));

}

return allChunks;

}

// We will define processFile, extractTextFromFile, and chunkText in the following sections.
This structure gives us a scalable way to traverse our knowledge base. The ingestDriveFolder function serves as the entry point, and processFolder does the heavy lifting of navigation.
Parsing different file types like Google Docs and PDFs
Not all files are created equal. A key challenge is extracting clean text from different formats. Our script needs to be smart enough to identify the file type and use the appropriate method to parse its content. We’ll focus on the two most common document types: Google Docs and PDFs.
We’ll create a “dispatcher” function, processFile, that checks a file’s MIME type and calls the correct text extraction logic.
Handling Google Docs: This is the most straightforward case. Apps Script’s DocumentApp service can open a Google Doc by its ID and read its content directly.
Handling PDFs: This is more complex, as Apps Script has no native PDF text parser. However, we can leverage a powerful, built-in feature of Google Drive: its Optical Character Recognition (OCR) engine. The strategy is:
-
Temporarily convert the PDF to a Google Doc using Drive’s OCR.
-
Extract the text from that new Google Doc.
-
Delete the temporary Google Doc to keep our Drive clean.
Important: To use the OCR method, you must enable the “Drive API” advanced service. In the Apps Script editor, click on “Services” in the left-hand menu, find “Drive API”, and click “Add”.
Here is the implementation for parsing these file types:
/**

* Processes a single file, extracts text, and chunks it.

* @param {GoogleAppsScript.Drive.File} file The file to process.

* @return {Array<Object>|null} An array of chunk objects or null if unsupported.

*/

function processFile(file) {

try {

const text = extractTextFromFile(file);

if (!text) {

Logger.log(`Skipping unsupported file type or empty file: "${file.getName()}"`);

return null;

}

Logger.log(`Extracted ${text.length} characters from "${file.getName()}"`);

// We'll define chunkText in the next section

const chunks = chunkText(text);

// Enrich each chunk with metadata

return chunks.map((chunkText, index) => ({

source: file.getUrl(),

fileName: file.getName(),

chunkIndex: index,

text: chunkText

}));

} catch (e) {

Logger.log(`Failed to process file "${file.getName()}": ${e.toString()}`);

return null;

}

}

/**

* Extracts raw text from a file based on its MIME type.

* @param {GoogleAppsScript.Drive.File} file The file object.

* @return {string|null} The extracted text or null.

*/

function extractTextFromFile(file) {

const mimeType = file.getMimeType();

let text = null;

if (mimeType === MimeType.GOOGLE_DOCS) {

text = DocumentApp.openById(file.getId()).getBody().getText();

} else if (mimeType === MimeType.PDF) {

// Use Drive's OCR capability to convert PDF to a temporary Google Doc

const blob = file.getBlob();

const resource = {

title: `[TEMP] OCR - ${file.getName()}`,

mimeType: MimeType.GOOGLE_DOCS

};

const tempDocFile = Drive.Files.insert(resource, blob, { ocr: true });

try {

// Extract text from the temporary doc

text = DocumentApp.openById(tempDocFile.id).getBody().getText();

} finally {

// Clean up: delete the temporary file

Drive.Files.remove(tempDocFile.id);

}

}

// Add more handlers here for other types like Slides, Sheets, or plain text

// else if (mimeType === MimeType.PLAIN_TEXT) {

//   text = file.getBlob().getDataAsString();

// }

return text ? text.trim() : null;

}
This modular approach allows us to easily add support for other file types like MimeType.GOOGLE_SLIDES or MimeType.GOOGLE_SHEETS in the future by extending the extractTextFromFile function.
Implementing a text chunking strategy for optimal embeddings
Now that we have the raw text, we can’t just feed it all into our embedding model. Language models have context window limitations, and more importantly, retrieval is far more effective when it operates on small, semantically-focused chunks of text. A query for “Q3 revenue targets” is more likely to find a precise match in a small chunk about financial goals than in an entire 50-page annual report.
We will implement a recursive character splitting strategy with overlap. This is a robust method that prioritizes semantic boundaries:
-
It first tries to split the text by paragraphs (
\n\n). -
If a resulting chunk is still too large, it tries splitting by single newlines (
\n). -
If that’s still not enough, it splits by spaces, and finally, by individual characters.
The overlap is crucial. By having a small amount of text from the end of the previous chunk at the beginning of the next one, we help preserve context that might otherwise be lost at the split.
const CHUNK_SIZE = 1000; // Max characters per chunk

const CHUNK_OVERLAP = 100;  // Characters to overlap between chunks

/**

* Splits text into chunks of a specified size with overlap.

* Implements a recursive character splitting strategy.

* @param {string} text The text to chunk.

* @return {Array<string>} An array of text chunks.

*/

function chunkText(text) {

if (text.length <= CHUNK_SIZE) {

return [text];

}

// Define potential separators in order of preference

const separators = ['\n\n', '\n', ' ', ''];

let finalChunks = [];

// Start with the full text as the first piece to process

let chunksToProcess = [text];

// Iterate through separators

for (const separator of separators) {

let newChunksToProcess = [];

for (const chunk of chunksToProcess) {

if (chunk.length <= CHUNK_SIZE) {

newChunksToProcess.push(chunk);

continue;

}

// If we're at the last separator (character-level), split without it

const splitChar = separator === '' ? '' : separator;

const subChunks = splitTextWithOverlap(chunk, splitChar, CHUNK_SIZE, CHUNK_OVERLAP);

newChunksToProcess.push(...subChunks);

}

chunksToProcess = newChunksToProcess;

// Check if all chunks are now small enough

if (chunksToProcess.every(c => c.length <= CHUNK_SIZE)) {

break;

}

}

// Filter out any empty strings that might have been created

return chunksToProcess.filter(c => c.trim() !== '');

}

/**

* Helper function to split text by a separator with overlap.

* @param {string} text The text to split.

* @param {string} separator The character(s) to split by.

* @param {number} chunkSize The target size of each chunk.

* @param {number} chunkOverlap The overlap between chunks.

* @return {Array<string>} The resulting chunks.

*/

function splitTextWithOverlap(text, separator, chunkSize, chunkOverlap) {

const splits = separator === '' ? text.split('') : text.split(separator);

const chunks = [];

let currentChunk = "";

for (let i = 0; i < splits.length; i++) {

const part = splits[i];

const potentialChunk = currentChunk + (currentChunk ? separator : "") + part;

if (potentialChunk.length > chunkSize) {

chunks.push(currentChunk);

// Start the new chunk with an overlap

let overlapStartIndex = Math.max(0, currentChunk.length - chunkOverlap);

currentChunk = currentChunk.substring(overlapStartIndex) + separator + part;

// Handle cases where the part itself is larger than the chunk size

while (currentChunk.length > chunkSize) {

chunks.push(currentChunk.substring(0, chunkSize));

currentChunk = currentChunk.substring(chunkSize - chunkOverlap);

}

} else {

currentChunk = potentialChunk;

}

}

if (currentChunk) {

chunks.push(currentChunk);

}

return chunks;

}
With this final piece in place, our Apps Script is complete. When ingestDriveFolder() is run, it will traverse your specified Drive folder, extract text from Docs and PDFs, and break it down into an array of structured JSON objects, each containing a text chunk and its source metadata. This structured data is now perfectly prepared for the next step: generating embeddings.
Step 2: Generating Embeddings with Vertex AI
With our document content neatly chunked, we’ve reached the core of the “representation” phase in RAG. We need to convert these human-readable text chunks into a format that a machine can understand and compare for semantic similarity: numerical vectors, also known as embeddings. For this critical task, we’ll leverage the power and scalability of Google’s Vertex AI, specifically its state-of-the-art text embedding models.
This step involves three key actions: securely authenticating our Apps Script to the Vertex AI API, making the API call to generate the embeddings, and correctly structuring our request and parsing the response.
Authenticating to Vertex AI services from Google Apps Script
Before our script can talk to Vertex AI, it needs to prove it has permission to do so. Google Apps Script runs in the Google Cloud ecosystem, which makes this process surprisingly streamlined using OAuth2. We don’t need to manually manage service account keys or complex authentication flows. Instead, we can use Apps Script’s built-in services to obtain an OAuth token that grants our script temporary, secure access to the necessary cloud resources on behalf of the user running the script.
The key is to declare the required permission scope in the script’s manifest file.
-
In the Apps Script editor, go to Project Settings (the gear icon ⚙️).
-
Check the box for “Show appsscript.json” manifest file in editor.
-
Return to the Editor (the
<>icon) and open theappsscript.jsonfile. -
Add the
https://www.googleapis.com/auth/cloud-platformscope to theoauthScopesarray. This is a broad scope that grants access to Google Cloud Platform services, including Vertex AI.
Your appsscript.json file should look something like this:
{

"timeZone": "America/New_York",

"dependencies": {},

"exceptionLogging": "STACKDRIVER",

"runtimeVersion": "V8",

"oauthScopes": [

"https://www.googleapis.com/auth/script.external_request",

"https://www.googleapis.com/auth/drive.readonly",

"https://www.googleapis.com/auth/documents.readonly",

"https://www.googleapis.com/auth/cloud-platform"

]

}
The first time you run a function that uses this scope, Google will prompt you (the user) with a consent screen to authorize these permissions. Once granted, the script can fetch an access token programmatically with a single line of code:
const accessToken = ScriptApp.getOAuthToken();
This token is the “key” we’ll include in our API request header to authenticate our call to Vertex AI.
Calling the text-embedding model to create vector representations
Now that we have our authentication token, we can make an HTTP POST request to the Vertex AI model endpoint. We’ll use Apps Script’s built-in UrlFetchApp service, which is designed for making external API calls.
The endpoint for the Vertex AI prediction service follows a standard structure:
https://{REGION}-aiplatform.googleapis.com/v1/projects/{PROJECT_ID}/locations/{REGION}/publishers/google/models/{MODEL_ID}:predict
Let’s break down the placeholders:
-
{PROJECT_ID}: The ID of your Google Cloud Project where Vertex AI is enabled. -
{REGION}: The region where you are using Vertex AI, for example,us-central1. -
{MODEL_ID}: The identifier for the embedding model. We’ll usetext-embedding-004, a powerful and efficient model optimized for retrieval tasks.
Our request will be a POST request containing a JSON payload. The essential headers for this request are:
-
Authorization: This is where we’ll put our OAuth token, prefixed withBearer. -
Content-Type: We must specify that we are sending JSON data, so we’ll set this toapplication/json.
Here’s how you can structure the UrlFetchApp call in Apps Script:
// Assume accessToken, projectId, and region are defined

const modelId = 'text-embedding-004';

const apiUrl = `https://${region}-aiplatform.googleapis.com/v1/projects/${projectId}/locations/${region}/publishers/google/models/${modelId}:predict`;

const options = {

'method': 'post',

'contentType': 'application/json',

'headers': {

'Authorization': `Bearer ${accessToken}`

},

'payload': JSON.stringify(payload), // We'll define the payload next

'muteHttpExceptions': true // Important for custom error handling

};

const response = UrlFetchApp.fetch(apiUrl, options);
Setting muteHttpExceptions to true is a best practice. It prevents the script from halting on an HTTP error (like a 400 or 500 status code) and allows us to inspect the response and handle the error gracefully in our code.
Structuring the embedding request and handling the API response
The final piece of the puzzle is formatting the data correctly for the API (the request payload) and then parsing the data we get back (the API response).
The Request Payload
The Vertex AI API is designed for efficiency and can process multiple text chunks in a single request, a process known as batching. The payload is a JSON object with a single key, instances, which is an array. Each element in the array is an object representing one chunk of text to be embedded.
For the text-embedding-004 model, each instance object should contain:
-
content: The string of text you want to embed. -
task_type: This is a crucial parameter that optimizes the embedding for a specific use case. For RAG, we specifyRETRIEVAL_DOCUMENTwhen embedding the source documents. -
title(optional): If your chunk has a title (like the document’s filename), including it can improve the quality of the embedding.
Here’s an example of a payload for two chunks:
{

"instances": [

{

"task_type": "RETRIEVAL_DOCUMENT",

"title": "Project Alpha Q3 Report.gdoc",

"content": "The project's key performance indicators (KPIs) showed a 15% increase in user engagement for the third quarter."

},

{

"task_type": "RETRIEVAL_DOCUMENT",

"title": "Project Alpha Q3 Report.gdoc",

"content": "Financial projections were adjusted to account for the new market expansion strategy, with an expected revenue uplift of 8%."

}

]

}
Handling the API Response
If the request is successful (HTTP status 200), Vertex AI will return a JSON object containing the embeddings. The structure mirrors the request:
-
A top-level
predictionskey holds an array. -
Each object in the
predictionsarray corresponds to an instance from our request, in the same order. -
Inside each prediction object is an
embeddingsobject, which contains avalueskey. -
The
valueskey holds the prize: an array of 768 floating-point numbers, which is the vector embedding for that text chunk.
Here is a simplified example of what the response looks like:
{

"predictions": [

{

"embeddings": {

"values": [0.0123, -0.0456, ..., 0.0789] // Array of 768 numbers

}

},

{

"embeddings": {

"values": [-0.0987, 0.0654, ..., -0.0321] // Array of 768 numbers

}

}

]

}
By combining these pieces, we can create a robust function in Apps Script to convert an array of text chunks into an array of vector embeddings, ready for the next step: indexing them in a vector database.
Step 3: Building and Querying the Vector Search Index
With our Google Drive content processed into embedding vectors, we’ve effectively translated the semantic meaning of our documents into a numerical format. The next crucial step is to create a specialized database that can understand and search this numerical space at high speed. This is where Vertex AI Vector Search comes into play. It’s a high-performance, fully managed service designed specifically for finding the most similar items in a massive dataset of vectors—a process known as Approximate Nearest Neighbor (ANN) search. In this step, we’ll create our index, populate it with our document embeddings, and then build the query mechanism to find relevant context.
Creating a Vector Search index in Vertex AI for semantic search
An index in Vector Search is a data structure optimized for low-latency vector similarity searches. Instead of naively comparing a query vector to every single vector in our database (which would be incredibly slow), it uses sophisticated algorithms like ScaNN (Scalable Nearest Neighbors) to find the closest matches in milliseconds, even with billions of vectors.
Let’s walk through creating the index and its public endpoint for querying.
1. Create the Index:
You can do this via the Google Cloud Console for a straightforward, visual setup.
-
Navigate to Vertex AI > Feature Store > Vector Search in the Google Cloud Console.
-
Click “Create Index”.
-
Configure the index with the following parameters:
-
Name: Give it a descriptive name, like
enterprise-rag-drive-index. -
Dimensions: This is the most critical setting. It must match the output dimensionality of your embedding model. For Google’s
text-embedding-004model, the dimension is 768. -
Approximate neighbor count: This is the default number of neighbors to return per query. A value of
10is a good starting point. -
Distance measure: This defines how “similarity” is calculated. For normalized embeddings (like those from Google’s models),
DOT_PRODUCT_DISTANCEis highly efficient and mathematically equivalent to Cosine Similarity. It’s the recommended choice here. -
Leaf node embedding count: This is part of the
Tree-AHalgorithm’s configuration. The default is usually sufficient, but you can tune it later for performance. -
Under “Index update method”, select “Batch update” for now. This is ideal for our initial, large-scale population of the index. You can enable streaming updates later if you need to add documents in real-time.
-
Click “Create”. The index provisioning will take a few minutes.
2. Create an Index Endpoint:
An index itself is just the data structure. To query it, you need to deploy it to an endpoint, which provides a live, queryable service with a public API.
-
In the Vector Search section, go to the “Index Endpoints” tab.
-
Click “Create Index Endpoint”.
-
Give it a name (e.g.,
enterprise-rag-drive-endpoint) and select your region. -
Crucially, under “VPC network peering”, you must configure a VPC network. Vector Search endpoints are not exposed directly to the public internet for security. They are accessible from within a specified VPC network. You’ll need to set up a VPC network if you don’t have one already. This is a standard networking step in Google Cloud.
-
Click “Create”.
3. Deploy the Index to the Endpoint:
-
Once the endpoint is created, click on its name in the list.
-
Click “Deploy Index”.
-
Select the index you created (
enterprise-rag-drive-index). -
Give the deployed index a display name.
-
Under “Machine type”, you can start with a small configuration like
e2-standard-2. You can monitor performance and scale this up later if needed. -
Click “Deploy”. This deployment process can take 15-30 minutes. Once complete, your index is live and ready to be populated and queried.
Populating the index with embeddings from your Drive content
Now that our index is live, we need to upload—or “upsert”—our document embeddings into it. This is typically done programmatically using the Vertex AI SDK. The data needs to be in a specific format: a JSON file where each line is an object containing a unique id and the embedding vector.
The id is your key for retrieval. It’s how you’ll map a search result vector back to its original text chunk. A robust strategy is to create a composite ID, such as google_doc_id::chunk_index. For example: 1aBcDeF...gHiJ::2.
Here’s a JSON-to-Video Automated Rendering Engine script demonstrating how to read your processed embeddings and upsert them into the index.
import json

from google.cloud import aiplatform

# --- Configuration ---

PROJECT_ID = "your-gcp-project-id"

REGION = "us-central1"

INDEX_ENDPOINT_ID = "your-vector-search-index-endpoint-id" # This is a number

DEPLOYED_INDEX_ID = "your-deployed_index_id" # This is a string

EMBEDDINGS_FILE_PATH = "path/to/your/embeddings.jsonl" # Your output from Step 2

# Initialize the Vertex AI client

aiplatform.init(project=PROJECT_ID, location=REGION)

# Get a reference to your deployed index endpoint

index_endpoint = aiplatform.MatchingEngineIndexEndpoint(

index_endpoint_name=INDEX_ENDPOINT_ID

)

# Load your embeddings from the file

# The file should be in JSONL format (one JSON object per line)

# e.g., {"id": "doc1::0", "embedding": [0.1, 0.2, ...]}

#       {"id": "doc1::1", "embedding": [0.3, 0.4, ...]}

datapoints_to_upsert = []

with open(EMBEDDINGS_FILE_PATH, 'r') as f:

for line in f:

data = json.loads(line)

datapoint = aiplatform.matching_engine.matching_engine_index_endpoint.Datapoint(

datapoint_id=data["id"],

feature_vector=data["embedding"]

)

datapoints_to_upsert.append(datapoint)

# Upsert the data in batches to avoid overwhelming the API

# The API supports up to 1,000 datapoints per call

batch_size = 100

for i in range(0, len(datapoints_to_upsert), batch_size):

batch = datapoints_to_upsert[i:i+batch_size]

print(f"Upserting batch {i//batch_size + 1}...")

index_endpoint.upsert_datapoints(

datapoints=batch,

deployed_index_id=DEPLOYED_INDEX_ID

)

print("Successfully populated the Vector Search index.")
After running this script, your index will contain all the semantic knowledge from your Google Drive documents, ready for querying.
Executing a semantic search query from Apps Script to find relevant context
This is where our system comes to life. A user types a question into a Google Doc, a Sheet, or a custom sidebar. Our Apps Script code will intercept this query, convert it into an embedding, and use it to search our new index.
The process involves three main API calls from Apps Script:
-
Get an OAuth Token: To authenticate with Google Cloud APIs.
-
Call the Vertex AI Model: To convert the user’s text query into an embedding vector.
-
Call the Vector Search Endpoint: To find the document chunks most similar to the query vector.
Here’s how you can implement this in Apps Script:
// --- Configuration ---

const GCP_PROJECT_ID = 'your-gcp-project-id';

const GCP_REGION = 'us-central1'; // e.g., us-central1

const INDEX_ENDPOINT_ID = 'your-vector-search-index-endpoint-id'; // The numeric ID

const DEPLOYED_INDEX_ID = 'your-deployed_index_id'; // The string ID

/**

* Main function to perform a semantic search.

* @param {string} userQuery The user's question.

* @returns {Array<Object>} An array of matching document chunk IDs and their distances.

*/

function performSemanticSearch(userQuery) {

// 1. Get an embedding for the user's query

const queryEmbedding = getEmbeddingForText_(userQuery);

if (!queryEmbedding) {

Logger.log('Failed to get embedding for query.');

return [];

}

// 2. Query the Vector Search index

const searchResults = findNearestNeighbors_(queryEmbedding);

// 3. Process and return the results

if (searchResults && searchResults.nearestNeighbors) {

const relevantContext = searchResults.nearestNeighbors[0].neighbors.map(neighbor => {

return {

id: neighbor.datapoint.datapointId,

distance: neighbor.distance

};

});

Logger.log(`Found ${relevantContext.length} relevant chunks.`);

Logger.log(relevantContext);

return relevantContext;

} else {

Logger.log('No neighbors found or an error occurred.');

return [];

}

}

/**

* Calls the Vertex AI embedding model to get a vector for a given text.

* @private

*/

function getEmbeddingForText_(text) {

const accessToken = ScriptApp.getOAuthToken();

const apiUrl = `https://${GCP_REGION}-aiplatform.googleapis.com/v1/projects/${GCP_PROJECT_ID}/locations/${GCP_REGION}/publishers/google/models/text-embedding-004:predict`;

const payload = {

instances: [{

content: text

}]

};

const options = {

method: 'post',

contentType: 'application/json',

headers: {

'Authorization': 'Bearer ' + accessToken

},

payload: JSON.stringify(payload),

muteHttpExceptions: true

};

try {

const response = UrlFetchApp.fetch(apiUrl, options);

const jsonResponse = JSON.parse(response.getContentText());

if (jsonResponse.predictions && jsonResponse.predictions.length > 0) {

return jsonResponse.predictions[0].embeddings.values;

} else {

Logger.log('Embedding API Error: ' + response.getContentText());

return null;

}

} catch (e) {

Logger.log('Error fetching embedding: ' + e.toString());

return null;

}

}

/**

* Queries the Vector Search index to find the nearest neighbors.

* @private

*/

function findNearestNeighbors_(queryVector) {

const accessToken = ScriptApp.getOAuthToken();

const apiUrl = `https://${GCP_REGION}-aiplatform.googleapis.com/v1/projects/${GCP_PROJECT_ID}/locations/${GCP_REGION}/indexEndpoints/${INDEX_ENDPOINT_ID}:findNeighbors`;

const payload = {

deployedIndexId: DEPLOYED_INDEX_ID,

queries: [{

datapoint: {

featureVector: queryVector

},

neighborCount: 5 // How many results to return

}]

};

const options = {

method: 'post',

contentType: 'application/json',

headers: {

'Authorization': 'Bearer ' + accessToken

},

payload: JSON.stringify(payload),

muteHttpExceptions: true

};

try {

const response = UrlFetchApp.fetch(apiUrl, options);

const jsonResponse = JSON.parse(response.getContentText());

return jsonResponse;

} catch (e) {

Logger.log('Error querying Vector Search: ' + e.toString());

return null;

}

}
When you run performSemanticSearch("What were the Q3 revenue goals?"), this script will return an array of objects, like [{id: "1aBcDeF...gHiJ::2", distance: 0.89}, {id: "XyZ...123::5", distance: 0.87}]. These IDs are your pointers to the most relevant pieces of text from your entire Google Drive corpus. The final step, which we’ll cover next, is to retrieve the actual text for these chunks and feed them into a Large Language Model to generate a coherent answer.
Step 4: Augmenting Gemini Prompts with Retrieved Context
We’ve successfully indexed our Google Drive content and built a mechanism to retrieve relevant document chunks based on a user’s query. Now, we’ve arrived at the “Generation” part of Retrieval-Augmented Generation. This is where we take the puzzle pieces—the user’s original question and the context we just retrieved from Vector Search—and hand them to Gemini to synthesize a final, coherent answer. The quality of our prompt is paramount here; it directly dictates the quality of the generated response.
Crafting the final prompt with context from Vector Search
An LLM like Gemini, for all its power, knows nothing about the private, enterprise-specific documents we just retrieved. It’s a blank slate in that regard. Our job is to provide the necessary information within the prompt itself, instructing the model to base its answer exclusively on this supplied context. This prevents hallucination and ensures the answer is grounded in our company’s data.
A robust prompt template for RAG typically has three components:
-
**The Instruction/Role: A clear directive telling the model how to behave. It should be instructed to act as a helpful assistant and to use only the provided context.
-
The Context: The block of text containing the concatenated document chunks retrieved from Vector Search. We’ll clearly demarcate this section.
-
The Question: The user’s original query, restated clearly.
Here’s a battle-tested template that works exceptionally well:
You are an expert AI assistant for our company. Your task is to answer the user's question based ONLY on the provided context. If the context does not contain the information needed to answer the question, state that you cannot find the answer in the provided documents. Do not use any external knowledge.

--- CONTEXT ---

{context_string}

--- END CONTEXT ---

Based on the context above, please answer the following question:

Question: "{user_query}"
Let’s implement this in Apps Script. We’ll create a helper function that takes our retrieved context and the original query and slots them into this template.
/**

* Creates a final, augmented prompt for Gemini by combining a template,

* the retrieved context, and the user's original query.

*

* @param {string} query The original question from the user.

* @param {string[]} contextChunks An array of text chunks retrieved from Vector Search.

* @returns {string} The fully-formed prompt ready to be sent to the Gemini API.

*/

function createAugmentedPrompt(query, contextChunks) {

// Join the individual chunks into a single string, separated by newlines for clarity.

const contextString = contextChunks.join("\n\n---\n\n");

const promptTemplate = `

You are an expert AI assistant for our company. Your task is to answer the user's question based ONLY on the provided context. If the context does not contain the information needed to answer the question, state that you cannot find the answer in the provided documents. Do not use any external knowledge.

--- CONTEXT ---

${contextString}

--- END CONTEXT ---

Based on the context above, please answer the following question:

Question: "${query}"

`;

return promptTemplate.trim();

}
This function is simple but critical. It programmatically ensures that every request to our LLM is properly framed, significantly improving the reliability and accuracy of the final answer.
Calling the Gemini API from Apps Script for generation
With our perfectly crafted prompt in hand, the next step is to send it to the Vertex AI Gemini API. We’ll use Apps Script’s built-in UrlFetchApp service to make a standard HTTPS POST request.
The process involves:
-
Getting a short-lived OAuth2 token to authorize our request.
ScriptApp.getOAuthToken()handles this beautifully, leveraging the permissions we granted when setting up the project. -
Constructing the correct API endpoint URL. This includes our GCP Project ID, region, and the specific model we want to use (e.g.,
gemini-1.0-pro). -
Building the request payload. This is a JSON object that contains our prompt and any generation parameters we want to set, like
temperature(for creativity) ormaxOutputTokens(to limit response length). -
Making the request and parsing the JSON response to extract the generated text.
Here is a reusable function to call the Gemini API:
/**

* Calls the Vertex AI Gemini API to generate content based on a given prompt.

*

* @param {string} prompt The complete prompt to send to the model.

* @param {string} projectId The Google Cloud Project ID.

* @param {string} location The Google Cloud location (e.g., "us-central1").

* @returns {string} The generated text content from the Gemini model.

*/

function callGeminiAPI(prompt, projectId, location = "us-central1") {

const modelId = "gemini-1.0-pro";

const apiEndpoint = `https://${location}-aiplatform.googleapis.com/v1/projects/${projectId}/locations/${location}/publishers/google/models/${modelId}:streamGenerateContent`;

const payload = {

"contents": {

"role": "user",

"parts": { "text": prompt }

},

"generation_config": {

"temperature": 0.2, // Lower temperature for more factual, less creative answers

"top_p": 0.8,

"top_k": 40,

"max_output_tokens": 1024,

}

};

const options = {

'method': 'post',

'contentType': 'application/json',

'headers': {

'Authorization': `Bearer ${ScriptApp.getOAuthToken()}`

},

'payload': JSON.stringify(payload),

'muteHttpExceptions': true // Important for debugging errors

};

const response = UrlFetchApp.fetch(apiEndpoint, options);

const responseCode = response.getResponseCode();

const responseBody = response.getContentText();

if (responseCode === 200) {

try {

// The response is streamed, so we need to parse it correctly.

// We'll combine the text from all parts of the response.

const responseObject = JSON.parse(responseBody);

return responseObject.map(item =>

item.candidates[0].content.parts[0].text

).join('');

} catch (e) {

Logger.log(`Error parsing Gemini response: ${e.toString()}`);

Logger.log(`Raw Response Body: ${responseBody}`);

return "Error: Could not parse the model's response.";

}

} else {

Logger.log(`Error from Gemini API: ${responseCode}`);

Logger.log(responseBody);

return `Error: Received status code ${responseCode} from the API. Check logs for details.`;

}

}
Note: We are using the streamGenerateContent endpoint, which returns an array of JSON objects. The code above correctly concatenates the text parts from each object in the stream to form the complete answer. For simpler, non-streamed generation, you could use the generateContent endpoint and adjust the response parsing accordingly.
Reviewing a complete end-to-end code example
Now, let’s tie all the steps together. We’ll create a single, top-level function that orchestrates the entire RAG flow: from taking a user query to returning a final, context-aware answer. This function will call the helper functions we’ve (notionally) built in the previous steps of this blog series and the ones we just created.
This master function represents the core logic of our enterprise RAG system.
// --- Assume these constants are defined elsewhere in your project ---

const GCP_PROJECT_ID = "your-gcp-project-id";

const VECTOR_SEARCH_INDEX_ID = "your-vector-search-index-id";

const VECTOR_SEARCH_INDEX_ENDPOINT_ID = "your-vector-search-endpoint-id";

const NUM_NEIGHBORS_TO_RETRIEVE = 5; // How many context chunks to retrieve

/**

* Main RAG orchestration function. Takes a user query and returns a generated

* answer grounded in documents from Google Drive.

*

* @param {string} query The user's question.

* @returns {string} The final answer generated by Gemini.

*/

function answerQueryWithRAG(query) {

Logger.log(`Starting RAG process for query: "${query}"`);

// STEP 1: Embed the user's query

// (Assumes a 'getEmbeddings' function exists from the previous blog post section)

const queryEmbedding = getEmbeddings([query])[0];

if (!queryEmbedding) {

return "Error: Could not generate an embedding for the query.";

}

Logger.log("Step 1/4: Successfully embedded the user query.");

// STEP 2: Find relevant document chunks using Vector Search

// (Assumes a 'findNeighbors' function exists from the previous blog post section)

const neighbors = findNeighbors(

GCP_PROJECT_ID,

VECTOR_SEARCH_INDEX_ID,

VECTOR_SEARCH_INDEX_ENDPOINT_ID,

queryEmbedding,

NUM_NEIGHBORS_TO_RETRIEVE

);

if (!neighbors || neighbors.length === 0) {

return "I could not find any relevant documents to answer your question.";

}

Logger.log(`Step 2/4: Retrieved ${neighbors.length} context chunks from Vector Search.`);

// Extract the text content from the neighbor objects

const contextChunks = neighbors.map(neighbor => neighbor.text);

// STEP 3: Craft the augmented prompt

const finalPrompt = createAugmentedPrompt(query, contextChunks);

Logger.log("Step 3/4: Constructed the final augmented prompt for Gemini.");

// Logger.log(`Prompt being sent to Gemini: \n${finalPrompt}`); // Uncomment for debugging

// STEP 4: Call the Gemini API for generation

const finalAnswer = callGeminiAPI(finalPrompt, GCP_PROJECT_ID);

Logger.log("Step 4/4: Received final answer from Gemini.");

return finalAnswer;

}
And there you have it. This answerQueryWithRAG function is the engine of our system. You can now hook this up to a user interface—a custom function in a Google Sheet (=GET_ANSWER("What are our Q3 marketing goals?")), a sidebar in Google Docs, or a custom web app—to provide a powerful, natural language interface for querying your entire Google Drive knowledge base.
Beyond the Proof of Concept: Scaling and Next Steps
Congratulations! You’ve built a functional RAG system that can pull knowledge from your Google Drive and generate intelligent answers. This is a significant milestone. However, moving from a Jupyter notebook or a simple script to a production-grade, enterprise-ready service requires a different mindset. Now, we’ll explore the critical next steps: hardening your system for production, automating its knowledge updates, and looking ahead to the future of AI in your organization.
Considerations for production environments: error handling and cost
A proof of concept (PoC) is designed to prove value; a production system is designed to deliver value reliably, securely, and cost-effectively. Here’s what you need to consider:
Architecture and Scalability:
Your initial script needs to be broken down into a robust, scalable architecture. Instead of running everything on a single machine, consider a serverless approach using Google Cloud services:
-
Ingestion Pipeline: Use Cloud Functions or Cloud Run to handle document processing and embedding. These services can scale automatically based on the number of documents you need to ingest, from a few files to thousands.
-
Query Endpoint: Expose your RAG query logic via an API endpoint, again using Cloud Run or a Cloud Function with an HTTP trigger. This decouples your application frontend from the backend logic, allowing for independent scaling and maintenance.
-
Monitoring and Logging: This is non-negotiable in production. Integrate with Google Cloud’s operations suite (formerly Stackdriver). Log every critical step: file discovery, chunking success/failure, embedding API calls, vector upserts, and user queries. Set up dashboards to monitor latency and error rates, and create alerts in Cloud Monitoring to notify you immediately if your embedding API starts failing or query latency spikes.
Robust Error Handling:
In the real world, things break. Your system must be resilient.
-
Ingestion Failures: What if a user uploads a corrupted PDF or a password-protected file? Your pipeline should catch these exceptions. Implement a retry mechanism with exponential backoff for transient network errors. For persistent failures, move the problematic file to a “dead-letter queue” (e.g., a specific Cloud Storage bucket or Pub/Sub topic) for manual inspection, ensuring one bad file doesn’t halt the entire ingestion process.
-
Query-Time Failures: If the LLM call to Vertex AI fails or times out, your API shouldn’t crash. It should return a graceful error message to the user, perhaps suggesting they rephrase their question or try again later.
-
Content Safety: Utilize the built-in safety filters in Vertex AI Gemini models. This helps prevent the generation of harmful, unethical, or inappropriate content, even if the source documents are benign.
Cost Management and Optimization:
AI can be expensive, but costs are manageable with careful planning.
- Understand the Bill: Your costs will primarily come from three sources:
-
Vertex AI: You’re billed for embedding generation (per 1,000 characters), LLM calls (per input and output token), and the operational cost of Vertex AI Search (indexing and query processing).
-
Compute: The execution time of your Cloud Functions or Cloud Run services.
-
APIs and Storage: High-volume Google Drive API calls and any intermediary storage in Cloud Storage.
-
Optimize Your Pipeline:
-
Batching: When ingesting a large number of documents, batch them together before sending them to the embedding API. This is far more efficient than sending one API request per document chunk.
-
Model Selection: Do you need the power (and cost) of Gemini 1.5 Pro for every query? Could Gemini 1.0 Pro suffice? Choose the model that provides the best cost-performance balance for your use case. The
text-embedding-004model is highly optimized and often more cost-effective than older versions. -
Set Budgets: Use Google Cloud Billing to set budgets and alerts. This won’t stop your services from running, but it will ensure you’re immediately notified if costs unexpectedly escalate.
Automating the pipeline with triggers for new or updated files
A static knowledge base quickly becomes obsolete. The true power of an enterprise RAG system is its ability to stay current with your organization’s evolving knowledge. The goal is to create a “living” system that updates itself automatically.
The key to this is the Google Drive API’s Push Notifications. Instead of polling the Drive for changes periodically (which is inefficient and slow), you can configure Drive to send your system a notification whenever a file is added, modified, or deleted.
Here’s a robust, event-driven architecture to achieve this:
-
Set Up a Watch: Use the Drive API’s
files.watchmethod to subscribe to changes in a specific folder or the entire Drive. You’ll provide a webhook URL as the destination for notifications. -
Webhook Receiver (Cloud Function): Create a secure HTTP-triggered Cloud Function to act as your webhook. Its sole job is to receive the notification from Google Drive, validate it, and immediately pass the event payload (containing information about the changed file) to a Pub/Sub topic. This makes your endpoint fast and resilient.
-
Decoupling with Pub/Sub: Using Pub/Sub as a message queue is a best practice. It decouples the incoming flood of notifications from your processing logic, smoothing out traffic spikes and allowing you to retry processing if a downstream service fails.
-
Processing Worker (Cloud Function): Create a second Cloud Function that is triggered by new messages on your Pub/Sub topic. This function contains the core logic:
-
On File Creation: It receives the new file’s ID, downloads the content from Drive, runs it through your chunking and embedding process, and upserts the new vectors into Vertex AI Search.
-
On File Modification: This is more complex. You must first delete the old vectors associated with the file. This is why it’s crucial to store the Google Drive
fileIdas metadata with every vector chunk. The worker deletes all chunks matching thefileIdand then proceeds with the ingestion process as if it were a new file. -
On File Deletion: The worker receives the
fileIdand issues a delete command to Vertex AI Search to remove all associated vectors, ensuring your RAG system doesn’t reference documents that no longer exist.
This event-driven architecture is highly scalable, resilient, and cost-effective, forming the backbone of a truly automated knowledge management system.
The future of AI-powered knowledge management in your enterprise
What we’ve built is the foundation. The road ahead is even more exciting and transformative. Here’s a glimpse of what’s next:
From Text to Multi-Modal Intelligence:
Your current system understands text. But your Google Drive is filled with much more: slide decks with complex diagrams, images from site inspections, audio recordings of project meetings, and videos of product demos. The next evolution of your RAG system is to become multi-modal. With models like Gemini, which can natively understand images, audio, and video, you can build a pipeline that:
-
“Sees” Diagrams: Extracts and understands information from charts and workflows in your presentations.
-
“Listens” to Meetings: Automatically transcribes meeting recordings, indexes the content, and allows you to ask, “What were the action items assigned to my team in yesterday’s sync?”
-
Analyzes Video: Processes video content to create searchable knowledge from tutorials and demos.
From Reactive Q&A to Proactive Agents:
A RAG system is fundamentally reactive—it waits for a user to ask a question. The future is proactive AI agents that use this knowledge base as a tool to perform tasks. Imagine an agent built on Vertex AI Agents that:
-
Monitors a “Sales Proposals” folder in Drive.
-
When a new proposal is added, it uses your RAG system to find relevant case studies and technical specs.
-
It then automatically drafts a summary, identifies potential risks based on past projects, and posts a notification to the relevant Slack channel, all without human intervention.
Hyper-Personalization and Security:
Finally, the future is secure and personalized. The ultimate goal is not a single, monolithic knowledge base for everyone, but a system that respects the complex web of permissions within your enterprise. The next-generation RAG system will be integrated with user identity. When an employee asks a question, the system will:
-
Perform the vector search to find all potentially relevant documents.
-
Filter the results based on that specific user’s Google Drive permissions before sending the context to the LLM.
-
Generate an answer based only on the information that the user is actually allowed to see.
This ensures data security and compliance while delivering a hyper-personalized experience. By building on the foundation you’ve created, you can transform your company’s collective knowledge from a passive archive into an active, intelligent partner that empowers every employee.


Stop Doing Manual Work. Scale with AI.
Want to turn these blog concepts into production-ready reality for your team?
Table Of Contents
Portfolios
Related Posts
Quick Links
Legal Stuff